2018 jeep grand cherokee service manual pdf

Welcome to the official service manual for the 2018 Jeep Grand Cherokee. This comprehensive guide provides detailed instructions for maintenance, diagnostics, and repairs, ensuring optimal vehicle performance and longevity.

Designed for both DIY enthusiasts and professional mechanics, the manual covers essential topics such as oil changes, fluid replacements, and advanced diagnostic procedures. It also includes specifications, wiring diagrams, and troubleshooting tips.

Whether you’re performing routine maintenance or addressing complex issues, this manual serves as your trusted resource. Always follow safety guidelines and manufacturer recommendations to ensure proper repairs and compliance with warranty terms.

By adhering to the instructions in this manual, you’ll maintain your Jeep Grand Cherokee in peak condition, preserving its durability and reliability for years to come.

Importance of the Service Manual for Vehicle Maintenance

The service manual is a critical tool for maintaining the 2018 Jeep Grand Cherokee. It provides detailed instructions for routine checks, repairs, and diagnostics, ensuring safety and optimal performance. By following the manual, owners can prevent potential issues, reduce repair costs, and maintain warranty compliance. Proper maintenance extends the vehicle’s lifespan, enhances reliability, and preserves its value, making it essential for both DIY enthusiasts and professionals.

Key Features of the 2018 Jeep Grand Cherokee

The 2018 Jeep Grand Cherokee combines rugged capability with refined luxury, offering versatility for both off-road adventures and urban driving. It features a spacious interior with cutting-edge technology, including an advanced infotainment system. Available in various trims like the Limited and Trailhawk, this SUV boasts a powerful engine lineup, including the 3.6L V6 and 5.7L V8, paired with a robust Quadra-Trac drivetrain for exceptional traction and control.

General Vehicle Information

The 2018 Jeep Grand Cherokee is a versatile SUV offering a blend of rugged capability and luxury, with a range of engine options and advanced drivetrain technology.

Specifications and Technical Details

The 2018 Jeep Grand Cherokee features a range of engine options, including a 3.6L V6 and a 5.7L V8, delivering up to 295 horsepower and 260 lb-ft torque. It boasts a maximum towing capacity of up to 7,400 pounds and offers both rear-wheel drive and four-wheel drive configurations. The SUV is equipped with a 8-speed automatic transmission and features advanced suspension systems for enhanced on-road and off-road performance.

Understanding the Vehicle’s Systems and Components

Understanding the 2018 Jeep Grand Cherokee’s systems and components is essential for effective maintenance and repair. The vehicle integrates advanced systems, including the engine, transmission, drivetrain, electrical, and braking systems. Each component works in harmony to deliver optimal performance, both on-road and off-road. Familiarizing yourself with these systems ensures proper functionality, safety, and longevity of your vehicle, making diagnostics and repairs more efficient and accurate.

Maintenance and Service Schedules

Regular maintenance is crucial for the 2018 Jeep Grand Cherokee. Follow the recommended service intervals for oil changes, fluid replacements, and system inspections to ensure reliability and performance. Always consult the manual for specific schedules tailored to your vehicle’s needs to prevent potential issues and extend its lifespan. Proper maintenance ensures your Jeep runs smoothly and efficiently, minimizing the risk of costly repairs. Adhering to these schedules is essential for maintaining warranty coverage and optimal vehicle health.

Recommended Maintenance Intervals

The 2018 Jeep Grand Cherokee service manual outlines specific maintenance intervals to ensure optimal performance and longevity. Routine oil changes are recommended every 5,000 to 7,500 miles, depending on driving conditions. Additionally, fluid replacements, such as transmission and coolant, should be performed at intervals of 30,000 to 60,000 miles. Regular tire rotations and brake inspections are also essential every 6,000 to 8,000 miles. Following these schedules helps prevent mechanical issues and maintains the vehicle’s reliability. Always refer to the manual for detailed guidelines tailored to your Jeep’s specific needs and driving habits.

The 2018 Jeep Grand Cherokee requires regular oil changes to maintain engine health. Use synthetic oil (0W-40 or 5W-30) and replace the oil filter every 5,000 to 7,500 miles, depending on driving conditions. Additionally, transmission fluid should be changed every 30,000 to 60,000 miles, while coolant and brake fluid replacements are recommended every 50,000 to 100,000 miles. Always refer to the manual for specific guidelines and ensure fluids meet Jeep’s specifications for optimal performance and longevity.

Diagnostics and Troubleshooting

Oil Change and Fluid Replacement Guidelines

The 2018 Jeep Grand Cherokee requires regular oil changes to maintain engine health. Use synthetic oil (0W-40 or 5W-30) and replace the oil filter every 5,000 to 7,500 miles, depending on driving conditions. Additionally, transmission fluid should be changed every 30,000 to 60,000 miles, while coolant and brake fluid replacements are recommended every 50,000 to 100,000 miles. Always refer to the manual for specific guidelines and ensure fluids meet Jeep’s specifications for optimal performance and longevity.

Common Issues and Diagnostic Procedures

The 2018 Jeep Grand Cherokee may experience issues like error codes, coolant leaks, or transmission slipping. Diagnostics often begin with scanning the OBD-II system for fault codes. Coolant leaks can be traced to the radiator or hoses, while transmission issues may require pressure tests. Always consult the manual for detailed procedures and ensure repairs are performed by a qualified technician for accurate resolution and to prevent further damage.

Interpreting Error Codes and Warning Lights

The 2018 Jeep Grand Cherokee uses specific error codes and warning lights to indicate system issues. Codes like P0300 (random cylinder misfire) or P0171 (system lean) can signal engine problems. Use an OBD-II scanner to retrieve codes and refer to the manual’s diagnostic chart for interpretations. Addressing these issues promptly ensures proper vehicle function and prevents further damage. Always consult the manual for accurate troubleshooting guidance.

Engine and Performance

The 2018 Jeep Grand Cherokee features a powerful 3.6L V6 or 5;7L V8 engine, delivering exceptional performance and towing capacity. Proper maintenance ensures optimal power and efficiency, with detailed repair procedures outlined in the service manual for enhanced reliability and longevity.

Engine Specifications and Repair Procedures

The 2018 Jeep Grand Cherokee offers a 3.6L V6 engine producing 295 horsepower and 260 lb-ft of torque, or an optional 5.7L V8 delivering 360 horsepower and 390 lb-ft of torque. Both engines feature Variable Valve Timing (VVT) and Engine Brake Dynamics (EBD) for enhanced performance. The service manual provides detailed repair procedures, including part numbers, torque specifications, and diagrams, ensuring accurate maintenance and diagnostics. Regular servicing, such as spark plug replacement and oil changes, is essential for maintaining engine health and longevity.

Tuning and Optimization Tips

Optimize your 2018 Jeep Grand Cherokee’s performance with proven tuning strategies. Upgrade the air intake system for improved airflow and consider high-performance exhaust modifications to enhance power output. ECU tuning can refine fuel injection and ignition timing for better efficiency and power delivery. Ensure all modifications comply with manufacturer guidelines to maintain warranty and reliability. Regular monitoring of engine parameters and timely adjustments will keep your Jeep running at its best.

Transmission and Drivetrain

The 2018 Jeep Grand Cherokee features a robust eight-speed automatic transmission, offering smooth gear shifts and improved fuel efficiency. Its advanced drivetrain system, including Quadra-Trac I and II, ensures superior traction and control in various terrains, making it ideal for both on-road comfort and off-road adventures.

Transmission Maintenance and Repair

Regular transmission maintenance is crucial for the 2018 Jeep Grand Cherokee. Check the transmission fluid level every 5,000 miles and replace it every 30,000 to 60,000 miles. Inspect the fluid for contamination or discoloration. Replace the transmission filter every 15,000 miles to prevent debris buildup. If issues like slipping gears or delayed engagement occur, consult the service manual for diagnostic codes and repair procedures. Always use MOPAR-approved fluids for optimal performance.

Four-Wheel-Drive System Overview

The 2018 Jeep Grand Cherokee features a robust four-wheel-drive system designed for superior traction and control. The Quadra-Trac I and Quadra-Trac II systems offer automatic or manual mode options, ensuring optimal power distribution between axles. Regular maintenance includes inspecting the transfer case, driveshaft, and differential fluids. Proper operation enhances off-road capability and stability, making it ideal for challenging terrain. Refer to the manual for system-specific diagnostics and adjustments.

Suspension and Steering

The 2018 Jeep Grand Cherokee features an independent front suspension and a five-link rear setup, ensuring durability and stability. The steering system provides precise control, with regular maintenance and inspections recommended to maintain optimal performance and safety.

Suspension Components and Alignment

The 2018 Jeep Grand Cherokee’s suspension system includes coil springs, shock absorbers, and stabilizer bars for enhanced stability and ride comfort. Regular inspection of these components is essential to maintain optimal performance and prevent wear. Proper wheel alignment ensures even tire wear and improves handling. Refer to the service manual for specific alignment specifications and adjustment procedures to ensure accuracy and safety during maintenance.

Steering System Maintenance

Regular maintenance of the 2018 Jeep Grand Cherokee’s steering system ensures precise control and safety. Inspect the power steering fluid levels and top them off as needed. Check the serpentine belt for cracks or wear and replace it if necessary. Lubricate steering components periodically and look for signs of wear in the steering gear or tie rods. Consult the service manual for specific procedures and torque specifications to maintain optimal performance.

Brake System

The brake system is crucial for safety, featuring ABS and Electronic Brake Force Distribution. Regular inspection of brake pads, rotors, and fluid levels ensures reliable stopping performance and prevents wear.

Brake Pad Replacement and Rotor Maintenance

Regular inspection of brake pads and rotors is essential for maintaining optimal braking performance. Replace brake pads when worn below 1/8 inch and resurface or replace rotors if warped or excessively worn. Always use genuine or high-quality replacement parts to ensure reliability. Refer to the service manual for detailed procedures, torque specifications, and safety precautions to avoid damage or injury. Proper maintenance ensures consistent stopping power and extends the life of your brake system.

ABS and Electronic Brake Force Distribution

The Anti-lock Braking System (ABS) prevents wheel lockup during hard braking, enhancing control and stability. Electronic Brake Force Distribution (EBD) optimizes braking pressure across all wheels for balanced deceleration. Regular system checks, sensor calibration, and proper maintenance ensure reliable operation. Consult the service manual for diagnostic procedures and troubleshooting tips to address issues like error lights or uneven braking performance.

Electrical and Electronic Systems

The 2018 Jeep Grand Cherokee’s electrical systems include advanced components like wiring diagrams, circuit analysis, and infotainment controls. The manual provides detailed troubleshooting steps for electrical issues, ensuring proper functionality of systems such as navigation, audio, and driver-assistance features; Regular checks and updates are essential for maintaining optimal performance.

Wiring Diagrams and Circuit Analysis

The 2018 Jeep Grand Cherokee service manual provides detailed wiring diagrams and circuit analysis to help diagnose and repair electrical system issues. These diagrams outline the vehicle’s complex electrical networks, making it easier to trace and identify faults. Whether you’re a professional mechanic or a DIY enthusiast, the manual’s clear illustrations and step-by-step instructions simplify the process of understanding and resolving electrical system problems.

By referencing the wiring diagrams, you can locate specific components, such as sensors, relays, and modules, and verify their connectivity. This section also covers troubleshooting techniques to identify faulty circuits, ensuring accurate and efficient repairs. The manual’s comprehensive approach to electrical systems empowers users to address issues confidently, reducing downtime and maintaining vehicle performance.

Infotainment and Navigation System Troubleshooting

The 2018 Jeep Grand Cherokee service manual offers detailed guidance for troubleshooting the infotainment and navigation systems. Common issues include screen freezes, connectivity problems, and software glitches. The manual provides step-by-step instructions for resetting the system, updating software, and diagnosing connectivity issues with Bluetooth or USB devices. It also covers error codes related to the infotainment system, ensuring seamless entertainment and navigation functionality.

By following the manual’s troubleshooting procedures, users can resolve issues efficiently, restoring full functionality to the Uconnect system and ensuring an enhanced driving experience.

Interior and Comfort Features

The 2018 Jeep Grand Cherokee offers a spacious, well-appointed interior with premium materials. Key features include leather upholstery, heated and ventilated seats, and adjustable seating for optimal comfort.

The cabin also features foldable rear seats for added cargo space and advanced climate control systems, ensuring a comfortable driving experience for all passengers.

Adjusting and Customizing Interior Settings

The 2018 Jeep Grand Cherokee allows for personalized comfort with power-adjustable seats, memory settings, and lumbar support. Drivers can customize their driving experience by adjusting seat positions and saving preferences for convenience.

Additional features include foldable rear seats for extra cargo space, dual-zone climate control, and an infotainment system with touchscreen navigation. These settings ensure a tailored and comfortable experience for both drivers and passengers.

Troubleshooting Climate Control and Audio Systems

For issues with the climate control system, check the air filters, blend door actuators, and ensure proper refrigerant levels. If the audio system malfunctions, verify connections, test speakers, and reset the infotainment system. Consult the manual for detailed diagnostic steps, including fuse checks and software updates, to resolve these problems efficiently and restore functionality.

Referencing the 2018 Jeep Grand Cherokee service manual ensures proper maintenance and repairs. For further assistance, explore official Jeep resources, online forums, and authorized dealerships for specialized tools and expert advice.

Final Tips for DIY Maintenance

Always consult the service manual for specific instructions to ensure compliance with manufacturer guidelines. Invest in the correct tools to avoid damaging components. Regularly check fluid levels and tire pressure. Refer to online forums or authorized dealers for additional guidance. By following these tips, you’ll maintain your Jeep Grand Cherokee effectively and safely, ensuring reliability and performance.

Recommended Tools and Accessories

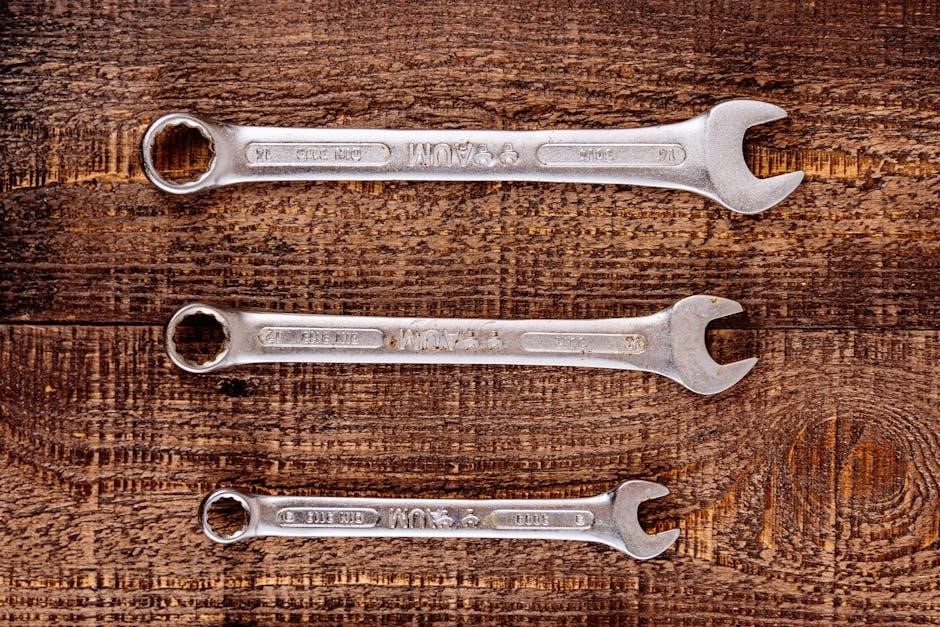
Essential tools for DIY maintenance include a multimeter for electrical diagnostics, a torque wrench for precise bolt tightening, and a socket set for various repairs. Additionally, a drain pan and funnel are crucial for oil changes. Invest in a wiring diagram for complex electrical work and a scan tool for troubleshooting error codes. Always consult the service manual for specific recommendations to ensure safety and effectiveness.

the poisonwood bible pdf

The Poisonwood Bible, written by Barbara Kingsolver, is a captivating novel published in 1998. It explores the journey of the Price family to the Belgian Congo in 1959, blending themes of faith, culture, and identity. The story is narrated by five female voices, offering diverse perspectives on their missionary experience. Available in PDF, this book remains a timeless exploration of human resilience and cultural clashes.

1.1 Overview of the Novel

The Poisonwood Bible, authored by Barbara Kingsolver, is a historical fiction novel published in 1998. It narrates the journey of the Price family, led by the zealous missionary Reverend Nathan Price, as they relocate from Georgia to the Belgian Congo in 1959. The story unfolds through the perspectives of Nathan’s wife, Orleanna, and their four daughters—Rachel, Leah, Adah, and Ruth May—each offering unique insights into their experiences. The novel explores themes of cultural clash, imperialism, and religious zeal, while delving into the complexities of family dynamics and personal identity. Set against the backdrop of the Congo’s struggle for independence, the book is a poignant exploration of human resilience and moral ambiguity. Available in PDF format, it remains a compelling read for its rich storytelling and profound themes.

1.2 Author Background: Barbara Kingsolver

Barbara Kingsolver, born in 1955 in Kentucky, is a renowned American novelist, essayist, and poet. She earned degrees in biology and literature, which deeply influenced her writing. Before becoming a full-time author, Kingsolver worked as a science writer and journalist. Her novels, such as The Bean Trees and Pigs in Heaven, reflect her ecological and social concerns. The Poisonwood Bible, published in 1998, became a critical and commercial success, solidifying her reputation. Kingsolver’s work often explores themes of identity, culture, and the human relationship with nature, blending scientific expertise with lyrical storytelling. Her writing has earned numerous awards and a dedicated global readership.

1.3 Historical Context: 1959 Belgian Congo

The novel is set against the backdrop of the late 1950s Belgian Congo, a region on the brink of political upheaval. In 1959, the Congo was nearing the end of Belgian colonial rule, with independence achieved in 1960. This period was marked by rising nationalism, ethnic tensions, and the decline of European control. The Belgian government’s abrupt withdrawal left a power vacuum, leading to chaos and instability. The setting reflects the broader African struggle for independence, with the Congo becoming a symbol of post-colonial challenges. This historical context shapes the Price family’s missionary endeavors, as they navigate a society in flux, grappling with cultural, political, and social transformations that deeply impact their lives and beliefs.

Plot Summary of The Poisonwood Bible

The Poisonwood Bible follows Reverend Nathan Price and his family as they embark on a missionary journey to the Belgian Congo in 1959. The story unfolds through the perspectives of Nathan’s wife, Orleanna, and their four daughters, exploring themes of faith, culture, and identity amidst the challenges of their new environment. The novel delves into the family’s struggles with cultural clashes, personal growth, and the complexities of their missionary endeavor, ultimately revealing the transformative impact of their experiences in Africa.

2.1 The Price Family’s Journey to Kilanga

The Price family’s journey to Kilanga begins with Reverend Nathan Price leading his wife, Orleanna, and their four daughters—Rachel, Leah, Adah, and Ruth May—from Georgia to the Belgian Congo in 1959. Driven by Nathan’s religious zeal, the family arrives in the remote village of Kilanga, unprepared for the harsh realities of their new environment. The transition from their comfortable life in Bethlehem, Georgia, to the primitive conditions of Kilanga is abrupt and challenging. The family struggles to adapt to the local customs, language, and way of life, setting the stage for a series of events that will test their faith, relationships, and resilience. This initial phase of their journey lays the foundation for the trials they will face in the Congolese wilderness.

2.2 Key Events in the Story

The Poisonwood Bible unfolds through pivotal events that shape the Price family’s experience in the Belgian Congo; Upon arrival in Kilanga, the family faces cultural misunderstandings and the harsh realities of their mission. Reverend Nathan Price’s rigid beliefs clash with the village’s traditions, leading to tension. The death of Ruth May, the youngest daughter, marks a tragic turning point, deeply affecting the family. Meanwhile, political turmoil brews as the Congo moves toward independence, further complicating their lives. These events, intertwined with personal struggles and growth, drive the narrative forward, exploring themes of faith, guilt, and identity. The story captures the family’s resilience amid adversity, creating a compelling tale of love and loss.

2.3 The Role of Reverend Nathan Price

Reverend Nathan Price, the patriarch of the Price family, is a central figure in The Poisonwood Bible. A zealous Baptist missionary, he relocates his family to the Belgian Congo in 1959, driven by a rigid religious conviction. His unwavering belief in spreading Christianity often leads to cultural clashes with the local villagers, as he fails to understand or respect their traditions. Nathan’s inflexibility and self-righteousness create tension within his family, particularly with his wife, Orleanna, and daughters, who struggle to adapt to their new life. His actions, though well-intentioned, ultimately contribute to the family’s turmoil and the tragic events that unfold, making him a complex and pivotal character in the story.

2.4 The Perspectives of the Five Female Narrators

The novel is uniquely narrated by the five female members of the Price family: Orleanna, Rachel, Leah, Adah, and Ruth May. Each narrator offers a distinct perspective on their experiences in the Belgian Congo, reflecting their personalities, struggles, and growth. Rachel, the eldest, focuses on her vanity and desire for normalcy. Leah and Adah, twins, provide contrasting views—Leah embracing missionary work, while Adah, with her physical disability, offers a more introspective and analytical voice. Ruth May, the youngest, brings innocence and a childlike view of the world. Orleanna, the mother, ties their stories together, revealing her own complexities and the weight of her responsibilities. This multivoiced narrative enriches the story, showcasing the diverse ways the family copes with their challenging environment and cultural differences.

Major Themes in The Poisonwood Bible

The novel explores themes of cultural clash, imperialism, religion, family dynamics, guilt, identity, and self-discovery, weaving them into a rich tapestry of human experience and resilience.

3.1 Cultural Clash and Imperialism

The novel vividly portrays the cultural clash between the Price family and the Congolese villagers, highlighting the tensions of imperialism. Reverend Nathan Price’s rigid missionary ideals clash with the villagers’ traditional beliefs, showcasing the complexities of cultural exchange. The family’s inability to understand local customs and language underscores the broader theme of imperialism, where Western superiority is imposed on indigenous cultures. Kingsolver critiques the “savior complex” of colonialism, illustrating how well-intentioned actions can lead to unintended harm. The novel also explores the villagers’ resistance to foreign intrusion, emphasizing the resilience of native cultures. This theme is central to the novel’s exploration of power dynamics and cultural misunderstanding.

3.2 Religion and Faith

Religion and faith are central themes in The Poisonwood Bible, as Reverend Nathan Price’s missionary zeal drives the family’s journey to the Congo. His rigid, unyielding interpretation of Christianity often clashes with the villagers’ traditional beliefs, leading to friction and misunderstanding. Nathan’s faith is portrayed as both a source of conviction and a form of blindness, as he struggles to comprehend the spiritual practices of the Congolese. In contrast, his wife and daughters develop more nuanced views of faith, influenced by their experiences in Africa. The novel critiques religious zealotry and the imposition of one’s beliefs on others, while also exploring the transformative power of faith in the face of adversity. This duality highlights the complex role of religion in shaping individual and cultural identities.

3.4 Family Dynamics and Guilt

Family dynamics in The Poisonwood Bible are marked by tension and guilt, shaped by Reverend Nathan Price’s authoritarian leadership. His unwavering dedication to his missionary work often neglects his family’s needs, creating a fractured home environment. The novel explores the emotional toll on his wife, Orleanna, and their four daughters, each grappling with feelings of abandonment and responsibility. Guilt is a pervasive theme, particularly for Orleanna, who struggles with her role as a mother and her complicity in Nathan’s decisions. The family’s collective guilt intensifies as they confront the consequences of their actions in the Congo, leading to a deeper examination of love, sacrifice, and accountability within the family structure.

3.5 Identity and Self-Discovery

In The Poisonwood Bible, identity and self-discovery are central themes as the Price sisters navigate their complex relationships and the alien environment of the Congo. Each daughter—Rachel, Leah, Adah, and Ruth May—embarks on a unique journey of self-discovery, shaped by their individual personalities and the challenges they face. Rachel struggles with her superficial identity, while Leah and Adah find purpose through their connections to the land and its people. Ruth May’s brief life serves as a catalyst for growth in those around her. The novel explores how cultural dislocation and personal loss force the characters to redefine themselves, leading to profound transformations and a deeper understanding of their place in the world.

Literary Analysis and Style

Barbara Kingsolver’s The Poisonwood Bible employs a rich, lyrical prose and a non-linear narrative structure, weaving multiple perspectives to create a layered exploration of cultural and personal complexities.

4.1 Narrative Structure and Multiple Perspectives

The novel’s narrative structure is a key element of its literary brilliance. Barbara Kingsolver employs multiple perspectives, with each chapter narrated by a different female member of the Price family. This technique allows readers to experience the story through diverse lenses, enriching the narrative with varied insights and emotions. The voices of Orleanna, Rachel, Leah, Adah, and Ruth May provide a multidimensional exploration of the family’s journey. Each narrator’s unique viewpoint adds depth to the story, revealing their individual struggles and growth. This layered storytelling not only enhances the novel’s complexity but also underscores the themes of identity, faith, and cultural clash, making The Poisonwood Bible a masterful tale of human experience.

4.2 Symbolism: The Poisonwood Tree

The poisonwood tree is a profound symbol in the novel, representing both danger and transformation. Its toxic sap causes painful rashes, mirroring the family’s struggles with their environment and cultural differences. The tree serves as a constant reminder of the Congo’s unforgiving nature and the Prices’ inability to fully adapt. Symbolically, it reflects the destructive aspects of imperialism and the consequences of imposing foreign beliefs. The tree also embodies the idea of growth through adversity, as the characters learn to navigate their surroundings. Its presence throughout the narrative underscores the central themes of resilience and the intricate relationship between nature and humanity, making it a powerful and enduring symbol in The Poisonwood Bible.

4.3 Use of Language and Imagery

Barbara Kingsolver’s use of language in The Poisonwood Bible is rich and evocative, creating vivid imagery that immerses readers in the lush yet unforgiving Congolese environment. Descriptive passages about the jungle’s dense foliage, the vibrant marketplace, and the oppressive heat paint a sensory experience. The language often contrasts the beauty of nature with the harsh realities of the characters’ struggles, reflecting their emotional and psychological journeys. Kingsolver’s prose is both poetic and precise, capturing the unique voices of the five female narrators and their distinct perspectives. This stylistic approach enhances the novel’s emotional depth, making the story resonate long after the final page;

The Poisonwood Bible remains a powerful exploration of cultural clashes, faith, and identity, offering timeless insights into humanity’s complexities and resilience, ensuring its lasting literary impact.

5.1 The Legacy of The Poisonwood Bible

Barbara Kingsolver’s The Poisonwood Bible has left an indelible mark on modern literature, celebrated for its rich storytelling and profound social commentary. Since its publication in 1998, the novel has become a bestseller and a critical favorite, praised for its exploration of cultural clashes, imperialism, and family dynamics. Its unique narrative structure, featuring five distinct female voices, has been widely admired for offering diverse perspectives on colonialism and identity. The book’s themes of guilt, faith, and resilience continue to resonate with readers, making it a staple in book clubs and academic studies. Its availability in PDF format has further expanded its reach, ensuring its legacy as a thought-provoking and emotionally charged tale of human struggle and transformation.

5.2 Relevance of the Novel in Modern Times

The Poisonwood Bible remains highly relevant in modern times, offering timeless insights into cultural clashes, imperialism, and personal identity. Its exploration of colonialism resonates amid contemporary discussions on globalization and neo-colonialism. The novel’s focus on family dynamics and guilt continues to mirror universal human struggles. Additionally, its themes of faith and doubt speak to ongoing debates about religion’s role in society. The PDF format has made the book accessible to a new generation of readers, ensuring its themes of cultural sensitivity, moral complexity, and resilience stay alive in today’s diverse world. Its ability to spark reflection on power imbalances and human connection ensures its enduring importance.

cdl hazmat test questions and answers pdf

The CDL Hazmat Test Questions and Answers PDF is a comprehensive study resource designed to help applicants prepare for the Hazardous Materials endorsement exam․

It includes multiple-choice questions covering safety inspections, vehicle operation, hazard awareness, and transportation regulations, along with detailed explanations to enhance understanding and retention;

By practicing with these materials, candidates can assess their knowledge, identify weak areas, and build confidence for the actual test, ensuring they meet FMCSA requirements effectively․

Overview of the Hazmat Endorsement

The Hazmat endorsement is a specialized certification required for commercial drivers transporting hazardous materials․ It ensures drivers understand safety protocols, regulations, and emergency procedures for handling such cargo․

The endorsement involves a written test covering topics like hazard identification, containment rules, and shipping paper requirements․ Drivers must demonstrate knowledge of federal and state regulations to obtain this endorsement․

Applicants are tested on their ability to safely operate vehicles carrying hazardous materials, respond to emergencies, and comply with transportation laws․ This certification is crucial for maintaining public safety and preventing accidents involving hazardous substances․

Importance of Preparing with Practice Tests

Preparing with practice tests is essential for success on the CDL Hazmat exam․ These tests simulate real exam conditions, helping candidates familiarize themselves with the format and content․

By completing practice tests, drivers can identify knowledge gaps and focus their study efforts on areas needing improvement․ Regular practice also builds confidence and reduces test anxiety․

Moreover, practice tests provide immediate feedback, allowing candidates to assess their readiness and refine their understanding of critical topics like hazard awareness and emergency procedures․ Consistent practice significantly increases the likelihood of passing the exam on the first attempt․

Study Materials for the CDL Hazmat Test

Key study materials include the FMCSA handbook, state-specific guides, online forums, and practice test websites offering PDF resources with questions, answers, and detailed explanations․

Official FMCSA Handbook for Hazmat Endorsement

The Federal Motor Carrier Safety Administration (FMCSA) Handbook is the official and most authoritative guide for preparing for the CDL Hazmat endorsement exam․

It covers essential topics such as safety regulations, proper handling of hazardous materials, and emergency procedures, ensuring drivers are well-prepared for the test․

The handbook is regularly updated to reflect current laws and industry standards, making it a vital resource for understanding the complexities of Hazmat transportation․

Available in PDF format, it provides clear, concise information on shipping papers, containment rules, and hazard awareness, aligning perfectly with the CDL Hazmat test questions and answers․

By studying this handbook, applicants can gain a deep understanding of the requirements and best practices for transporting hazardous materials safely and legally․

State-Specific DMV Study Guides

State-specific DMV study guides are tailored to address local regulations and requirements for the CDL Hazmat endorsement, complementing federal guidelines provided by the FMCSA․

These guides often include regionally relevant information, such as state-specific placarding rules, routing restrictions, and emergency contact details, ensuring drivers are prepared for local conditions․

They are available in PDF format and cover essential topics like hazardous materials identification, shipping paper requirements, and containment procedures, aligning with the CDL Hazmat test questions and answers․

By studying these guides, applicants can gain a deeper understanding of state-level expectations and ensure compliance with both federal and local standards for transporting hazardous materials safely and efficiently․

Online Forums and Communities for CDL Hazmat Prep

Online forums and communities are invaluable resources for CDL Hazmat test preparation, offering a platform for drivers to share knowledge and experiences․ Websites like CDL Trucking Forum and Reddit communities provide access to practice questions, study tips, and real-life scenarios discussed by experienced drivers․ These forums often include discussions on the latest regulations, shipping paper requirements, and emergency procedures, aligning with the content of CDL Hazmat test questions and answers PDFs․ Additionally, they allow candidates to interact with others preparing for the exam, fostering collaborative learning and problem-solving․ Many forums also offer downloadable study guides and practice tests, making them a comprehensive tool for Hazmat endorsement preparation․ Engaging with these communities can enhance understanding and readiness for the exam․

Recommended Practice Test Websites

Several websites offer reliable CDL Hazmat practice tests, providing candidates with realistic exam simulations․ Websites like CDL Practice Test and OyetTrade feature extensive question banks covering safety inspections, hazard awareness, and transportation regulations․ These platforms often include timed tests and scoring systems to help candidates assess their readiness․ Some sites, such as OyetTrade, offer downloadable PDFs with hundreds of questions and answers, making them ideal for offline study․ Additionally, forums linked to these websites allow users to discuss challenging topics and share tips․ Regularly practicing on these sites can significantly improve test performance and confidence․ They are essential tools for anyone aiming to pass the Hazmat endorsement exam efficiently․

Understanding the CDL Hazmat Test Structure

The CDL Hazmat test consists of multiple-choice questions assessing knowledge of safety inspections, vehicle operation, hazard awareness, and transportation regulations․ It requires a passing score of 85%․

Safety Inspection and Vehicle Operation Questions

The CDL Hazmat test includes questions on safety inspections and vehicle operation, ensuring drivers can identify and address potential hazards before and during transport․

These questions cover pre-trip inspection steps, proper handling of emergency equipment, and safe driving practices specific to hazardous materials transportation․

Understanding vehicle operation is critical, as it directly impacts the safe transport of hazardous goods, and the test evaluates this knowledge through multiple-choice scenarios․

Hazard Awareness and Transportation Regulations

Hazard awareness and transportation regulations are central to the CDL Hazmat test, ensuring drivers understand how to handle and transport hazardous materials safely․

Questions cover identification of different hazard classes, proper labeling, and compliance with federal and state regulations, such as those outlined in the FMCSA handbook․

Understanding these regulations is crucial for preventing accidents and ensuring legal compliance, making this section a key focus area for exam preparation and successful endorsement attainment․

Containment Rules and Emergency Procedures

Containment rules and emergency procedures are critical components of the CDL Hazmat test, ensuring drivers can manage hazardous materials safely in crisis situations․

Questions address proper container securement, handling leaks or spills, and following emergency protocols like evacuating areas or using fire extinguishers․

Understanding these procedures is vital for minimizing risks and protecting both the driver and the public, making this section essential for effective hazmat transportation and test preparation․

Sample Questions from the CDL Hazmat Test

Sample questions cover essential topics like shipping paper requirements, hazmat loading procedures, and emergency response protocols․

These questions help candidates understand the exam format and prepare effectively for the real test․

Examples of Shipping Paper Requirements

Shipping papers for hazardous materials must include detailed information about the cargo, such as the proper shipping name, UN ID number, and hazard class․

They should also list emergency contact details and any relevant handling instructions to ensure safe transport․

These documents are critical for compliance with regulations and for first responders in case of an incident․

Practical Scenarios for Loading and Transporting Hazmat

Practical scenarios for loading and transporting hazardous materials involve ensuring proper securing of cargo, using approved containers, and following specific routing requirements․

Drivers must verify that all shipments are correctly labeled and placarded, and they must carry emergency response information readily accessible in the vehicle․

In case of a spill or leak, drivers should implement containment measures and notify authorities immediately to minimize risks to public safety and the environment․

These real-world examples help applicants understand how to apply regulations and safety protocols effectively during the transportation of hazardous materials․

Preparing for the Hazmat Endorsement Exam

Focused study habits, regular practice tests, and a thorough understanding of federal and state regulations are essential for success on the Hazmat endorsement exam․

Concentrate on key areas such as safety protocols, containment rules, and emergency procedures to ensure comprehensive preparation and confidence during the test․

Key Topics to Focus On for Maximum Score

To achieve a high score on the CDL Hazmat test, prioritize understanding safety inspections, hazard identification, and transportation regulations․

Familiarize yourself with shipping paper requirements, containment rules, and emergency procedures;

Practicing with sample questions and reviewing the FMCSA handbook will help reinforce these concepts and ensure readiness for the exam․

Mastering the CDL Hazmat test requires thorough preparation and understanding of critical topics․

Utilize practice tests and study materials to build confidence and ensure success․

A well-prepared applicant will pass the exam and obtain the Hazmat endorsement efficiently․

Final Tips for Passing the CDL Hazmat Test

To excel in the CDL Hazmat test, focus on understanding containment rules and emergency procedures, as these are frequently tested topics․

Regularly review the FMCSA handbook and state-specific guides to stay updated on regulations and best practices․

Practice with sample questions to familiarize yourself with the test format and identify areas needing improvement․

Ensure you can locate and interpret shipping papers, as this is a critical component of the exam․

Join online forums and communities to gain insights from experienced drivers and stay informed about any changes in testing criteria․

Consistent study and practical application of knowledge will significantly enhance your chances of passing the test with a high score․

wsxa pdt sa wh programming instructions

The WSXA PDT SA WH is a dual-technology sensor switch designed for efficient automation. This guide provides comprehensive programming instructions to ensure optimal configuration and performance.

Overview of the WSXA PDT SA WH Sensor Switch

The WSXA PDT SA WH is a dual-technology sensor switch combining passive infrared (PIR) and ultrasonic sensing for reliable occupancy detection. Designed for energy-efficient automation, it operates at 120/277V, ensuring versatility across various applications. Its compact design and easy installation make it suitable for commercial and industrial spaces. With advanced features like adjustable sensitivity and time delay settings, it offers precise control over lighting and HVAC systems. The sensor switch is ideal for areas requiring consistent and accurate motion detection, ensuring optimal performance and energy savings.

Importance of Proper Programming

Proper programming of the WSXA PDT SA WH sensor switch is crucial for ensuring optimal performance and reliability. Accurate configuration of settings, such as sensitivity and time delays, guarantees precise motion detection and energy efficiency. Incorrect programming can lead to false triggers, reduced lifespan, or inefficient energy usage. By following the recommended guidelines, users can tailor the sensor’s behavior to their specific needs, minimizing errors and enhancing overall system functionality. Proper programming also ensures compatibility with existing infrastructure, making it a critical step for seamless integration and long-term satisfaction. This attention to detail guarantees the sensor operates as intended, delivering reliable results.

Technical Specifications and Requirements

The WSXA PDT SA WH operates on dual-technology sensing, ensuring reliable motion detection. It requires a 120/277V power supply and supports standard lighting system compatibility.

Hardware and Software Compatibility

The WSXA PDT SA WH sensor switch is compatible with standard lighting systems and operates on dual-technology sensing. It supports integration with building management software and requires minimal hardware adjustments. The sensor works seamlessly with 120/277V power supplies and is designed for easy installation. Compatibility with various lighting fixtures ensures versatile application. Software updates are supported through firmware enhancements, maintaining optimal performance. This dual-technology sensor is also compatible with VELUX window systems, ensuring a seamless fit for tilt windows. Proper hardware and software integration ensures reliable motion detection and energy efficiency, making it suitable for diverse environments and applications.

Power Requirements and Voltage Range

The WSXA PDT SA WH sensor switch requires a power supply of 120/277V AC, ensuring compatibility with standard electrical systems. Its dual-technology design optimizes energy efficiency while maintaining reliable performance. The voltage range supports flexible installation across various environments, from residential to commercial spaces. Proper power supply ensures consistent operation, preventing sensor malfunctions. This voltage range is suitable for most lighting systems, making it a versatile choice for different applications. The sensor’s power requirements are minimal, reducing energy consumption while delivering accurate motion detection. This ensures long-term reliability and cost-effectiveness in any setting.

Installation and Setup Guidelines

Installing the WSXA PDT SA WH sensor switch is straightforward, requiring basic tools and adherence to safety protocols. Ensure proper alignment and secure mounting for optimal performance and reliability.

Pre-Installation Checks and Tools Needed

Before installing the WSXA PDT SA WH sensor switch, ensure compatibility with your system and verify power requirements. Gather essential tools: voltage tester, screwdriver, level, and mounting hardware. Check sensor coverage and ensure the installation area is clean and level. Review the installation manual for specific guidelines. Proper preparation ensures a smooth and error-free installation process, minimizing downtime and ensuring optimal performance. Always follow safety protocols when handling electrical components.

Step-by-Step Installation Process

Mount the WSXA PDT SA WH sensor switch in the desired location, ensuring secure fastening. Connect the power supply, adhering to the specified voltage range. Install the sensor module, aligning it for optimal coverage. Follow the wiring diagram to connect the sensor to the control unit. Use a level to ensure proper alignment. Secure all connections and test the sensor’s functionality.Verify detection range and adjust as needed. Power on the system and perform a test cycle to ensure smooth operation. Refer to the manual for detailed wiring and configuration steps to achieve reliable performance.

Initial Setup and Configuration

Power on the WSXA PDT SA WH sensor switch and allow it to initialize. Navigate to the programming interface using the provided access method. Set the basic parameters, such as detection range and sensitivity, according to your requirements. Configure the sensor’s operational mode, selecting between automatic, manual, or scheduled operation. Ensure the sensor is properly aligned and calibrated for accurate detection. Review and save all settings to ensure they are retained. Perform a test cycle to verify functionality. Refer to the manual for detailed configuration steps to achieve optimal performance and reliability in your specific application.

Programming Instructions and Configuration

The WSXA PDT SA WH offers advanced programming options. Access settings via the interface, configure sensor sensitivity, and set custom schedules. Ensure settings align with specific needs for optimal performance.

Understanding the Programming Interface

The WSXA PDT SA WH’s programming interface is user-friendly, offering intuitive controls for configuring settings; It features a responsive design with clear menu options, enabling easy navigation. Key sections include sensor sensitivity adjustment, timing controls, and advanced automation features. The interface allows users to customize settings based on specific needs, ensuring optimal performance. By familiarizing yourself with the interface, you can efficiently program the sensor switch to meet your automation requirements. Proper use of the interface ensures smooth operation and maximizes the device’s capabilities.

Configuring Sensor Settings and Parameters

Configuring the WSXA PDT SA WH involves setting sensor sensitivity, timing, and detection parameters. Adjust sensitivity to minimize false triggers while ensuring accurate detection. Timing settings control how long the sensor remains active after detection. Advanced parameters allow customization of detection zones and response delays. Use the programming interface to fine-tune these settings based on your application. Proper configuration ensures reliable performance and energy efficiency. Always test settings after configuration to verify functionality. Adjustments may be needed for optimal results in varying environments. Ensure settings align with the intended use case for the best outcome.

Advanced Programming Features and Options

The WSXA PDT SA WH offers advanced programming features such as custom scripts, occupancy-based learning, and energy-saving modes. Users can integrate with smart systems for seamless automation. Advanced settings allow for real-time monitoring and data logging, enhancing performance. Customizable zones and event triggers provide tailored solutions. These features optimize functionality and efficiency, making the sensor versatile for various applications. Explore these options to unlock full potential and achieve precise control over lighting and automation systems. Regular updates ensure compatibility with evolving technologies.

Troubleshooting Common Issues

Identify and resolve issues like sensor malfunctions or connectivity problems. Check power sources and configurations. Consult the manual for reset procedures and software updates.

Identifying and Diagnosing Common Problems

Common issues with the WSXA PDT SA WH include sensor malfunctions and connectivity problems. Start by checking the power supply and ensuring all connections are secure. If the sensor isn’t responding, verify that the programming settings are correct and aligned with the device’s specifications. Use diagnostic tools to identify error codes or unusual behavior. Refer to the troubleshooting section of the manual for step-by-step guidance on resolving these issues. Regular software updates and maintenance can help prevent many of these problems from occurring in the first place.

Resetting and Reconfiguring the Sensor

Resetting the WSXA PDT SA WH sensor restores it to factory defaults, useful for troubleshooting or starting over. Access the programming interface, navigate to the reset option, and confirm the action. After resetting, reconfigure basic settings like voltage, sensitivity, and operation mode to match your application. Ensure all parameters align with your system’s requirements. If issues persist, check for firmware updates or consult the manual for detailed reconfiguration steps. Proper reconfiguration ensures optimal performance and reliability of the sensor switch in your automation setup.

Maintenance and Updates

Regularly check for firmware updates to ensure optimal performance and security. Perform routine maintenance tasks to maintain sensor accuracy and reliability over time.

Regular Maintenance Tasks

Perform routine inspections of the sensor and its connections to ensure proper functionality. Clean the sensor lens periodically to maintain accuracy and reliability. Check for firmware updates and install them as needed to keep the system up-to-date. Verify that all settings and configurations are correct and aligned with the intended application. Schedule regular calibration checks to ensure the sensor operates within specified parameters. Address any software or hardware issues promptly to prevent downtime. Regular maintenance helps extend the lifespan of the device and ensures optimal performance in various environments.

Updating Firmware and Software

Regularly updating the firmware and software of the WSXA PDT SA WH sensor switch is essential for optimal performance. Check the manufacturer’s website for the latest updates and follow the provided instructions carefully. Use compatible software tools to ensure a smooth update process. Always back up current configurations before proceeding to avoid data loss. Updates may include bug fixes, security enhancements, and new features. Ensure a stable internet connection during the update to prevent interruptions. After completing the update, verify that all settings are restored and functioning correctly. Keeping the firmware and software up-to-date ensures compatibility and enhances overall system reliability.

Proper programming and maintenance of the WSXA PDT SA WH sensor switch ensure optimal performance and efficiency. Follow the guide for successful configuration and updates.

The WSXA PDT SA WH sensor switch offers dual-technology automation, ensuring reliable performance. Proper programming is essential for optimal functionality, with detailed guidelines provided for ease of use. The device supports a wide voltage range and is compatible with various systems. Regular maintenance and firmware updates are crucial for sustained efficiency. By following the outlined instructions, users can configure and troubleshoot effectively, ensuring seamless operation. This guide serves as a comprehensive resource for installing, programming, and maintaining the WSXA PDT SA WH sensor switch, maximizing its potential in automated environments.

Final Tips for Optimal Performance

To ensure the WSXA PDT SA WH sensor switch operates at peak efficiency, regular firmware updates are essential. Always verify power supply stability before installation to prevent malfunctions. Conduct thorough testing post-installation to confirm sensor accuracy. Maintain a clean environment around the sensor to avoid interference. Refer to the programming guide for advanced customization options. For troubleshooting, consult the diagnostic section to resolve issues promptly. Schedule periodic inspections to ensure optimal performance. By adhering to these practices, users can maximize the sensor switch’s reliability and longevity, ensuring seamless automation in various applications.

bls instructor manual pdf free download

The BLS Instructor Manual is an essential resource for teaching Basic Life Support courses, providing comprehensive lesson plans and aligning with the 2020 guidelines.

1.1 Overview of the BLS Instructor Manual

The BLS Instructor Manual is a comprehensive guide designed for instructors teaching Basic Life Support (BLS) courses. It includes detailed lesson plans, course materials, and updated content from the 2020 CPR and ECC Guidelines. This manual serves as a central resource for instructors, ensuring they can effectively teach lifesaving skills. It is structured to align with the latest scientific recommendations, making it an indispensable tool for BLS training.

1.2 Importance of the BLS Instructor Manual

The BLS Instructor Manual is vital for ensuring instructors deliver high-quality training. It provides standardized lesson plans and updated guidelines, ensuring consistency and adherence to best practices in BLS instruction. This manual helps instructors develop the necessary technical and teaching skills, enabling them to effectively train healthcare professionals in lifesaving techniques. Its structured approach ensures comprehensive coverage of critical BLS concepts and skills.

Key Features of the BLS Instructor Manual

The manual includes detailed lesson plans, updated 2020 guidelines, and resources for both instructor-led and blended learning courses, ensuring comprehensive training for BLS instructors.

2.1 Lesson Plans and Course Materials

The BLS Instructor Manual provides structured lesson plans, including agendas, skill sheets, and assessment tools. These materials are designed to ensure instructors deliver consistent, high-quality training. The manual also includes downloadable resources, such as PowerPoint presentations and videos, to enhance learning. Together, these components help instructors effectively teach the critical skills needed for Basic Life Support certification.

2.2 Updates from the 2020 Guidelines for CPR and ECC

The BLS Instructor Manual incorporates the latest updates from the 2020 Guidelines for CPR and ECC. These updates include revised chest compression techniques, new approaches to cardiac arrest management, and enhanced emphasis on team dynamics. The manual ensures instructors are equipped to teach evidence-based practices, reflecting current scientific consensus and improving student readiness for real-world emergencies.

How to Access the BLS Instructor Manual

The BLS Instructor Manual is available as a free PDF download on platforms like Scribd or for purchase on the American Heart Association’s official website.

3.1 Free Download Options

The BLS Instructor Manual can be downloaded for free as a PDF from platforms like Scribd or other online repositories. While free options are available, ensure the source is reliable to maintain content accuracy. Official sources like the American Heart Association website may charge a fee, but they guarantee the most updated and authentic version of the manual. Always verify the source to avoid unauthorized or outdated copies.

3.2 Official Sources for the BLS Instructor Manual

The official BLS Instructor Manual is available through the American Heart Association (AHA) website or authorized training centers. The AHA offers both print and digital versions, ensuring access to the most updated guidelines. Additionally, the BLS Instructor Network provides resources exclusively for certified instructors. Always purchase or download from trusted sources to ensure the manual’s authenticity and compliance with current standards.

BLS Provider Manual

The BLS Provider Manual serves as a comprehensive guide for participants, detailing essential lifesaving skills and sequences to ensure successful course completion and real-world application.

4.1 Content and Structure

The BLS Provider Manual is structured to provide clear, concise information on lifesaving techniques. It includes detailed sections on CPR procedures, Chain of Survival, and emergency care. The manual emphasizes practical application, ensuring participants grasp critical skills through step-by-step instructions and visual aids. Regular updates align with the latest scientific guidelines, making it an indispensable resource for both training and real-world emergencies.

4.2 Role of the Provider Manual in BLS Training

The BLS Provider Manual serves as the cornerstone of training, offering participants the knowledge needed to perform lifesaving techniques effectively. It ensures consistency in teaching methods and provides a standardized approach to CPR and emergency care. The manual is a reference guide for instructors, helping them deliver structured lessons that align with the latest scientific guidelines, thus enhancing the quality of training and improving learner outcomes significantly.

Becoming a Certified BLS Instructor

Becoming a certified BLS instructor requires completing the BLS Provider Course and meeting specific prerequisites, such as holding a current AHA Healthcare Provider card, to ensure expertise in teaching lifesaving skills effectively.

5.1 Prerequisites for BLS Instructor Certification

To qualify as a BLS instructor, candidates must hold a current AHA Healthcare Provider card or, for non-healthcare professionals, a Heartsaver First Aid provider card. Proficiency in CPR skills and strong teaching abilities are essential. Additional requirements include completing the BLS Provider Course and demonstrating competence in course materials, ensuring readiness to effectively train others in lifesaving techniques.

5.2 The Certification Process

The certification process involves submitting an application, passing a written exam, and demonstrating practical skills. Candidates must complete the BLS Instructor Essentials Course and show proficiency in teaching and technical expertise. Upon successful evaluation, instructors receive certification, enabling them to conduct BLS courses effectively and maintain compliance with AHA standards for high-quality training.

Resources for BLS Instructors

The BLS Instructor Network offers exclusive resources, including updated lesson plans and tools for effective teaching, ensuring instructors stay current with AHA guidelines and best practices.

6.1 Instructor Network and Support

The BLS Instructor Network provides a collaborative platform for instructors to share resources, access updated materials, and receive support. It ensures instructors are well-equipped to deliver high-quality training, fostering a community of professionals dedicated to saving lives through proper BLS techniques and adherence to the latest guidelines.

6.2 Tools for Effective Teaching

The BLS Instructor Manual offers a variety of tools to enhance teaching effectiveness, including detailed lesson plans, multimedia resources, and structured debriefing techniques. Instructors can also access the Instructor Essentials online course for additional guidance. These tools help ensure that courses are engaging, informative, and aligned with the latest guidelines, enabling instructors to deliver high-quality training and improve learner outcomes effectively.

Course Preparation and Management

Effective course preparation ensures smooth delivery. The BLS Instructor Manual includes a detailed checklist for instructors, covering equipment setup, material organization, and alignment with current guidelines.

7.1 Checklist for Course Preparation

The BLS Instructor Manual provides a detailed checklist to ensure instructors are fully prepared. This includes verifying equipment functionality, organizing course materials, and confirming the training environment meets AHA standards. Instructors must review lesson plans, prepare skill stations, and ensure all participants have necessary resources. Adherence to this checklist guarantees a smooth and effective learning experience, aligning with the latest 2020 guidelines and instructional best practices.

7.2 Managing Course Materials and Equipment

Effective management of BLS course materials and equipment is crucial for a successful training session. Instructors should conduct regular equipment checks, ensuring all mannequins, AEDs, and supplies are functional. Organize materials like manuals, DVDs, and assessment tools in an accessible manner. Stay updated with the latest 2020 guidelines and ensure all resources align with current standards. Proper inventory management and equipment maintenance are key to delivering high-quality training experiences.

Special Considerations for BLS Training

Special considerations in BLS training include integrating psychomotor skills with critical thinking, addressing diverse learning styles, and ensuring accessibility for all participants.

8.1 Integrating Psychomotor Skills with Critical Thinking

Integrating psychomotor skills with critical thinking is vital in BLS training. Instructors should ensure participants master techniques like chest compressions while developing decision-making abilities. The BLS Instructor Manual provides structured lesson plans and scenarios to teach these skills cohesively, enhancing real-world application and improving patient outcomes through effective skill execution and problem-solving.

8.2 Handling Different Learning Styles

Instructors should adapt teaching methods to accommodate visual, auditory, and kinesthetic learners. The BLS Instructor Manual offers strategies to engage diverse learning styles, such as using videos, hands-on practice, and group discussions. Incorporating real-life scenarios and varying instructional techniques ensures all participants grasp critical skills effectively, fostering an inclusive and dynamic learning environment.

The BLS Instructor Manual is a vital resource for effective training, ensuring instructors are well-prepared to teach lifesaving skills and promote high-quality care.

9.1 Summary of Key Points

The BLS Instructor Manual is an essential resource for teaching life-saving skills, offering structured lesson plans and updated guidelines. It ensures instructors are well-prepared to deliver effective training, emphasizing critical thinking and hands-on practice. The manual aligns with the 2020 CPR and ECC guidelines, providing a comprehensive framework for BLS courses. Accessing it as a free PDF from trusted sources like Scribd or the AHA website ensures instructors stay current and compliant with training standards.

9.2 Final Thoughts on the BLS Instructor Manual

The BLS Instructor Manual is a vital tool for effective BLS training, offering detailed lesson plans and updated guidelines. Its availability as a free PDF ensures accessibility for instructors worldwide. By adhering to the 2020 CPR and ECC guidelines, it equips instructors with the knowledge and skills needed to deliver high-quality training. Regular updates and comprehensive resources make it indispensable for maintaining excellence in BLS education and ensuring optimal patient outcomes.

guide de remorquage ford 2023

Discover Ford’s 2023 towing capabilities, featuring powerful models like the F-150, Super Duty, and Ranger. This guide provides essential insights into towing safety, capacity, and equipment for optimal performance.

Key Ford Models for Towing in 2023

The 2023 Ford lineup features the F-150, Super Duty, and Ranger, each offering exceptional towing capabilities tailored for heavy-duty and recreational needs with advanced technology.

Ford F-150 Towing Capacity and Features

The 2023 Ford F-150 offers impressive towing capabilities, with a maximum capacity of up to 8,200 pounds when properly equipped. Equipped with a powerful 290-horsepower engine and 265 lb-ft of torque, it delivers robust performance for hauling heavy loads. Proper weight distribution is crucial for safe towing, and Ford provides advanced towing packages tailored to different trailer classes. These features ensure optimal control and stability, making the F-150 a reliable choice for both professional and recreational towing needs.

Ford Super Duty Towing Capabilities

The 2023 Ford Super Duty lineup delivers exceptional towing power, with a maximum capacity of up to 40,000 pounds. Available in F-250, F-350, and F-450 models, it offers tailored capabilities for heavy-duty tasks. The F-250 can tow up to 30,000 pounds, while the F-450 reaches 40,000 pounds with a gooseneck setup. Advanced features like Ford’s Trailer Tow Package and Pro Trailer Backup Assist enhance control and stability, ensuring confident towing even with the heaviest loads. This makes the Super Duty a top choice for professional-grade towing needs.

Ford Ranger Towing Specifications

The 2023 Ford Ranger offers impressive towing capabilities, with a maximum towing capacity of up to 7,500 pounds. Equipped with a 2.3L EcoBoost engine, it delivers 290 horsepower and 265 lb.-ft. of torque, ensuring robust performance; The Ranger supports various trailer types and sizes, making it versatile for work and recreation. Advanced features like Trailer Sway Control and the optional Class III Trailer Tow Package enhance towing stability and safety. With a payload capacity of up to 1,500 pounds, the Ranger is a reliable choice for mid-size truck towing needs.

Understanding Towing Capacity

Towing capacity is the maximum weight a vehicle can safely tow, influenced by factors like vehicle weight, axle ratio, and engine power. Understanding it ensures safe and efficient towing.

Factors Affecting Towing Capacity

Several factors influence towing capacity, including the vehicle’s weight, engine power, axle ratio, and trailer type. The Gross Vehicle Weight Rating (GVWR) and payload capacity also play a role. Proper weight distribution and the use of appropriate hitch classes ensure safe towing. Additionally, environmental conditions like altitude and temperature can affect performance. Understanding these factors helps in optimizing towing efficiency and safety, ensuring that Ford vehicles operate within their limits for reliable and secure hauling experiences.

Calculating Maximum Towing Capacity

Calculating maximum towing capacity involves understanding the vehicle’s weight ratings and specifications. The Gross Vehicle Weight Rating (GVWR) and payload capacity are critical. Subtract the vehicle’s curb weight from the GVWR to determine the maximum trailer weight. Ford vehicles, like the F-150 and Super Duty, are designed with SAE-certified towing capacities. Always consult the owner’s manual for precise figures, as engine options and axle ratios affect limits. Proper calculations ensure safe towing, preventing overload and maintaining vehicle performance and stability on the road.

Conventional vs. Gooseneck Towing

Conventional towing uses a bumper-mounted hitch, ideal for lighter loads, while gooseneck towing employs a bed-mounted hitch for heavier trailers. Ford vehicles, like the F-150 and Super Duty, support both methods. Gooseneck towing offers better weight distribution and stability for large trailers, making it popular for heavy-duty applications. Conventional towing is simpler and sufficient for smaller loads. Both methods require proper setup and adherence to Ford’s towing guidelines for safety and performance. Choose the right option based on trailer weight and type for optimal towing efficiency and control.

Safety Tips for Towing with Ford Vehicles

Ensure proper weight distribution, secure trailer connections, and use Ford’s advanced safety features like trailer sway control. Always follow towing capacity limits for safe and efficient hauling.

Proper Weight Distribution

Proper weight distribution is crucial for safe and stable towing. Ensure the trailer tongue weight is 10-15% of the trailer’s total weight. Use Ford’s weight distribution hitches to balance the load evenly, enhancing control and preventing swaying. Always consult your Ford vehicle’s owner’s manual for specific guidelines on weight limits and distribution. Correctly balancing the weight ensures optimal towing performance and safety, reducing the risk of accidents. Ford’s advanced towing technologies, like sensors and hitch systems, help maintain proper distribution for a secure haul.

Trailer Setup and Maintenance

Proper trailer setup and regular maintenance are essential for safe towing. Ensure the trailer is securely attached to the hitch, with all lights and brakes functioning correctly. Check tire pressure, brakes, and wiring before each trip. Regularly inspect the trailer frame, axles, and suspension for wear. Use Ford-approved hitch systems and accessories for compatibility. Proper setup and maintenance ensure reliability, safety, and optimal performance while towing with your Ford vehicle. Always follow Ford’s guidelines for trailer preparation to avoid potential issues on the road.

Ford’s Advanced Safety Features for Towing

Ford’s advanced safety features enhance towing confidence. The Pro Trailer Backup Assist simplifies reversing with a trailer, while Trailer Brake Controller adjusts braking seamlessly. Blind Spot Information System with Trailer Coverage monitors blind spots, and the optional 360-degree camera provides clear visibility. Additionally, Ford’s Intelligent Adaptive Cruise Control maintains safe distances, even with a trailer. These technologies work together to ensure safer, more controlled towing experiences, reducing driver stress and improving overall safety on the road.

Necessary Equipment for Towing

Essential towing equipment includes a compatible hitch, wiring harness, and brake controller. Ford offers tailored towing packages with class-specific hitches and advanced brake systems for safe towing.

Hitch Classes and Types

Ford offers various hitch classes (I to V) to suit different towing needs. Class I hitches handle lightweight trailers, while Class V is designed for heavy-duty applications. Weight distribution hitches are recommended for larger loads to ensure stability. Ford’s towing packages include class-specific hitches, ensuring compatibility and safety. Proper hitch selection is crucial for secure towing, preventing damage to both vehicle and trailer. Always match the hitch class to your trailer’s weight and type for optimal performance and safety on the road.

Wiring and Electrical Connections

Proper wiring and electrical connections are essential for safe and efficient towing. Ford vehicles are equipped with advanced wiring harnesses and connectors to ensure compatibility with various trailers. The 4-pin and 7-pin connectors are standard, providing power for lights, brakes, and auxiliary systems. Trailer wiring kits are available for seamless installation, while Ford’s integrated trailer brake controllers simplify setup. Always ensure connections are secure to avoid electrical issues. Correct wiring ensures safety, preventing faults in lighting or braking systems during towing. Consult Ford’s guidelines for specific wiring requirements tailored to your vehicle and trailer setup.

Brake Controllers and Accessories

Ford offers advanced brake controllers to enhance towing safety. The integrated trailer brake controller, available on select models, adjusts braking force automatically; Accessories like brake control harnesses and adapters ensure compatibility with various trailers; Proper installation and setup are crucial for optimal performance, preventing trailer sway and ensuring smooth stops. Always refer to Ford’s specifications for the correct brake controller and accessories tailored to your vehicle and trailer weight. These systems work seamlessly with Ford’s towing technologies, providing confidence and control while on the road.

Preparation and Maintenance

Regular inspections, proper weight distribution, and genuine Ford parts ensure safe towing. Follow maintenance guidelines to optimize performance and reliability for every towing experience.

Pre-Tow Checklist

Ensure vehicle readiness by checking tire pressure, fluids, brakes, and suspension. Inspect the trailer frame, axles, and wiring. Verify hitch class compatibility and secure coupling. Distribute weight evenly, ensuring proper tongue load. Test brake controllers and trailer lights. Review towing capacity and vehicle manuals. Always adhere to local regulations and safety guidelines for a secure towing experience.

Regular Maintenance for Towing

Regular maintenance is crucial for safe and efficient towing. Check tire pressure, fluid levels, and brake systems before and after towing. Inspect suspension components and electrical connections for wear. Ensure the hitch and coupler are secure and well-maintained. Lubricate moving parts and verify trailer lighting functionality. Follow Ford’s recommended maintenance schedule to prevent issues. Address any worn or damaged components promptly to maintain towing performance and safety on the road.

Choosing the Right Trailer

Selecting the right trailer ensures safe and efficient towing. Match trailer size and type to your Ford vehicle’s capacity, considering weight and intended use for optimal performance.

Trailer Types and Sizes

Ford’s 2023 towing guide outlines various trailer types, including flatbed, enclosed, and utility trailers, each suited for specific tasks. Trailer sizes range from small utility trailers for light loads to large flatbeds for heavy-duty hauling. Matching the trailer size and type to your Ford vehicle’s towing capacity ensures safety and efficiency. For example, smaller trailers are ideal for the Ford Ranger, while larger, heavier trailers are better suited for the F-150 or Super Duty models. Always consider weight distribution and vehicle capacity to avoid overloading, ensuring a secure towing experience.

Matching Trailer to Vehicle Capacity

Correctly matching your trailer to your Ford vehicle’s towing capacity ensures safe and efficient hauling. Smaller trailers, like utility or boat trailers, are ideal for the Ford Ranger, while larger, heavier trailers suit the F-150 or Super Duty. Always consider the trailer’s weight, size, and type alongside your vehicle’s specifications. For example, a Ford F-150 with a Max Tow Package can handle larger trailers, while a Ranger is better suited for lighter loads. Consult Ford’s towing guide for precise capacity ratings to ensure compatibility and safety.

Legal and Regulatory Considerations

Ensure compliance with local towing laws, including weight limits and trailer braking requirements. Certain Ford models, like the E-Transit and Mustang Mach-E, are not recommended for towing.

Towing Laws and Regulations

Compliance with local towing laws is crucial for safe and legal towing. Ford adheres to SAE towing standards across its vehicles. Certain models, such as the E-Transit and Mustang Mach-E, are not recommended for towing due to manufacturer guidelines. Always check local regulations regarding weight limits, trailer braking requirements, and necessary permits. Proper licensing and adherence to towing restrictions ensure a safe and lawful towing experience with your Ford vehicle.

License Requirements for Towing

Towing with a Ford vehicle may require specific licensing depending on the trailer weight and local regulations. A standard driver’s license typically suffices for lighter loads, but heavier trailers or specialized setups may demand a commercial driver’s license (CDL). Check your state’s DMV regulations, as requirements vary. Some states mandate a trailer endorsement for towing above certain weight limits. Ensure compliance with licensing rules to avoid legal issues and maintain safe towing practices with your Ford vehicle.

Troubleshooting Common Towing Issues

Identify and resolve common towing problems like trailer sway, uneven weight distribution, and electrical connectivity issues. Ensure proper hitch setup and brake controller calibration for safe towing.

Common Problems and Solutions

Address issues like trailer sway by adjusting load distribution or using stabilizers. Electrical faults? Check wiring connections and ensure proper brake controller settings. Uneven braking? Verify trailer brake synchronization. For hitch issues, ensure correct ball size and tight connections. Regular maintenance, like lubricating hitch components and inspecting tire pressure, prevents breakdowns. Always refer to Ford’s towing guide for specific solutions tailored to your vehicle and trailer setup.

guiding question

Guiding questions are open-ended inquiries designed to spark critical thinking and exploration. They help structure learning, research, or problem-solving processes, ensuring focused and meaningful outcomes in educational and professional contexts.

1.1 Definition of a Guiding Question

A guiding question is an open-ended inquiry designed to direct exploration, critical thinking, and problem-solving. It is a foundational tool used in education, research, and professional contexts to focus investigations and stimulate deeper understanding. Unlike yes/no questions, guiding questions require detailed answers and often encourage multiple perspectives. They are typically specific enough to provide direction but broad enough to allow for comprehensive analysis. For example, “How does climate change impact biodiversity?” or “What are the causes of homelessness?” These questions are crafted to provoke thought, challenge assumptions, and guide learners or researchers toward meaningful insights and solutions. They are essential for structuring inquiries, fostering creativity, and ensuring that the exploration process remains purposeful and aligned with desired outcomes.

1.2 Importance of Guiding Questions

Guiding questions play a crucial role in fostering critical thinking, focus, and purposeful exploration. They help learners and researchers stay aligned with their objectives while encouraging deeper understanding and meaningful insights. By framing inquiries in a structured yet open-ended manner, guiding questions promote engagement, creativity, and analytical skills. They are particularly valuable in educational settings, where they help students develop a systematic approach to problem-solving and encourage active learning. In professional contexts, guiding questions can enhance decision-making processes and ensure that investigations remain relevant and effective. Ultimately, guiding questions serve as a foundation for inquiry-based learning, enabling individuals to navigate complex topics with clarity and purpose. Their ability to spark curiosity and direct exploration makes them an indispensable tool in both academic and professional environments.

How to Create Effective Guiding Questions

To create effective guiding questions, start with clear and focused queries, incorporating the 5 Ws (Who, What, When, Where, Why) and How. Ensure they are open-ended to encourage exploration and critical thinking.

2.1 Using Journalistic Questions (5 Ws and H)

Journalistic questions, known as the 5 Ws and H, are essential for crafting effective guiding questions. These include Who, What, When, Where, Why, and How. By incorporating these elements, questions become comprehensive and targeted, ensuring all aspects of a topic are explored. For instance, asking “Who is involved?” clarifies stakeholders, while “What is the main issue?” defines the problem. “When” and “Where” provide context, “Why” explores motivations, and “How” explains methods. This approach helps in creating well-rounded inquiries that guide deeper investigation and understanding. It is particularly useful in educational settings to encourage students to think critically and cover all dimensions of a subject. Using these questions ensures that guiding queries are thorough and lead to meaningful insights.

Google Search Tips for Refining Your Query

Use OR to broaden searches, AND to narrow results, intitle for specific page titles, and exclude terms to refine queries, ensuring precise and relevant search outcomes quickly.

3.1 Using OR to Broaden Search

Using “OR” in Google searches allows you to broaden your query by including results that contain either of the specified terms. This is particularly useful when searching for synonyms or related concepts, such as “education OR schooling,” which retrieves results containing either term. By incorporating “OR,” you can cast a wider net and explore a broader range of topics, making your search more comprehensive. This technique is especially helpful when you’re unsure of the exact terminology or want to discover alternative perspectives. For instance, searching “climate change OR global warming” will yield results that mention either phrase, providing a more extensive overview of the topic. This approach ensures you don’t miss relevant information by limiting your search to a single term, thereby enhancing the depth and variety of your findings.

3.2 Using AND to Narrow Search

Using “AND” in Google searches helps narrow down results by requiring both specified terms to be present. This operator is essential for refining queries to focus on specific topics. For example, searching “education AND technology” will only show results that include both terms, ensuring relevance. To further enhance precision, combine “AND” with other techniques. For instance, using quotes for exact phrases, like “education AND ‘artificial intelligence,'” yields more targeted outcomes. Additionally, you can pair “AND” with “OR” to refine complex queries, such as “education AND (technology OR innovation).” This approach is particularly useful for academic or professional research, where narrowing down to the most relevant information is crucial. By strategically using “AND,” you can eliminate irrelevant results and focus on content that directly addresses your query, making your search more efficient and effective. This technique is especially valuable when exploring specific aspects of a broader topic.

3.3 Using intitle for Specific Results

The “intitle” operator is a powerful tool for refining Google searches by targeting specific terms in webpage titles. This technique ensures that your results are highly relevant to your query, as it focuses only on pages where the specified keywords appear in the title. For example, searching “intitle:marketing intitle:inbound” will yield results with both “marketing” and “inbound” in their titles, providing precise and focused outcomes. This is especially useful when looking for authoritative sources or specific types of content. By combining “intitle” with other operators like “OR” or “AND,” you can further tailor your search. For instance, “intitle:guiding questions OR intitle:critical thinking” will retrieve pages with either phrase in the title, enhancing the breadth of your results while maintaining specificity. Using “intitle” effectively streamlines your research process, ensuring that you quickly find the most relevant and accurate information available online. This method is particularly beneficial for academic or professional searches, where time efficiency and precision are paramount. By leveraging the “intitle” operator, you can significantly improve the quality and relevance of your search results, making your research more effective and productive.

3.4 Excluding Terms from Search

Excluding specific terms from your search can help refine results and eliminate irrelevant information. In Google, this is achieved by using a minus sign (-) before the term you wish to exclude. For example, searching “guiding questions -education” will yield results about guiding questions that do not mention education. This technique is particularly useful when certain words have multiple meanings or when you want to avoid unrelated topics. By excluding specific terms, you can focus your search on the most relevant content. For instance, if you’re researching “guiding questions” but want to avoid articles related to “critical thinking,” you can search “guiding questions -critical thinking.” This ensures your results are more targeted and aligned with your specific needs. Regularly using this operator can significantly enhance the efficiency of your research and help you find exactly what you’re looking for without sifting through unnecessary information. This method is especially handy for academic or professional searches where precision is key.

Role of Guiding Questions in Education

Guiding questions play a vital role in education by fostering engagement and deeper understanding. They encourage students to explore topics thoroughly, promoting meaningful learning experiences.

4.1 Promoting Critical Thinking

Guiding questions are instrumental in fostering critical thinking by encouraging students to analyze, evaluate, and synthesize information. They prompt learners to explore multiple perspectives, question assumptions, and seek evidence-based answers. For instance, a question like “What are the causes of homelessness?” compels students to investigate various factors, such as economic conditions, social policies, and personal circumstances, rather than settling for a simplistic explanation. This approach cultivates deeper understanding and the ability to address complex issues. By framing inquiries that require analysis, guiding questions help students develop the skills to evaluate information, identify patterns, and form well-supported conclusions. This process not only enhances problem-solving abilities but also prepares students to navigate real-world challenges with a critical and inquisitive mindset.

4.2 Application Across Educational Stages

Guiding questions are versatile tools applicable across all educational stages, from elementary to higher education. At the elementary level, they help students develop foundational skills by encouraging curiosity and exploration. For example, questions like “What causes day and night?” simplify complex concepts for young learners. In middle school, guiding questions become more detailed, fostering deeper understanding, such as “How does photosynthesis affect our environment?” At the high school level, they often align with subject-specific inquiry, like “How does Shakespeare’s context influence his writing?” In higher education, guiding questions are used to frame research and critical analysis, such as “What are the implications of climate change on global economies?” This progression ensures that students at every stage develop the ability to think critically and approach problems systematically, preparing them for lifelong learning and intellectual growth.

club car carryall 500 parts manual

The Club Car Carryall 500 parts manual is an essential guide for maintenance, repair, and troubleshooting. It provides detailed information on components, ensuring proper functionality and longevity.

This comprehensive resource covers everything from routine checks to complex repairs, helping users understand and maintain their vehicle effectively. It is a must-have for owners and technicians alike.

1.1 Overview of the Club Car Carryall 500

The Club Car Carryall 500 is a versatile utility vehicle designed for reliability and durability. Known for its robust performance, it is widely used in various settings, including golf courses and industrial sites. Available in gas, electric, and lithium-ion models, it offers flexibility to meet different operational needs. The parts manual provides essential guidance for maintaining and troubleshooting this vehicle, ensuring optimal functionality and longevity. It serves as a comprehensive resource for owners and technicians, detailing components, repairs, and upgrades to keep the Carryall 500 in prime condition.

1.2 Importance of the Parts Manual for Maintenance and Repair

The parts manual is crucial for maintaining and repairing the Club Car Carryall 500. It provides detailed diagrams, part numbers, and repair procedures, ensuring accurate and efficient service. Regular maintenance, as outlined in the manual, prevents breakdowns and extends the vehicle’s lifespan, while proper repairs restore functionality and safety. It also helps in identifying and replacing worn or damaged components, ensuring optimal performance. By following the manual’s guidelines, owners and technicians can maintain the vehicle’s reliability and value over time. This resource is essential for anyone looking to keep their Carryall 500 in excellent working condition.

Where to Find the Club Car Carryall 500 Parts Manual

The Club Car Carryall 500 parts manual can be found on the official Club Car website, through authorized dealers, or third-party marketplaces like online retailers.

2.1 Official Club Car Website and Resources

The Club Car Carryall 500 parts manual is readily available on the official Club Car website. Users can access it through the support or resources section, where they can download PDF versions or view it online. This ensures easy access to genuine and updated information directly from the manufacturer.

2.2 Authorized Dealers and Distributors

Authorized Club Car dealers and distributors provide genuine parts manuals and expert assistance. They offer reliable access to the Carryall 500 manual, ensuring authenticity and accuracy. Visit Club Car’s official website to locate your nearest authorized dealer or distributor for trusted support and resources.

2.3 Third-Party Sources and Online Marketplaces

Third-party sources and online marketplaces offer easy access to the Club Car Carryall 500 parts manual. Platforms like eBay and Amazon have downloadable PDF versions, making it simple for users to obtain the manual. Ensure the source is reliable for accuracy and cross-reference part numbers to avoid errors.

Understanding the Structure of the Parts Manual

The parts manual is organized into sections, including a table of contents, detailed diagrams, and part descriptions. It helps users quickly locate specific components and instructions, ensuring efficient maintenance and repair processes for the Club Car Carryall 500.

3.1 Table of Contents and Index

The table of contents provides a clear outline of the manual, while the index allows quick access to specific topics. These features ensure users can efficiently navigate and locate necessary information for maintenance and repairs on their Club Car Carryall 500, saving time and effort. Proper organization enhances usability significantly for all users.

3.2 Diagrams and Illustrations

The manual includes detailed diagrams and illustrations to help users visualize components and assembly. These visuals guide technicians through complex repairs and maintenance tasks, ensuring accuracy. Color-coded elements and clear labels make identification easier, while step-by-step illustrations enhance understanding of procedures. They are invaluable for both novice and experienced technicians working on the Club Car Carryall 500.

3.3 Part Numbers and Descriptions

The Club Car Carryall 500 parts manual lists part numbers with detailed descriptions, ensuring accurate identification. Each component is cataloged with specifications and cross-references, making it easy to locate and order genuine or compatible parts. This section is crucial for maintaining consistency and quality in repairs and upgrades.

Safety Precautions and Guidelines

Adhering to safety guidelines is crucial when working on the Club Car Carryall 500. Always wear PPE, follow proper procedures, and ensure the vehicle is stable before starting any maintenance or repair to prevent accidents and ensure a safe working environment.

4.1 General Safety Warnings

Always disconnect the battery before starting repairs to prevent electrical shocks. Ensure the vehicle is on a level surface and apply brakes. Be cautious of hot components and sharp edges. Use proper tools and avoid shortcuts to maintain safety and prevent accidents during maintenance or repairs.

4.2 Personal Protective Equipment (PPE)

When performing maintenance or repairs on your Club Car Carryall 500, always wear appropriate Personal Protective Equipment (PPE), including safety glasses, gloves, and a face mask. Steel-toe boots and a helmet are also recommended. Ensure loose clothing is secured and long hair is tied back to avoid accidents. PPE is essential for protecting against hazards and ensuring a safe working environment.

4.3 Safety Procedures for Specific Repairs

Always follow specific safety procedures for each repair task. Disconnect the battery before electrical work, and use jack stands for lifting. Handle fuel and hydraulic systems with care to avoid spills. Wear PPE when working with sharp objects or hot components. Refer to the manual for guidelines on handling hazardous materials and components safely.

Maintenance Schedule and Routine Checks

Regular maintenance is essential for optimal performance and longevity. Perform daily, weekly, and monthly checks as outlined, including lubrication of moving parts and tire pressure monitoring. Follow the recommended schedule to prevent issues and ensure reliability.

5.1 Daily and Pre-Operational Checks

Start with a thorough inspection of tire pressure, brakes, lights, and fluid levels. Check the battery terminals for corrosion and ensure all connections are secure. Inspect seat belts, mirrors, and safety equipment for proper function. Test all controls and ensure no warning lights are illuminated before operation. This routine ensures safety and reliability.

5.2 Weekly and Monthly Maintenance Tasks

Perform weekly checks on tire pressure, brake function, and battery water levels. Inspect belts for wear and ensure all connections are tight. Monthly, lubricate moving parts and clean the cart thoroughly. Check fluid levels and inspect for any signs of wear or damage. Regular maintenance ensures optimal performance and extends the vehicle’s lifespan.

5.3 Annual or Seasonal Maintenance Requirements

Annual maintenance involves thorough checks of the battery, including water levels and terminal cleanliness. Inspect brakes, suspension, and electrical systems. Lubricate all moving parts and replace worn components. Seasonal preparation includes storing the vehicle properly, charging the battery, and protecting it from extreme temperatures to ensure optimal performance year-round.

Identifying and Locating Parts

This section guides users in identifying and locating parts using detailed diagrams and part numbers, ensuring accurate verification and compatibility for maintenance and repairs;

6.1 Reading Parts Diagrams and Schematics

Understanding parts diagrams and schematics is crucial for identifying components. The manual provides detailed visuals with labeled parts, enabling users to locate items quickly. Symbols and codes are explained to ensure accurate identification. Cross-referencing part numbers with descriptions helps in verifying compatibility and ordering the correct replacements efficiently.

6.2 Understanding Part Numbers and Codes

Part numbers in the Club Car Carryall 500 manual are structured to identify components precisely. They often include prefixes for category, application, and version. Understanding these codes ensures accurate identification and compatibility. This system helps avoid errors during maintenance or repairs, making the process more efficient and reliable for users and technicians alike.

6.3 Cross-Referencing Parts with Other Models

Cross-referencing parts with other Club Car models ensures compatibility and availability. Using part numbers and compatibility charts, users can identify equivalent components. This method is especially useful for older or discontinued models, helping maintain functionality and performance. Always consult the manufacturer or authorized dealers for accurate cross-referencing and reliable results.

Ordering Replacement Parts

Ordering replacement parts ensures reliability and quality. Use authorized dealers for genuine parts or trusted online retailers. Always verify compatibility and authenticity before purchasing to maintain your vehicle’s performance;

7.1 Authorized Dealers and Genuine Parts

Authorized dealers offer genuine Club Car parts, ensuring quality and compatibility. They provide accurate fitment and reliability, backed by warranties. Purchasing from authorized sources guarantees authenticity and optimal performance for your Carryall 500. Always verify dealer credentials to avoid counterfeit products and maintain your vehicle’s integrity and safety standards effectively.

7.2 Online Retailers and Aftermarket Options

Online retailers offer a wide range of aftermarket parts for the Club Car Carryall 500. These options often provide cost-effective solutions and quick delivery. However, ensure to verify compatibility and quality by checking reviews and seller ratings. Aftermarket parts can be a convenient alternative but may vary in warranty and support compared to genuine products.

7.3 Tips for Ordering the Correct Parts

Always verify part numbers using the manual or manufacturer’s website. Double-check compatibility with your Carryall 500 model year and configuration. Order from authorized dealers or reputable retailers to ensure authenticity. Consider purchasing kits for common repairs to save time and ensure all necessary components are included. Keep records of purchases for future reference.

Troubleshooting Common Issues

Identify issues like battery performance or motor function problems. Check for symptoms such as reduced speed or uneven acceleration. Refer to the manual for diagnostic steps and solutions.

8.1 Identifying Symptoms and Diagnostic Steps

Identify symptoms like reduced speed, uneven acceleration, or battery issues. Use the manual to guide diagnostic steps, such as checking error codes or testing electrical components. This helps pinpoint root causes for effective troubleshooting and repair, ensuring optimal performance and safety for your Club Car Carryall 500.

8.2 Common Problems and Their Solutions

Common issues include battery drainage, motor malfunctions, and error codes. Solutions involve checking connections, replacing faulty components, and updating software. Refer to the manual for specific fixes, ensuring proper tools and safety measures are applied to restore functionality and performance efficiently.

8.3 Error Codes and Their Meanings

Error codes like “E01” and “E02” indicate specific issues such as battery faults or motor malfunctions. The manual provides detailed explanations for each code, helping users identify and address problems quickly. Referencing the manual ensures accurate troubleshooting and prevents further damage to the vehicle’s systems.

Upgrading and Customizing Your Club Car Carryall 500

Upgrading with lithium batteries or performance parts enhances efficiency and power. Customizations like aftermarket accessories or specialized controllers can tailor your vehicle to specific needs or preferences.

9.1 Types of Upgrades and Modifications

Upgrades for the Club Car Carryall 500 include lithium batteries for improved range, high-torque motors for enhanced performance, and suspension modifications for better stability. Customizations may involve aftermarket accessories like advanced controllers, specialized wheels, and ergonomic seating options to enhance functionality and comfort. These upgrades can be tailored to meet specific operational needs effectively.

9.2 Compatibility of Aftermarket Parts

When considering aftermarket parts for the Club Car Carryall 500, ensure compatibility by verifying specifications and cross-referencing with the parts manual. Non-genuine parts may void warranties or cause mechanical issues. Always check reviews and consult authorized dealers to confirm fitment and performance before installation to maintain optimal vehicle functionality and safety standards.

9.3 Considerations Before Making Changes

Before modifying your Club Car Carryall 500, assess potential risks, such as voiding warranties or compromising safety. Always consult the parts manual to ensure changes align with manufacturer guidelines and avoid unintended consequences.

Consider local regulations, load capacity, and intended use. Verify compatibility and seek professional advice if unsure to maintain reliability and performance. Plan carefully to avoid costly mistakes or operational issues down the line.

Tools and Equipment Needed for Maintenance

Essential tools include a multimeter, wrench set, and screwdrivers. Specialized equipment like a torque wrench and diagnostic tools may be required for specific repairs.

10.1 Essential Tools for Routine Maintenance

For routine maintenance, essential tools include a multimeter, socket set, wrenches, screwdrivers, and pliers. A torque wrench is crucial for battery maintenance. Keep lubricants, gloves, and cleaning supplies on hand to ensure safe and effective servicing.

10.2 Specialized Tools for Specific Repairs

Specialized tools like a multimeter for electrical diagnostics, a torque wrench for specific bolt settings, and a battery tester for lithium batteries are essential. A hydraulic pressure tester is needed for system checks, and a wiring diagram tool aids in complex electrical repairs, ensuring accurate troubleshooting and efficient fixes.

10.3 Workspace and Equipment Setup

A well-ventilated workspace with a sturdy workbench and vice is essential for repairs. Proper lighting ensures visibility, while storage cabinets keep tools organized. Safety equipment like fire extinguishers and oil drip pans should be on hand. A drain pan for fluid changes and a welding station for metal repairs are also recommended for efficiency and safety.

The Club Car Carryall 500 parts manual is crucial for maintaining and repairing your vehicle. Always follow guidelines and reference the manual for complex tasks. Regular maintenance ensures longevity and performance. Consult professionals for major repairs to avoid further damage.

11.1 Importance of Following the Manual

Following the Club Car Carryall 500 parts manual is critical for safety, efficiency, and maintaining vehicle integrity. It ensures proper maintenance, repair, and part identification, preventing costly damages. Adhering to the manual guarantees optimal performance and longevity, while deviations may lead to malfunctions or safety risks. Always consult professionals for complex tasks.

11;2 Best Practices for Long-Term Maintenance

Regularly inspect and maintain brakes, batteries, and tires to ensure safety and performance. Follow the recommended maintenance schedule in the parts manual for routine checks and replacements. Address minor issues promptly to prevent major repairs. Keep a record of all maintenance activities for future reference and troubleshooting purposes.

11.3 Resources for Further Assistance

For additional support, consult Club Car’s official website, authorized dealers, or online forums. These resources offer troubleshooting guides, parts manuals, and expert advice. Reaching out to the Club Car customer support team can also provide personalized solutions and clarification on technical issues.

capezio ballet shoes size guide

Capezio, a renowned brand in dance footwear, offers a detailed size guide to ensure the perfect fit for ballet shoes. This guide helps dancers choose the right size, considering foot length, width, and comfort for optimal performance.

Capezio Ballet Shoes Size Chart

Capezio provides a detailed size chart for ballet shoes, offering separate guides for men and women. Sizes typically start two sizes above street shoe size for women and four sizes above for men, ensuring a precise fit.

Men’s Size Chart

Capezio’s men’s size chart for ballet shoes is designed to provide a comfortable and precise fit. Men typically start with a size that is four sizes larger than their street shoe size. For example, a street shoe size 8 corresponds to a Capezio size 4. The sizing logic is based on the length and width of the foot, ensuring optimal support during ballet movements.

The chart ranges from smaller sizes, such as Capezio size 2 (street size 6), to larger sizes, like Capezio size 16 (street size 12). It’s important to note that Capezio sizes may vary slightly depending on the specific style of the shoe. The chart is a helpful guide, but it’s recommended to try on shoes if possible, as personal comfort and fit can vary.

  • Street shoe size 6 corresponds to Capezio size 2.
  • Street shoe size 8 corresponds to Capezio size 4.
  • Street shoe size 10 corresponds to Capezio size 6.
  • Street shoe size 12 corresponds to Capezio size 8.

Referencing the official Capezio size chart ensures the best fit for men’s ballet shoes, whether for beginners or professional dancers.

Women’s Size Chart

Capezio’s women’s size chart for ballet shoes is tailored to ensure a precise fit for dancers of all levels. Women typically begin with a size that is two sizes larger than their street shoe size. For instance, a street shoe size 5 corresponds to a Capezio size 3. This sizing logic is designed to accommodate the unique demands of ballet movements while providing comfort and support.

The chart ranges from smaller sizes, such as Capezio size 2 (street size 4), to larger sizes, like Capezio size 16 (street size 14). It’s important to note that Capezio sizes may vary slightly depending on the specific style of the shoe. For example, the Hanami stretch ballet shoe is known to run narrow, so dancers with wider feet may need to adjust their size accordingly.

  • Street shoe size 4 corresponds to Capezio size 2.
  • Street shoe size 5 corresponds to Capezio size 3.
  • Street shoe size 7 corresponds to Capezio size 5.
  • Street shoe size 9 corresponds to Capezio size 7.

While the chart serves as a reliable guide, it’s recommended to try on shoes if possible, as personal comfort and fit can vary. Proper sizing ensures optimal performance and prevents discomfort during ballet practice or performances.

How to Measure Your Foot for the Best Fit

To ensure accuracy, measure your foot while standing, as feet spread when bearing weight. Trace your foot outline on paper, measure from the heel to the longest toe, and use a flexible ruler for precise results.

  • Stand on a flat surface with your weight evenly distributed.
  • Trace the outline of your foot on paper.
  • Measure the longest distance from the back of the heel to the tip of the longest toe.
  • Use a flexible ruler to ensure accurate measurements.

This method ensures a precise fit for your Capezio ballet shoes, avoiding discomfort and allowing optimal performance during dance.

Common Mistakes to Avoid When Measuring

When measuring your foot for Capezio ballet shoes, several common mistakes can lead to an improper fit. One of the most frequent errors is measuring while sitting rather than standing, as feet spread slightly when bearing weight.

  • Not accounting for foot width: Many people focus solely on length, neglecting the importance of width for comfort and proper fit.
  • Measuring only one foot: Foot sizes can differ slightly, so always measure both feet and use the larger measurement to ensure the best fit.
  • Using an inflexible ruler: A flexible tape measure or ruler is essential for capturing the natural curve of the foot.
  • Measuring at the wrong time of day: Feet tend to swell slightly throughout the day, so measure in the evening for the most accurate size.

Avoiding these mistakes ensures a more accurate measurement and a comfortable, proper fit for your Capezio ballet shoes. By taking the time to measure correctly, you can enjoy optimal performance and reduce the risk of discomfort during dance.

Factors That Influence the Fit of Capezio Ballet Shoes

Foot width, brand sizing differences, and personal comfort preferences are key factors influencing the fit of Capezio ballet shoes. Proper measurement and understanding these elements ensure a comfortable and precise fit for optimal performance.

Importance of Foot Width

Foot width plays a crucial role in ensuring a proper fit for Capezio ballet shoes. Dancers with narrower or wider feet may find that standard sizes do not accommodate their foot shape, leading to discomfort or poor performance. Proper alignment of the shoe’s width with the foot’s natural proportions is essential for optimal support and mobility. Improper fit due to width can result in blisters, restricted movement, or even long-term foot issues.

Capezio offers various styles to cater to different foot widths, ensuring that dancers can find a shoe that matches their unique shape. For instance, some models are designed specifically for narrower feet, while others provide a roomier fit. Understanding and measuring foot width accurately helps dancers choose the most suitable option. Additionally, the width of the shoe can affect how it hugs the foot during pointe work or turns, making it a critical factor for technique and overall comfort.

By prioritizing foot width in the sizing process, dancers can ensure a more personalized and comfortable fit, enhancing their performance and reducing the risk of injuries. Proper fit also allows for better control and alignment, which are essential for executing ballet movements effectively.

How Brand Sizing Differs

Brand sizing can vary significantly, and Capezio is no exception. While some brands use universal sizing, others, like Capezio, may have specific measurements tailored to their designs. For instance, Capezio shoes often run narrower compared to other brands, which can affect fit. This means dancers may need to size up for comfort and proper alignment.

Regional differences also play a role, as Capezio, being an American brand, uses U.S. sizing, whereas European brands like Bloch use UK sizing. This discrepancy can confuse dancers accustomed to one system. Additionally, Capezio’s sizing may differ between styles, with some shoes designed for specific foot shapes or dance techniques.

It’s important to consult Capezio’s size chart and consider personal fit preferences. Some dancers find that Capezio sizes run smaller than their street shoe size, requiring them to order 1-2 sizes up. This variation highlights the need to try shoes on or refer to detailed size guides to ensure the best fit. Proper sizing is crucial for performance and comfort, making it essential to understand how Capezio’s sizing compares to other brands.

Choosing the right size for Capezio ballet shoes is essential for both comfort and performance. By understanding the size charts, measuring accurately, and considering factors like foot width and brand differences, dancers can ensure a perfect fit. Capezio’s sizing guide offers valuable insights, but personal fitting remains key. Remember, proper footwear enhances technique and reduces injury risk, so take the time to find your ideal pair of Capezio ballet shoes.

tv guide high point nc

Your TV Guide High Point NC serves as a comprehensive resource for local programming, offering detailed schedules for popular channels and on-screen entertainment, helping viewers plan their day.

1.1 Overview of TV Listings in High Point, NC

The TV listings in High Point, NC, provide a detailed schedule of programs airing on local channels, including major networks like ABC, CBS, NBC, and FOX, as well as PBS and The North Carolina Channel. Viewers can access both over-the-air broadcasts and cable/satellite listings, ensuring they never miss their favorite shows, sports, or local news.

1.2 Importance of TV Guides for Local Viewers

TV guides are essential for High Point, NC viewers, offering a structured way to plan daily viewing schedules. They provide easy access to local programming, including news, sports, and entertainment, while helping viewers discover new shows. By catering to diverse preferences, TV guides ensure that audiences never miss their favorite content, making them an indispensable resource for the local community.

Popular TV Channels in High Point, NC

High Point, NC offers a variety of TV channels catering to diverse viewer interests, including major networks, sports, news, and entertainment options available through cable, satellite, or over-the-air broadcasts.

2.1 Major Broadcast Networks (ABC, CBS, NBC, FOX)

In High Point, NC, major broadcast networks like ABC, CBS, NBC, and FOX provide diverse programming. These include local news, sports, and popular shows. ABC 45 ౼ WXLV, FOX 8 ౼ WGHP, NBC 12 ౼ WXII, and CBS affiliate WFMY News 2 are prominent channels, offering a mix of entertainment, news, and community-focused content.

2.2 Public Broadcasting Service (PBS)

PBS in High Point, NC offers educational and cultural programming through channels like UNC-TV and the North Carolina Channel (4.4). Viewers can enjoy shows like NC Impact, Black Issues Forum, and Turning Point. These channels provide diverse content, including documentaries, children’s shows, and public affairs programs, catering to a wide audience.

2.3 The North Carolina Channel

The North Carolina Channel (4.4) offers diverse programming tailored to local interests, including shows like Ncimpact, Black Issues Forum, and Turning Point. It focuses on cultural, educational, and public affairs content, providing viewers in High Point, NC with insightful programs that highlight regional stories and issues, making it a valuable resource for the community interested in local and educational content.

Cable and Satellite TV Providers in High Point, NC

Cable and satellite TV providers in High Point, NC include AT&T U-verse, Spectrum, Dish Network, and DirecTV, offering various channel lineups and advanced features.

3.1 AT&T U-verse

3.1 AT&T U-verse

AT&T U-verse offers reliable TV services in High Point, NC, with a wide range of channels, including HD options, and advanced DVR capabilities. It provides customizable packages, ensuring viewers can access their favorite shows and movies. U-verse also features on-demand content, making it a popular choice for those seeking flexible entertainment options in the region.

3.2 Spectrum (Charter)

Spectrum (Charter) is a leading cable TV provider in High Point, NC, offering a wide range of channels, including HD options, premium networks, and on-demand content. With flexible packages and no long-term contracts, Spectrum provides viewers with customizable entertainment options. Its user-friendly DVR and reliable service make it a popular choice for residents seeking quality TV experiences in the area.

3.3 Dish Network

Dish Network offers a variety of channel packages in High Point, NC, catering to diverse viewer preferences. With options like HD programming, premium channels, and a user-friendly DVR system, Dish Network provides flexible entertainment solutions. Its satellite-based service ensures wide availability, making it a strong contender for those seeking reliable TV access in the High Point area.

3.4 DirecTV

DirecTV provides a robust lineup of channels in High Point, NC, including exclusive sports content like NFL Sunday Ticket. With HD and 4K options, viewers enjoy crisp visuals. The Genie DVR allows recording multiple shows simultaneously. DirecTV’s satellite service ensures wide coverage, making it a popular choice for those seeking premium entertainment options in the High Point area, tailored to diverse viewer preferences.

TV Listings by Time of Day

TV listings by time of day in High Point, NC, help viewers plan their schedule. Daytime, primetime, late night, and weekend listings ensure access to shows, news, sports, and entertainment at convenient times.

4.1 Daytime TV Schedule

The daytime TV schedule in High Point, NC, features a mix of local news, talk shows, and educational programming. Channels like WFMY News 2 and PBS North Carolina provide updates and informative content, while shows like Today and Live with Kelly and Ryan entertain audiences, making daytime viewing diverse and engaging for all preferences.

4.2 Primetime TV Schedule

Primetime TV in High Point, NC, offers a variety of shows, including popular dramas, comedies, and reality TV. Major networks like ABC, CBS, NBC, and FOX air top-rated series such as The Voice and 60 Minutes. Local channels like WFMY News 2 and WXII also feature regional programming, ensuring a diverse lineup for evening entertainment.

4.3 Late Night TV Schedule

Late-night TV in High Point, NC, features a mix of talk shows, comedy specials, and encore programming. Networks like NBC and CBS air popular series such as The Tonight Show and The Late Show. Additionally, local channels like The North Carolina Channel and TCT Today provide diverse late-night options, catering to varied viewer preferences and interests.

4.4 Weekend TV Schedule

The weekend TV schedule in High Point, NC, offers a variety of programming, including sports, movies, and local shows. Channels like The North Carolina Channel feature educational content, while networks such as ABC and CBS provide entertainment and news. Weekend programming often includes marathons of popular series, live sports events, and special broadcasts tailored for family viewing and relaxation.

Special Features of the High Point TV Guide

The High Point TV Guide offers interactive listings, allowing users to customize their viewing experience. It also provides DVR options for recording favorite shows seamlessly.

5.1 Interactive TV Listings

The High Point TV Guide features interactive listings that allow users to search, filter, and customize their viewing experience. Viewers can easily find shows by genre, channel, or time, set reminders, and even record programs. This user-friendly interface ensures fans never miss their favorite series or movies, making it a must-have tool for TV enthusiasts in the area.

5.2 DVR and Recording Options

The High Point TV Guide offers advanced DVR and recording options, allowing viewers to capture live TV and schedule recordings effortlessly. With features like series recording and storage management, users can enjoy their favorite shows at any time. This convenience enhances the viewing experience, ensuring no moments are missed, whether it’s local news or primetime entertainment.

How to Access the TV Guide

Residents in High Point, NC, can easily access the TV Guide through online platforms, mobile apps, or traditional print editions for convenient viewing schedules.

6.1 Online TV Guides

Online TV Guides for High Point, NC, offer real-time updates and customizable listings. Platforms like TV Passport provide detailed schedules, allowing users to filter by cable, satellite, or antenna providers. Residents can access live programming, set reminders, and explore on-demand content. Popular services include PBS North Carolina Channel and AT&T U-verse listings, ensuring easy access to local and national shows.

6.2 Mobile Apps for TV Listings

Mobile apps like Spectrum TV and AT&T U-verse TV provide High Point, NC, residents with portable access to TV listings. These apps offer real-time updates, channel lineups, and personalized viewing experiences. Users can set reminders, browse on-demand content, and even stream live TV. This convenience ensures viewers never miss their favorite shows, making TV listings accessible on-the-go.

6.3 Print and Digital Versions

Residents in High Point, NC, can access TV listings through both print and digital versions. Print editions, like newspapers, offer a tangible schedule, while digital versions provide interactive features online. Many providers, such as Spectrum and AT&T U-verse, publish digital TV guides on their websites, allowing users to view and customize listings. This dual accessibility ensures convenience for all viewers.

Popular TV Shows in High Point, NC

Viewers in High Point, NC, enjoy a variety of popular TV shows, including local news, sports, and entertainment programs. Shows like WFMY News 2 and FOX 8 ー WGHP are favorites, offering engaging content for all audiences.

7.1 Local News and Weather

In High Point, NC, viewers rely on channels like WFMY News 2 and FOX 8 ౼ WGHP for trusted local news, weather updates, and community stories. These stations provide up-to-date coverage of regional events, ensuring residents stay informed about what matters most in their area.

7.2 Sports Programming

Sports enthusiasts in High Point, NC, can enjoy a variety of programming, including live games and highlights. Channels like FOX8 and WFMY cover local and national sports, while networks such as ESPN and FOX Sports provide extensive coverage of events like NASCAR, college basketball, and NFL games, keeping fans connected to their favorite teams and athletes.

7.3 Entertainment and Reality TV

High Point viewers enjoy a wide range of entertainment and reality TV shows. Popular programs like American Idol and The Voice air on major networks, while reality shows such as Survivor and The Great British Baking Show are fan favorites. Local channels, including ABC, CBS, and FOX, provide diverse options, ensuring something for every entertainment seeker in the area.

Troubleshooting TV Guide Issues

Resolve common issues like outdated listings or missing channels by refreshing your guide, checking internet connectivity, or contacting your provider for assistance or updates.

8.1 Common Problems with TV Listings

Common issues with TV listings in High Point, NC, include outdated schedules, missing channels, or incorrect program times. Connectivity problems or outdated guide software can cause these issues. Users may also face difficulties with channel lineups or DVR recordings. Refreshing the guide, checking internet connections, or contacting the provider often resolves these problems. Ensure your TV guide is updated for accurate viewing information.

8.2 Updating Your TV Guide

To ensure accurate and up-to-date listings, regularly refresh your TV guide. For cable or satellite providers, check their websites or mobile apps for the latest schedules. Antenna users can refresh their guide through the TV’s menu. Enable automatic updates or manually sync to get the most current programming information for High Point, NC.

The Future of TV Guides in High Point, NC

9.1 Impact of Streaming Services

Streaming services are reshaping how viewers in High Point, NC consume content, offering personalized options and on-demand access, challenging traditional TV guides to adapt to evolving viewer habits.

Streaming services are revolutionizing how viewers in High Point, NC consume content, offering personalized recommendations and on-demand access. This shift is challenging traditional TV guides to evolve, integrating streaming options alongside broadcast schedules to remain relevant in a rapidly changing media landscape.

9.2 Technological Advancements in TV Listings

Technological advancements have transformed TV listings in High Point, NC, with features like AI-driven recommendations, real-time updates, and multi-device access. Interactive guides now allow viewers to customize schedules, set reminders, and even stream content directly, enhancing the overall viewing experience and ensuring TV guides remain indispensable in the digital age.

FAQs About High Point TV Guide

Frequently Asked Questions address common viewer inquiries, such as channel availability, scheduling updates, and provider selection, ensuring a seamless experience for High Point TV Guide users.

10.1 How to Choose the Best Cable Provider

Selecting the best cable provider in High Point, NC, involves evaluating channel selection, pricing, and service reliability. Compare providers like AT&T U-verse, Spectrum, and Dish Network for their packages and DVR options. Consider user reviews and coverage areas to ensure optimal service for your viewing needs, ensuring a seamless entertainment experience tailored to your preferences and budget.

10.2 How to Customize Your TV Listings

To customize your TV listings, start by selecting your preferred provider and package. Use online platforms or mobile apps to filter channels and create personalized schedules. Prioritize favorite shows or sports events and set reminders. Check provider reviews to ensure compatibility with your viewing habits. Explore DVR options for recording and streaming capabilities to enhance your viewing experience.

The TV Guide High Point NC is an essential tool for staying informed about local programming, ensuring viewers never miss their favorite shows or important broadcasts.

11.1 Final Thoughts on the Importance of TV Guides

TV Guides remain vital for navigating High Point, NC’s diverse channel offerings, from local news to sports and entertainment. They help viewers discover new shows and stay updated on schedules, ensuring seamless access to preferred content in an ever-evolving media landscape.

References

Sources include local TV listings, cable provider websites, and online platforms like TV Passport, offering detailed schedules for High Point, NC channels and programming.

12.1 Sources for TV Listings and Channel Information

Key sources include TV Passport, local cable provider websites, and station-specific platforms like PBS NC and WFMY News 2. These offer detailed schedules, channel lineups, and program descriptions tailored to High Point, NC viewers, ensuring accurate and up-to-date entertainment and programming information.