
Understanding Valve Guides and Their Importance
Valve guides are critical engine components that direct airflow and ensure proper valve operation. They prevent oil leakage and maintain combustion efficiency. Worn guides can lead to poor engine performance, increased oil consumption, and emissions issues.
What Are Valve Guides?
Valve guides are essential components in an engine’s cylinder head, responsible for directing the valve stems as they move up and down. They ensure precise alignment and smooth operation of the valves, which is crucial for proper airflow, combustion efficiency, and engine performance. Typically made from durable materials like bronze, valve guides are either pressed into the cylinder head or threaded, depending on the engine design. Over time, these guides can wear out due to heat, friction, and oil contamination, leading to issues such as oil leakage, reduced performance, and increased emissions. Understanding the role and construction of valve guides is fundamental for diagnosing and addressing engine problems related to valve function and overall engine health.
Symptoms of Worn Valve Guides
Worn valve guides often manifest through several noticeable symptoms that can alert drivers to potential engine issues. One of the most common signs is increased oil consumption, as worn guides allow engine oil to seep into the combustion chamber and burn along with the fuel. This not only reduces the engine’s efficiency but also leads to blue smoke emanating from the exhaust system. Additionally, drivers may notice a rough engine idle, as misaligned or loose valves can disrupt the smooth operation of the engine.
Another symptom is a decrease in engine performance, including reduced power and acceleration. This occurs because worn valve guides can cause valves to move improperly, disrupting the precise airflow required for optimal combustion. In some cases, a clicking or tapping noise may be audible from the engine, indicating that the valves are not being guided correctly. Over time, these issues can lead to more severe damage, such as bent valves or cylinder head damage, if left unaddressed. Recognizing these symptoms early is crucial for preventing costly repairs and maintaining engine longevity.

Preparation and Tools
Replacing valve guides requires careful preparation and specialized tools. Gather an air hammer, valve guide puller, reamer, and new guides. Safety gear like gloves and goggles is essential. Ensure the engine is clean and properly supported before starting the process.
Tools Required
Replacing valve guides demands a specific set of tools to ensure a successful and efficient process. An air hammer and compressor are essential for removing old guides, while a valve guide puller and installer facilitate precise extraction and insertion. A reamer is necessary to prepare the guide bore for new guides. Additionally, safety equipment such as safety glasses and gloves is crucial to protect against potential hazards. A valve spring compressor is needed to relieve tension on the springs during the replacement. Specialized tools like the Lisle 59000 can be useful for installing bronze guides without machine tools. A set of chisels and punches may also be required for various adjustments. Having a torque wrench on hand ensures proper tightening of components post-installation. These tools collectively streamline the replacement process, minimizing the risk of damage and ensuring optimal engine performance. Proper utilization of these tools is vital for a professional-grade repair;
Gathering Parts
Before starting the replacement process, it is essential to gather all the necessary parts to ensure a smooth and efficient repair. New valve guides are the primary component needed, and they must be compatible with your engine’s specifications. Bronze guide liners are a popular choice due to their durability and heat resistance. If your engine requires oversized valve stems, you may need to purchase guides that accommodate this modification. Additionally, valve guide seals are critical for preventing oil leakage and should be replaced alongside the guides.

Depending on the condition of your engine, you may also need to acquire valve stem keepers, spring retainers, and new valve springs. In some cases, installing BronzeWall 2 coil-type liners can provide an extra layer of protection and performance. It is important to consult your vehicle’s parts catalog or a trusted supplier to ensure all components are correctly matched to your engine type.
If you are modifying the guides to accept oversize valve stems, be sure to purchase the appropriate tools and parts for this specific task. Always avoid using universal or one-size-fits-all solutions, as they may not fit properly and could lead to further engine damage. Properly fitting parts are crucial for maintaining engine performance and longevity.
Removal Process
The removal process involves extracting the old valve guides carefully to avoid damaging the engine. Methods include using an air hammer or liquid CO2 to loosen and remove the guides. Proper tools, like an air compressor and chisels, are essential for safe extraction. Always wear protective gear.
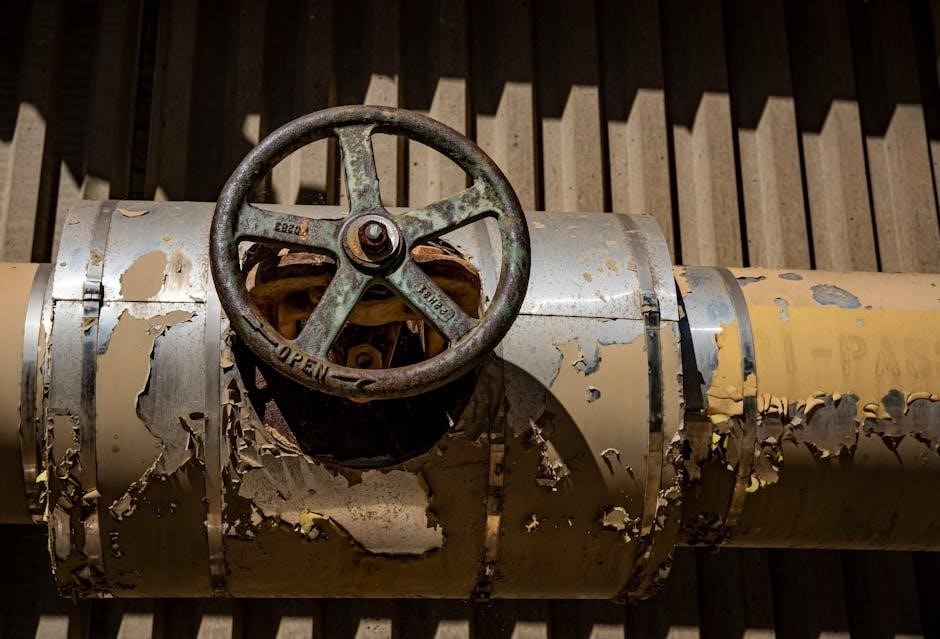
Locating the Valve Guides
Valve guides are situated within the cylinder head, surrounding the valve stems. They are typically positioned above the valve seats and below the valve spring retainers. To locate them, start by identifying the valve train components. The guides are usually visible once the valve springs and retainers are removed. For most engines, especially those with pressed-in guides, they are embedded into the head and require precise tools for removal. In some cases, such as integral guides, they are part of the head itself and need to be bored out. Always consult a repair manual for specific locations, as designs may vary between engine types. Proper identification ensures accurate removal and replacement, preventing further engine damage. Safety glasses and gloves are recommended during this process to protect against debris.
Methods of Removal
Valve guides can be removed using several methods, each requiring specific tools and techniques. The most common approach involves using an air hammer to carefully drive the guides out from the cylinder head. This method is effective for pressed-in guides but requires caution to avoid damaging the head. Another option is to use liquid CO2, which freezes the guide, making it easier to remove. For integral guides, machining is necessary, often involving boring and reaming to prepare for new inserts.
Some mechanics prefer knurling, where the guide is expanded in place to create a tighter fit, though this is less common. Reaming and installing thin-wall bronze guide liners is another method, offering a durable solution. If the guides are severely damaged, they may need to be pressed out using a hydraulic press or specialized tools. Regardless of the method, precision is key to avoid costly repairs. Always follow safety protocols, such as wearing protective eyewear, and consult a professional if unsure. Proper removal ensures a successful replacement and maintains engine performance.
New valve guides are installed by pressing or driving them into place, ensuring proper alignment and seating. Machining involves reaming and milling to achieve precise dimensions and correct height, ensuring optimal valve stem fitment and engine performance. Installing new valve guides requires precision to ensure proper fitment and functionality. Start by preparing the cylinder head by cleaning the guide bores thoroughly. Apply a thin layer of lubricant to the new guide to facilitate installation. Using a guide driver or installation tool, carefully drive the new guide into place, ensuring it is straight and evenly seated. Avoid using excessive force, which could damage the surrounding material. Once the guide is in position, use a reaming tool to achieve the correct inner diameter, matching the valve stem specifications. Proper alignment is crucial to prevent future wear and ensure smooth engine operation. After installation, inspect the guides for any burrs or irregularities and address them before reassembling the engine. This step is vital for maintaining optimal engine performance and preventing potential issues down the road. Milling the valve guides to the correct height is a critical step in ensuring proper valve operation and engine performance. After installing the new guides, use a milling tool specifically designed for this purpose to achieve the precise height specification required by the manufacturer. Start by setting up the milling machine and attaching the appropriate pilot bushing to guide the tool accurately. Carefully lower the milling cutter onto the guide and begin the process, taking small increments to avoid overheating or damaging the surrounding material. Use a micrometer to measure the height periodically and adjust as needed until the desired specification is reached. It is essential to maintain the correct angle and alignment during milling to ensure the guide remains concentric with the valve seat. Once the correct height is achieved, inspect the surface for any irregularities or scratches and address them with a fine-grit stone or honing tool. Proper milling ensures the valve stem seals correctly, prevents oil leakage, and maintains optimal engine performance. This step requires precision and attention to detail to guarantee a successful repair. Ensure all tools and materials are ready before starting. Properly clean and inspect the engine area to avoid contamination. Always refer to the manufacturer’s specifications for precise measurements and procedures. This ensures a smooth and effective repair process. Inspecting the valves is a crucial step when replacing valve guides. Look for signs of wear, such as excessive stem wear, pitting, or cracks. Replace any damaged valves to ensure proper engine performance. Valve faces should be reground or replaced if they are not smooth, as rough surfaces can lead to poor sealing and reduced efficiency. When replacing valves, ensure they are compatible with the new guides. Measure the valve stem diameter to confirm it matches the guide’s internal diameter. If the valves are reused, they must be within acceptable specifications to prevent future issues. Use a valve grinder to resurface the valve faces if necessary. Apply a thin layer of grinding paste and rotate the valve face against a flat surface until smooth. After grinding, clean the valves thoroughly to remove any residue. Installing new valves involves placing them in the correct orientation and ensuring the stem seals are properly seated. Use a valve spring compressor to install the springs and retainers without damaging the components. Tighten all hardware to the recommended torque specifications to avoid leaks or premature wear. Perform a final inspection after installation to ensure all valves are functioning correctly. Check for any signs of leakage or improper seating, as these issues can lead to engine problems down the road. Proper engine preparation is essential before replacing valve guides to ensure a smooth and successful repair. Start by cleaning the engine thoroughly, especially around the cylinder head area, to prevent dirt and debris from causing contamination. Drain the coolant and oil to avoid any spills during the process. Use jack stands to securely lift the vehicle and ensure the engine is stable. Disconnect the battery and label all electrical connections to avoid confusion when reconnecting. Remove the intake manifold and any other components that obstruct access to the cylinder head. Use an air compressor to blow out debris from the engine compartments. Cover the engine bay with plastic sheets to protect it from dust and metal shavings during the repair. Before starting, ensure all necessary tools are within reach, such as an air hammer, valve spring compressor, and guide removal tools. If the cylinder head is not already removed, use a torque wrench to loosen the head bolts in the correct sequence. Once the head is removed, place it on a sturdy workbench and secure it with clamps to prevent movement during the guide replacement process. Inspect the engine for any existing damage or wear that may need attention before proceeding. Addressing these issues now can prevent costly repairs later. Proper preparation ensures safety, efficiency, and a successful outcome for the valve guide replacement project. Wear safety glasses and ear protection when using tools like air hammers. Costs vary based on labor, parts, and machine shop fees. DIY repairs can save money but require expertise. Ensure proper safety measures to avoid injuries and costly mishaps during the replacement process. When replacing valve guides, prioritize safety to avoid injuries and equipment damage. Always wear protective gear, including safety glasses and ear protection, especially when using power tools like air hammers or compressors. Ensure the engine is cold to prevent burns from hot components. Properly secure the engine block and cylinder head to maintain stability during the process. Use jack stands and never rely solely on a jack to support the vehicle. Disconnect the battery to prevent accidental engine start-up. Properly vent the workspace to avoid inhaling harmful fumes from cleaning agents or lubricants. Follow manufacturer guidelines for tool usage and maintain a clean, organized workspace to minimize tripping hazards. Regularly inspect tools and equipment for wear or damage before use. If unsure about any step, consider consulting a professional mechanic to ensure safety and correctness. Proper safety measures ensure a smooth and successful valve guide replacement process. Replacing valve guides can vary significantly in cost depending on several factors, including the type of engine, the extent of the damage, and whether you perform the repair yourself or hire a professional. If you decide to tackle the job yourself, you can save on labor costs, but you’ll still need to invest in specialized tools and replacement parts. Basic tools like an air hammer and valve guide puller can range from $50 to $200, while replacement guides themselves may cost between $20 to $100 each, depending on the quality and brand. Additionally, if machining work is required, such as reaming or milling the cylinder head, you may need to pay a machine shop, which can add another $200 to $500 to the total cost. On the other hand, if you opt for professional installation, labor costs can range from $300 to $1,000, depending on the mechanic’s rates and the complexity of the job. Overall, the total cost for replacing valve guides can range from $500 to $2,000 or more, making it a significant investment in your engine’s health and performance. Replacing valve guides typically requires 4 to 8 hours, depending on the engine complexity and whether machining is needed. This project demands careful planning to ensure all tools and parts are ready beforehand, avoiding delays during the process. For DIYers, allocate additional time for learning and preparation. Professional shops may complete the job faster but often require scheduling in advance. Plan accordingly to minimize downtime and ensure a smooth repair experience. Replacing valve guides is a detailed process, and the duration varies based on the method used and the engine’s complexity. Simple guide replacements using press-in or thread-in guides may take around 3 to 6 hours, while more complex procedures, like machining or installing bronze liners, can extend the project to 8-12 hours or more. For DIY enthusiasts, the time required often doubles due to the learning curve and preparation. Professional shops typically complete the job faster, averaging 4 to 8 hours, depending on their workload and the engine type. If extensive machining or custom modifications are needed, the project may span several days. Factors such as the availability of tools and parts also influence the timeline. Proper planning and organization are crucial to avoid delays; Allocating a full weekend for the project is advisable for DIYers to ensure ample time for each step without rushing. Additionally, if valve inspection or replacement is required alongside guide replacement, this can add 2 to 4 hours to the process; Always consider these variables when estimating the total time needed for a successful repair. Utilize step-by-step guides, online forums, and video tutorials for detailed instructions. Tools like air hammers and valve seal pullers are essential. Consult professionals or machine shops for complex tasks. Ensure access to proper equipment and parts for a successful repair. Replacing valve guides requires careful planning and execution. Start by preparing the engine, ensuring it is clean and securely positioned. Remove the valve springs and keepers using specialized tools like spring compressors. Next, extract the old guides, which may involve pressing or using an air hammer. Install the new guides, ensuring proper alignment and fitment. Once in place, mill the guides to the correct height for optimal valve operation. Reassemble the engine components, replacing any worn parts like seals or springs. Finally, test the engine to ensure proper function and performance. Following these steps carefully ensures a successful repair and prevents future engine issues.
Installation and Machining
Installing New Guides
Milling to Correct Height

Additional Considerations
Valve Inspection and Replacement
Engine Preparation

Safety and Costs
Safety Measures
Cost Analysis

Time Management
Project Duration

Resources and Support
Step-by-Step Guides