Exide Battery Charger User Manual: An Overview
This manual provides essential guidance for Exide battery chargers, including models like D3E-24-1050 and 7035211. It covers safety, operation, and maintenance for optimal performance.
Exide has a long-standing reputation for producing reliable and durable battery charging solutions. These chargers are engineered to efficiently and safely replenish power in a wide range of lead-acid and, increasingly, LiFePO4 batteries. From forklift applications utilizing the 48V D3E-24-1050 to maintaining automotive batteries with the 12V 10/2 Amp (7035211) model, Exide caters to diverse needs.
The MP6-6-1-800 exemplifies Exide’s commitment to advanced charging technology. Whether for industrial, commercial, or recreational use – like VW buses, campers, and motorhomes with the 12V 7A charger – Exide provides solutions. Understanding your specific model and its features is crucial for maximizing battery life and charger performance, which this manual will detail.
Safety Precautions
Prioritize safety when operating your Exide battery charger. Always work in a well-ventilated area, as batteries release explosive gases during charging. Wear appropriate eye protection and gloves to prevent contact with corrosive materials. Never charge damaged batteries, and ensure the charger is disconnected from the power source before making any connections or disconnections.
Avoid short-circuiting the terminals, as this can cause severe damage and potential injury. Inspect all cables and connections for wear or damage before each use. Do not expose the charger to rain or moisture. Keep the charger out of reach of children and unauthorized personnel. Following these precautions will ensure safe and reliable operation.
Understanding Your Exide Charger Model
Identifying your specific Exide charger model – like D3E-24-1050 or MP6-6-1-800 – is crucial for understanding its features and optimal usage.
Identifying Your Charger Model Number (e.g., D3E-24-1050, 7035211, MP6-6-1-800)
Locating your Exide charger’s model number is the first step towards accessing specific documentation and support. This unique identifier, often found on a label affixed to the charger’s casing, is essential for accurate troubleshooting and understanding its capabilities. Examples include D3E-24-1050, commonly used for forklift applications, the versatile 7035211 (a 12V 10/2 Amp model), and the MP6-6-1-800.
Carefully examine all sides of the charger for a plate or sticker displaying this information. The serial number, often listed alongside the model number (like WL2033), provides further traceability. Having this information readily available when contacting customer support or ordering replacement parts will significantly expedite the process. Accurate model identification ensures you receive the correct guidance for your specific Exide charger.
Charger Specifications (Voltage, Amperage, Battery Capacity)
Understanding your Exide charger’s specifications is crucial for safe and effective operation. Key parameters include input voltage (208/240/480V, often wired for 480V in industrial settings) and DC output, such as 48 Volts with a maximum of 168 Amps, as seen in the D3E-24-1050 model. Battery capacity, measured in Amp Hours (Ah), dictates charge times; a 1050Ah battery may require approximately 8 hours for a full charge with this charger.
The 12V 10/2 Amp charger (7035211) is suitable for smaller batteries, while the 12V 7A model handles up to 150Ah. Always verify that the charger’s voltage matches your battery’s voltage to prevent damage. Proper specification alignment ensures optimal charging performance and extends battery lifespan.
Input Voltage and Phase Compatibility (208/240/480V, 3-Phase)
Exide chargers are designed to accommodate various input voltages and phases, commonly including 208, 240, and 480V. Many industrial models, like the D3E-24-1050, are frequently wired for 480V operation with a 3-phase power supply. Confirming compatibility with your facility’s electrical system is paramount before connecting the charger. Incorrect voltage or phase configuration can cause severe damage to the charger and potentially create a safety hazard.
Always consult a qualified electrician to verify proper wiring and ensure adherence to local electrical codes. Understanding the phase requirements (single or three-phase) is equally important for optimal performance and longevity of the charging equipment.
Charging Process
Proper charging involves securely connecting the charger to the battery, selecting the appropriate charging mode (automatic or manual), and monitoring charge time.
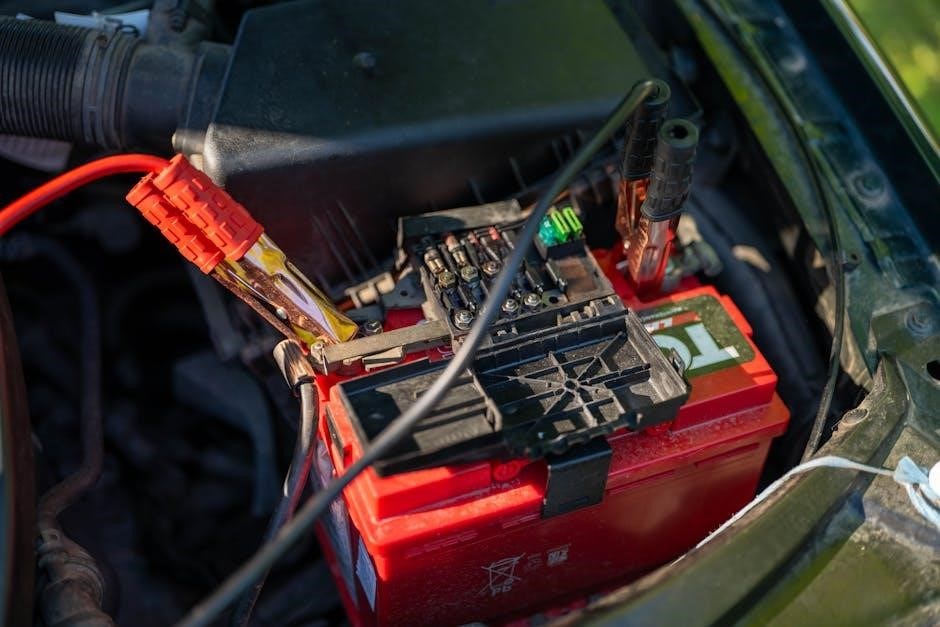
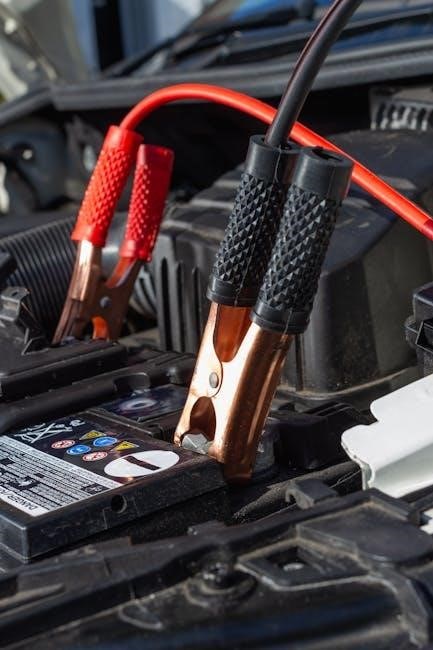
Connecting the Charger to the Battery
Before connecting, ensure the charger is switched off. Identify the positive (+) and negative (-) terminals on both the charger and the battery; Always connect the positive cable first, followed by the negative cable, to prevent sparking. Ensure a firm and clean connection for efficient charging. Incorrect polarity can damage both the charger and the battery, potentially causing hazardous situations. Double-check all connections before initiating the charging process. For forklift applications utilizing a D3E-24-1050 charger, confirm proper grounding. Regularly inspect cables for damage and replace if necessary. A secure connection is crucial for safe and effective battery charging.
Charging Modes (Automatic, Manual)
Exide chargers often feature both automatic and manual charging modes. Automatic mode, like on the 7035211 model, intelligently manages the charging process, switching between bulk, absorption, and float stages. This optimizes battery life and prevents overcharging. Manual mode allows users to set specific voltage and current levels, providing greater control for specialized applications. Selecting the correct mode is crucial; automatic is generally recommended for standard lead-acid batteries. Manual mode requires a thorough understanding of the battery’s specifications. Always consult the battery manufacturer’s recommendations before using manual mode. Incorrect settings can lead to damage or reduced battery performance.
Charge Time Estimation (Based on Battery Amp Hours ౼ e.g., 8 Hours for 1050Ah)
Estimating charge time depends on the battery’s Amp-hour (Ah) capacity and the charger’s output amperage. For example, a 1050Ah battery, when paired with a D3E-24-1050 charger delivering 168 Amps, may require approximately 8 hours for a full charge. However, this is an approximation. Factors like the battery’s initial state of discharge, temperature, and battery age influence actual charge time. Deeply discharged batteries will take longer to charge. It’s crucial to monitor the charging process and avoid interrupting it prematurely. Refer to the charger’s display for progress updates and completion indicators.

Specific Model Features
Exide offers diverse chargers, like the 12V 10/2A (7035211) for general use, the 48V D3E-24-1050 for forklifts, and a 12V 7A model for camper vans.
Exide 12V 10/2 Amp Charger (7035211) ౼ Features and Usage
The Exide 7035211 is a fully automatic, 12V, 10/2 Amp battery charger designed for maintaining and charging various 12-volt batteries. This versatile charger is ideal for automotive, marine, and recreational vehicle applications. Its automatic switching function ensures optimal charging without overcharging, extending battery life.
Key features include a multi-stage charging process, which includes desulfation, bulk, absorption, and float modes. This charger is suitable for both deep-cycle and standard lead-acid batteries. It’s a tested and reliable unit, offering convenience and peace of mind. The compact design allows for easy storage and portability. Regular use helps maintain battery health and ensures reliable performance when needed.
Exide 48V D3E-24-1050 Charger ⎻ Forklift Applications
The Exide D3E-24-1050 is a robust 48V battery charger specifically engineered for forklift applications, handling batteries up to 1050 Amp-hours with 24 cells. Designed for industrial use, this charger features a 208/240/480V input voltage with 3-phase compatibility (wired for 480V). Its high amperage output (max 168 Amps) ensures efficient and rapid charging, minimizing downtime in demanding operational environments.
This model offers a reliable charging solution for maintaining forklift battery health and maximizing productivity. An 8-hour charge time is achievable for a 1050Ah battery. Proper ventilation is crucial during operation. Regular maintenance, including inspection of connections and adherence to safety guidelines, is essential for optimal performance and longevity.
Exide 12V 7A Charger ౼ VW Bus/Camper/Motorhome Compatibility
The Exide 12V 7A battery charger is an ideal solution for maintaining batteries in VW Buses, Campers, and Motorhomes. This charger is perfectly suited for batteries up to 150Ah, offering a powerful yet compact charging solution for recreational vehicles. Its 12V output ensures compatibility with standard automotive and leisure batteries.
Being fully automatic, it simplifies battery maintenance, switching to a float charge once the battery is full. This prevents overcharging and extends battery life; The 7A model’s adaptability makes it a versatile choice for various battery types. Ensure proper ventilation during charging and follow all safety precautions outlined in this manual for optimal performance and longevity.

Troubleshooting
This section details common charging issues, error code explanations, and solutions if the charger fails to power on. Resolve problems efficiently!
Common Charging Issues and Solutions
Experiencing charging difficulties? Several issues can arise. A common problem is incorrect cable connections – ensure positive to positive and negative to negative. Verify the AC input voltage matches the charger’s requirements (208/240/480V). If the battery isn’t charging, check the fuse and replace it if blown.
For automatic chargers, confirm they are set to the correct battery type (Lead-Acid or LiFePO4). A fully discharged battery may take significantly longer to charge – estimate around 8 hours for a 1050Ah battery. If the charger displays an error code, consult the ‘Error Codes and Their Meanings’ section. Always disconnect the charger before inspecting connections or replacing fuses. If issues persist, contact a qualified technician.
Error Codes and Their Meanings
Exide chargers utilize error codes to diagnose issues. While specific codes vary by model (like D3E-24-1050 or MP6-6-1-800), common indicators include “Low Voltage” suggesting insufficient input power, or “Reverse Polarity” indicating incorrect cable connections. A “Short Circuit” error signals a problem within the battery itself or the charging circuit.
“Over Temperature” suggests the charger is overheating and requires cooling before resuming operation. Refer to your specific model’s documentation for a complete list of error codes and their corresponding solutions. Ignoring error codes can lead to battery damage or charger malfunction. Always disconnect the charger before troubleshooting and consult a qualified technician if unsure.
What to Do If the Charger Doesn’t Turn On
If your Exide charger (models like 7035211 or D3E-24-1050) fails to power on, first verify the AC power source is functioning correctly. Check the input voltage compatibility (208/240/480V) and ensure proper phase connection (3-Phase). Next, inspect the charger’s fuse – replacement procedures are detailed in the ‘Maintenance’ section.
Confirm the power switch is fully engaged. If the issue persists, examine the power cord for damage. A lack of response could indicate an internal fault requiring professional repair. Do not attempt to disassemble the charger yourself. Contact Exide support or a qualified technician for assistance, providing the model and serial number (e.g., WL2033).
Maintenance and Care
Regular cleaning and proper storage are crucial for longevity. Replace fuses as needed, following the outlined procedures, to ensure optimal Exide charger performance.
Cleaning the Charger
To maintain your Exide battery charger’s performance and lifespan, regular cleaning is essential. Before any cleaning procedure, always disconnect the charger from both the AC power source and the battery to prevent electrical shock. Use a dry cloth to wipe down the exterior casing, removing any dust, dirt, or debris that may have accumulated.
Avoid using water or solvents, as these can damage internal components. For stubborn dirt, a slightly damp cloth may be used, but ensure the charger is completely dry before reconnecting it. Inspect the charging cables and clamps for any signs of damage, such as cracks or fraying, and replace them if necessary. A clean charger operates more efficiently and safely, contributing to a longer service life.

Storage Guidelines
Proper storage is crucial when your Exide battery charger is not in use. Before storing, ensure the charger is completely dry and clean, following the cleaning procedures outlined previously. Store the charger in a cool, dry environment, protected from extreme temperatures, humidity, and direct sunlight. Avoid storing the charger in areas prone to dust or corrosive fumes.
It’s recommended to store the charging cables neatly coiled and secured, preventing damage or tangling. If possible, store the charger in its original packaging to provide additional protection. Periodically check the charger during storage to ensure no signs of deterioration have occurred. Disconnect the charger from the power source during storage.
Fuse Replacement Procedures
If your Exide charger malfunctions, a blown fuse may be the cause. Always disconnect the charger from the AC power source before attempting any fuse replacement. Locate the fuse holder, typically found near the AC input. Carefully remove the fuse holder cover and inspect the fuse for a broken filament.
Replace the blown fuse with a new fuse of the exact same type and amperage rating. Using a different fuse rating can damage the charger or create a safety hazard. Reinstall the fuse holder cover securely. If the fuse blows again immediately after replacement, do not continue to use the charger and contact qualified service personnel for assistance.
Technical Specifications

Exide chargers offer diverse outputs, including 48V DC at 168 Max Amps (D3E-24-1050). Compatibility spans L-A and LiFePO4 batteries, with varying weights and dimensions.
DC Output Volts and Max Amps
Exide battery chargers deliver a range of DC output voltages and maximum amperage levels, tailored to specific battery types and applications. The D3E-24-1050 model, for instance, provides a substantial 48 Volts DC output with a maximum amperage of 168 Amps. This configuration is ideally suited for demanding applications like forklift battery charging, requiring robust and efficient power delivery.
Conversely, the Exide 7035211 charger offers a 12 Volt DC output, with selectable amperage settings of 10 Amps and 2 Amps. This versatility makes it suitable for a wider array of 12V battery types, including those found in automotive, marine, and recreational vehicles. Understanding these specifications is crucial for selecting the appropriate charger for your specific battery and ensuring optimal charging performance and longevity.
Battery Type Compatibility (Lead-Acid ౼ L-A, LiFePO4)
Exide battery chargers are designed with compatibility in mind, supporting both traditional Lead-Acid (L-A) batteries and the increasingly popular Lithium Iron Phosphate (LiFePO4) chemistries. However, it’s crucial to verify the charger’s specifications to ensure it’s appropriate for your specific battery type. Using an incompatible charger can lead to reduced battery life, inefficient charging, or even safety hazards.
Generally, Exide chargers offer selectable modes or automatic detection to optimize the charging process for each battery type. The D3E-24-1050 is primarily designed for L-A batteries, while newer models, or those with advanced features, may include LiFePO4 charging profiles. Always consult the charger’s documentation and battery manufacturer’s recommendations before connecting to ensure a safe and effective charge.
Shipping Weight and Dimensions (e.g., 250 Lbs, 48x48x48 inches)
Understanding the shipping weight and dimensions of your Exide charger is vital for logistical planning, especially for larger models like the D3E-24-1050. This particular unit, commonly used in forklift applications, typically weighs around 250 Lbs and measures approximately 48 inches in length, width, and height; These substantial dimensions necessitate careful handling and appropriate transportation equipment.
Smaller chargers, such as the 12V 10/2 Amp (7035211), will have significantly reduced weight and dimensions, making them easier to manage. Always refer to the product specifications or packaging for precise measurements before arranging shipping or storage. A skidding fee of $25 may also apply during shipment.