Kasia’s Pierogi brings traditional Polish comfort food to your table, offering a delicious blend of tender dumplings filled with potatoes, cheese, and savory onions, boiled or pan-fried to perfection.
What Are Pierogi?
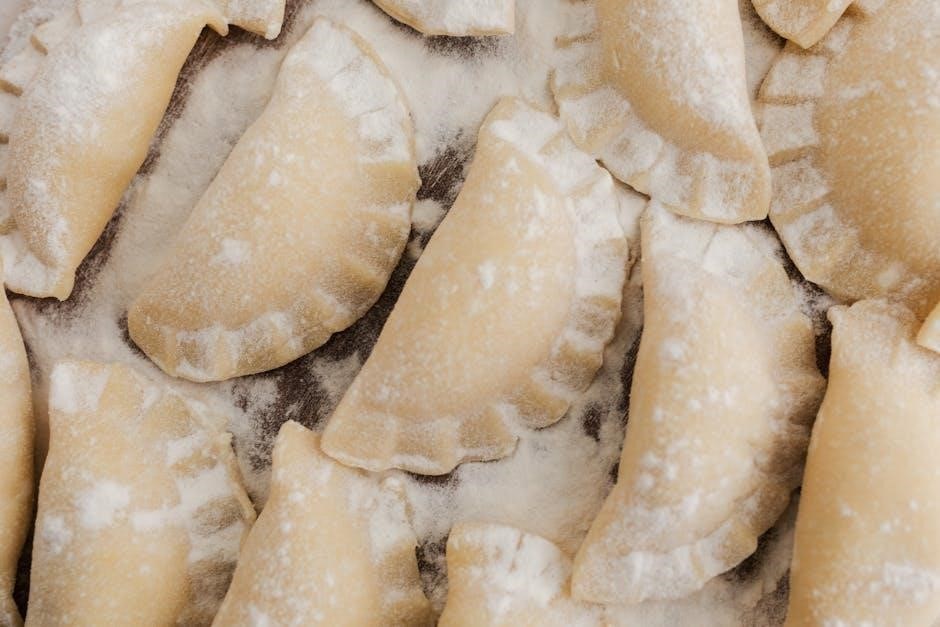
Pierogi are traditional Polish dumplings, typically made from unleavened dough, filled with savory or sweet ingredients like potatoes, cheese, meat, or fruits. They are boiled, fried, or baked, offering a hearty, flavorful dish rich in Polish culinary heritage. Kasia’s Pierogi maintains this cherished tradition, blending authentic recipes with modern cooking techniques to create a delicious, comforting meal for all to enjoy.
Kasia’s Pierogi: A Traditional Polish Recipe
Kasia’s Pierogi embodies the heart of Polish cuisine, offering a timeless recipe passed through generations. The dish features tender dumplings filled with classic ingredients like potatoes, cheese, and onions, wrapped in a soft, elastic dough. Traditionally boiled or pan-fried, Kasia’s Pierogi captures the essence of Polish comfort food, blending simplicity with rich flavors. This beloved dish is a testament to Poland’s culinary heritage, providing a delicious and authentic experience for every palate.
Ingredients for Kasia’s Pierogi Dough
The dough requires flour, warm water, egg, and salt, creating a smooth, elastic texture. Optional additions like sour cream or milk enhance flexibility and richness.
Essential Ingredients for the Dough
The foundation of Kasia’s Pierogi dough relies on simple, high-quality ingredients: all-purpose flour for structure, warm water for hydration, a single egg for binding, and a pinch of salt for flavor. These components create a smooth, elastic dough that is easy to roll out and shape. Using room-temperature ingredients ensures the dough comes together seamlessly, avoiding any toughness or stickiness. This traditional combination has been perfected over generations to deliver the perfect texture for wrapping flavorful fillings.
Optional Additives for Enhanced Flavor
For an extra layer of flavor, Kasia’s Pierogi dough can be enriched with optional additives. A tablespoon of sour cream or milk adds a subtle tanginess, while a drizzle of melted butter enhances richness. Some cooks also incorporate finely chopped fresh herbs like dill or chives for a fragrant twist. These additions refine the dough’s taste without overpowering it, allowing the natural simplicity of the ingredients to shine while offering a personalized touch to the traditional recipe.
Preparing the Pierogi Dough
Combine flour, salt, and warm water in a bowl. Add eggs and sour cream, mixing until a dough forms. Knead until smooth, rest for 30 minutes.
Step-by-Step Dough Preparation
Start by combining 2 cups of flour and 1 teaspoon of salt in a large bowl. Gradually add 1/2 cup of warm water, mixing until the dough begins to form. Incorporate 1 egg and 1 tablespoon of sour cream, continuing to mix until a smooth, elastic dough forms. Knead the dough on a floured surface for 5-7 minutes until it becomes pliable. Cover and let rest for 30 minutes to allow gluten relaxation. Divide the dough into smaller portions for easy rolling. This process ensures a tender and durable dough for wrapping fillings.
Tips for Achieving the Perfect Dough Consistency

Traditional Pierogi Fillings
Classic fillings include potato and cheese, savory meat with onions, and sweet fruit options like strawberries or cherries, each offering a delightful taste of Polish heritage.
Classic Potato and Cheese Filling
The classic potato and cheese filling is a staple in traditional pierogi. Mashed potatoes are blended with sharp cheddar or farmer’s cheese, creating a creamy, savory filling. Many recipes suggest using leftover mashed potatoes, which adds convenience. The dough is then stuffed generously but not overly, ensuring the pierogi seal properly. This filling is often served with caramelized onions and sour cream, enhancing its rich, comforting flavor. It’s a simple yet hearty option cherished in Polish cuisine.
Savory Meat and Onion Filling
The savory meat and onion filling offers a hearty twist. Ground pork or beef is sautéed with caramelized onions until fragrant. Seasoned with garlic and black pepper, this filling adds a robust flavor. Some recipes incorporate fresh herbs for a brighter taste, while others suggest adding a touch of tomato paste for depth. This filling is ideal for those seeking a meaty, satisfying pierogi option, often paired with fried bacon bits or sour cream for added richness. Perfect for meat lovers, it’s a delightful variation of traditional pierogi.
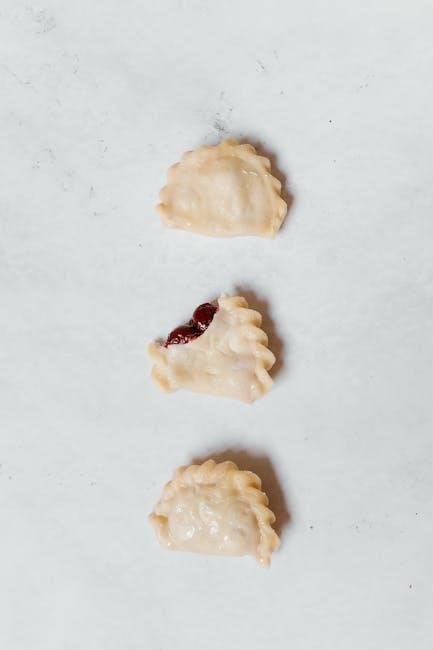
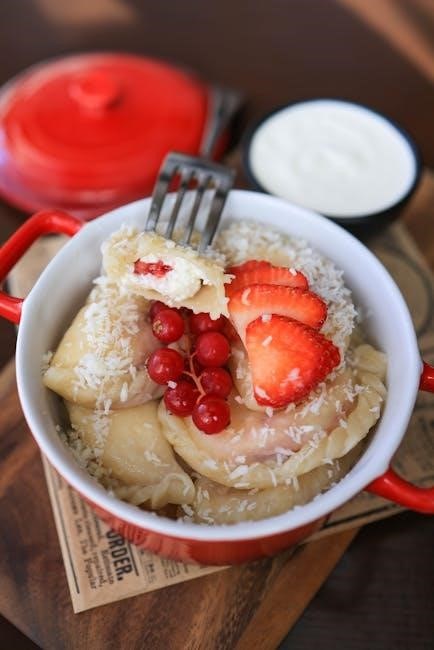
Fruit Fillings for Sweet Pierogi
Fruit fillings transform pierogi into a sweet treat. Strawberries, blueberries, or cherries are mashed with sugar and lemon zest. Some recipes add vanilla for extra flavor. The dough is rolled thin, filled generously, and sealed tightly. These sweet pierogi are often pan-fried until golden and served with powdered sugar or a dollop of whipped cream. They’re a refreshing dessert option, especially in summer, offering a fruity twist on traditional pierogi, perfect for satisfying sweet cravings.
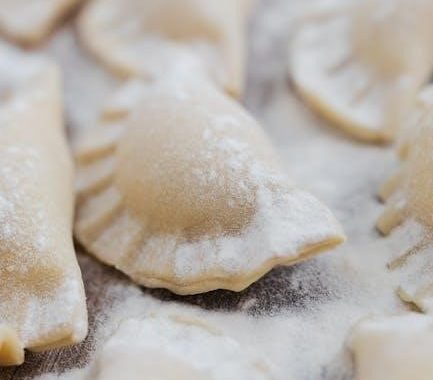
Assembling the Pierogi
Roll out the dough thinly, place a spoonful of filling in the center, fold the dough over, and press edges to seal the pierogi tightly;
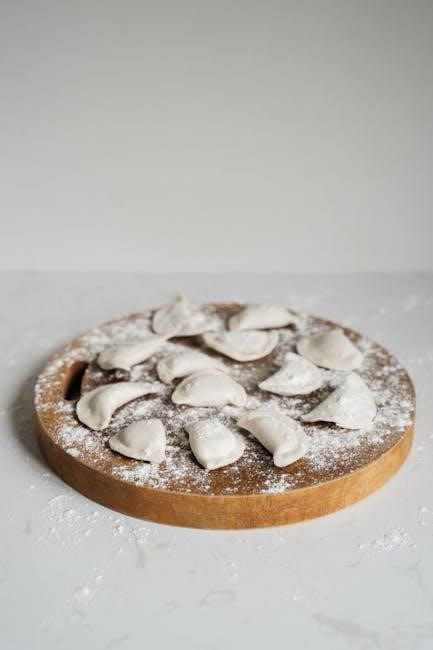
Rolling Out the Dough
Roll out the pierogi dough on a floured surface to a thickness of about 1/8 inch. Use a rolling pin to achieve an even consistency, ensuring the dough is thin enough to fold easily. Keep the dough lightly floured to prevent sticking. If needed, divide the dough into smaller portions for easier handling. Roll gently but firmly to maintain uniform thickness, which helps the pierogi cook evenly. Avoid overworking the dough to keep it tender and pliable for filling.
Placing the Filling
Place a tablespoon or two of your chosen filling in the center of each dough circle. Be careful not to overfill, as this can cause the pierogi to break during cooking. Gently press the filling down to ensure it’s evenly distributed, leaving a small border around the edges. Handle the dough lightly to avoid stretching or tearing. This step ensures the filling is secure and the pierogi seal properly, creating a delicious, intact dumpling ready for cooking.
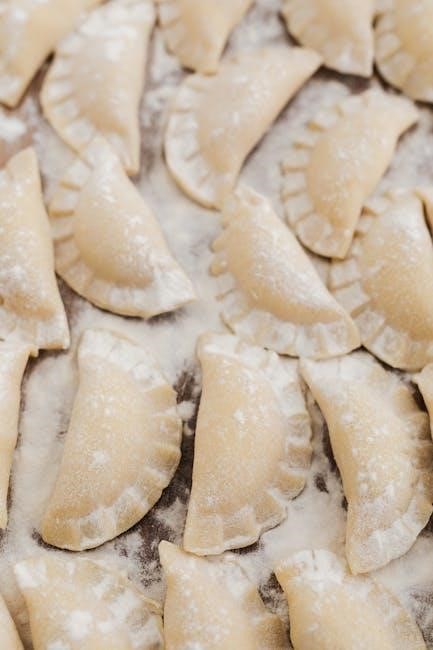
Sealing the Pierogi Properly
Fold the dough over the filling, forming a half-circle shape, and press the edges together firmly to seal. Use a fork to crimp the edges, ensuring a tight seal to prevent breaking during cooking. Avoid overworking the dough, as it may become tough. For an extra secure seal, lightly moisten the edges with water before pressing. Proper sealing ensures the pierogi hold their shape and filling intact, creating a delicious, professional finish for boiling or frying;
Cooking Methods for Pierogi
Boil, pan-fry, or bake pierogi for perfect results. Boiling is traditional, pan-frying adds crispiness, and baking offers a healthier option. Each method enhances texture and flavor uniquely.
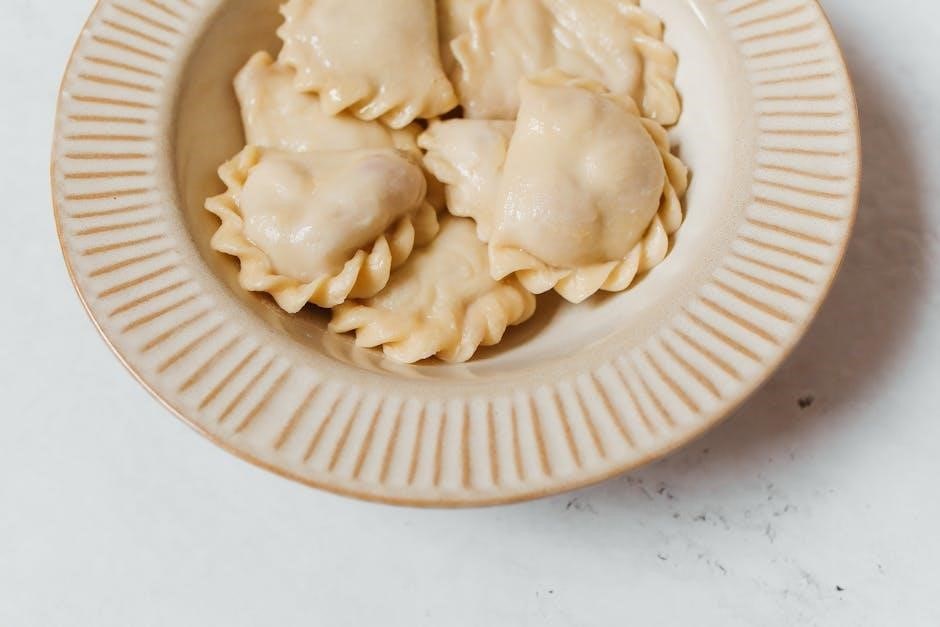
Boiling Pierogi: A Traditional Approach
Boiling pierogi is a classic method that ensures tender results. Bring a large pot of salted water to a boil, gently add pierogi, and cook until they float. Avoid overcrowding the pot to prevent sticking. Cook for 5-7 minutes after they rise, then drain and serve with caramelized onions or sour cream. This traditional approach preserves the delicate texture and flavor of Kasia’s Pierogi, offering an authentic Polish experience.
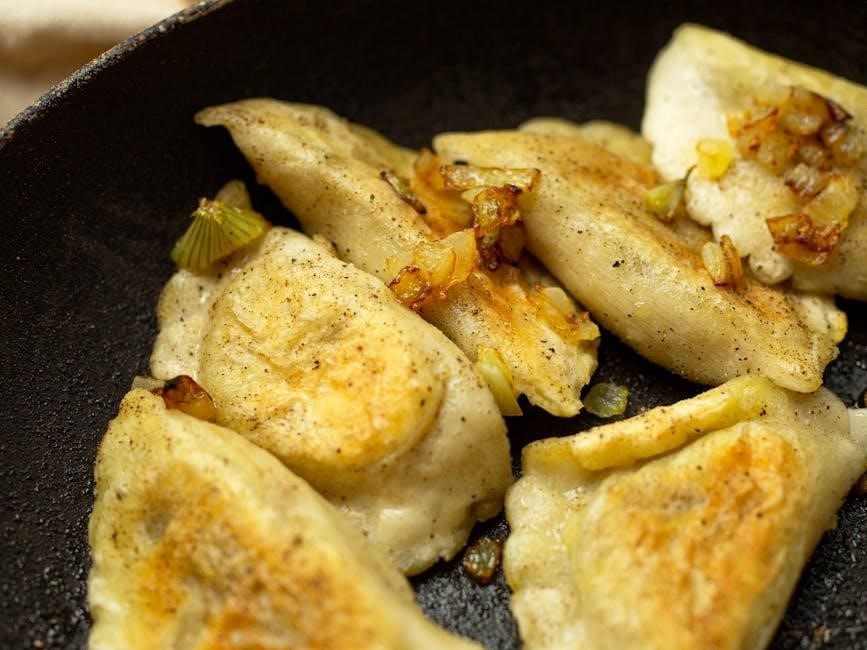
Pan-Frying Pierogi for a Crispy Texture
Pan-frying pierogi adds a golden, crispy exterior while maintaining a soft interior. Heat a skillet over medium with butter or oil, add pierogi in a single layer, and cook until golden brown on both sides, about 3-4 minutes per side. For extra flavor, add diced onions or bacon to the pan. This method enhances the texture and flavor, offering a satisfying crunch that complements traditional fillings like potato and cheese or meat and onions.
Baking Pierogi: A Healthier Alternative
Baking pierogi offers a healthier option with less oil. Preheat the oven to 375°F (190°C). Place pierogi on a parchment-lined baking sheet, lightly brushed with oil. Bake for 15-20 minutes, flipping halfway, until golden. This method preserves flavor while reducing fat, making it ideal for those seeking a lighter version. Serve with toppings like sour cream or herbs for added freshness without the extra calories from frying.
Serving Suggestions
Enhance your pierogi experience with classic toppings like sour cream, caramelized onions, or crispy bacon. Fresh herbs add a bright touch, while experimenting with new combinations sparks creativity.
Classic Toppings: Sour Cream and Caramelized Onions
Sour cream and caramelized onions are timeless favorites for topping pierogi, offering a rich, creamy contrast to the tender dumplings. The tangy creaminess of sour cream balances the savory flavors, while caramelized onions add a sweet, deep undertone. This classic combination enhances the overall texture and flavor, making it a beloved Polish tradition for serving pierogi. It’s a simple yet impactful way to elevate your dish into a comforting, memorable meal.
Adding Bacon or Ham for Extra Flavor
Add a smoky, savory twist by incorporating bacon or ham into your pierogi dish. Crispy bacon bits or diced ham can be sautéed with onions and butter before tossing with cooked pierogi, infusing a hearty, meaty flavor. This addition complements the dumplings’ delicate taste, creating a satisfying and robust meal. Bacon or ham not only adds texture but also enhances the overall aroma, making it a delicious variation for those who enjoy a bit of smokiness in their traditional Polish dish.
Fresh Herbs for a Bright, Refreshing Touch
Fresh herbs like parsley, dill, or chives add a vibrant, refreshing flavor to Kasia’s Pierogi. Sprinkle chopped herbs as a garnish or mix them with sour cream for a lighter topping. They balance the richness of the dumplings, offering a zesty contrast to the savory fillings. Fresh herbs not only enhance the dish’s visual appeal but also provide a burst of fresh flavor, making it a perfect way to brighten your traditional pierogi meal.
Cooking Pierogi from Frozen
Cooking Kasia’s Pierogi directly from frozen is simple. Boil or pan-fry them until they float, ensuring even cooking. No defrosting needed for perfect, flavorful results every time.
Cooking Frozen Pierogi: Step-by-Step Guide
- Bring a large pot of salted water to a boil and gently add frozen pierogi without defrosting.
- Reduce heat to a simmer and cook for 5-7 minutes, or until pierogi float to the surface.
- Remove with a slotted spoon and drain excess water.
- For pan-frying, heat a skillet with butter or oil over medium heat, add pierogi, and cook until golden brown on both sides.
- Serve hot with caramelized onions, sour cream, or bacon bits for added flavor.
Tips for Maintaining Texture and Flavor
- Cook pierogi directly from the freezer without defrosting to preserve their texture.
- Avoid overcrowding the pot to prevent sticking and ensure even cooking.
- Don’t overcook, as this can make pierogi tough; stop when they float.
- For pan-frying, use a medium heat to achieve a golden crust without burning.
- Pat dry excess moisture before pan-frying to enhance crispiness.
Advanced Pierogi Cooking Techniques
Elevate your pierogi game with creative methods like layering flavors in dough, experimenting with unique fillings, and combining cooking techniques for a richer taste experience.
Layering Flavors in the Dough
Enhance your pierogi dough by incorporating fresh herbs like parsley or dill for a bright, refreshing taste. For a richer flavor, substitute a portion of all-purpose flour with whole wheat or buckwheat flour. Adding a splash of olive oil or a pat of melted butter infuses a subtle savory note, while a pinch of garlic powder or onion powder can deepen the aroma. Experiment with grated Parmesan or a sprinkle of caraway seeds for a tangy, aromatic twist that complements the fillings beautifully. This approach creates a more complex and satisfying base for your pierogi.
Experimenting with Different Fillings
Step beyond traditional potato and cheese by exploring a variety of creative fillings. For a savory twist, try mixing ground beef with sautéed onions and a hint of nutmeg. Vegetarian options could include roasted butternut squash blended with sage or caramelized mushrooms with thyme. Sweet fillings like strawberry or blueberry jam offer a delightful dessert pierogi. Adventurous cooks might even experiment with smoked salmon or goat cheese for a modern, sophisticated take on this classic dish, ensuring each batch is uniquely flavorful and memorable.
Combining Cooking Methods for Ultimate Flavor
Achieve the perfect balance of texture and taste by combining boiling and pan-frying. Start by boiling pierogi until they float, ensuring they are cooked through without being too soft. Immediately transfer them to a hot skillet with melted butter and a sprinkle of bacon bits. Sauté until golden brown, creating a crispy exterior while retaining a tender interior. This dual method enhances both flavor and texture, offering a truly satisfying culinary experience with each bite.
Common Mistakes to Avoid
- Overworking the dough can make it tough and dense.
- Overfilling pierogi leads to them breaking during cooking.
- Incorrect water temperatures affect texture and doneness.
Overworking the Dough
Overworking the dough is a common mistake that makes pierogi dense and tough. Mix ingredients just until combined, then knead gently until smooth. Overmixing develops excess gluten, leading to a less tender texture. Stop once the dough comes together in a cohesive ball. Resting the dough for 30 minutes helps relax the gluten, ensuring a soft, pliable texture for rolling out. A light touch ensures perfect, delicate pierogi.
Overfilling the Pierogi
Overfilling the pierogi is a common mistake that can lead to them breaking apart during cooking. Use a small ball of filling, about 1-2 teaspoons, depending on the size of your pierogi. Excess filling can cause the dough to stretch thin, making it prone to tearing. Proper sealing is also compromised with too much filling. Leave enough dough around the edges to crimp or press firmly for a tight seal. This ensures the pierogi stay intact while boiling or pan-frying.
Incorrect Cooking Temperatures
Cooking pierogi at the wrong temperature can lead to undercooked or overcooked dumplings. For boiling, ensure the water is at a gentle boil, not a rolling boil, to prevent pierogi from breaking. For pan-frying, use medium heat to avoid burning the dough before the filling is fully heated through. If the temperature is too low, pierogi may stick to the pan or cook unevenly. Maintain consistent heat for optimal texture and flavor, ensuring a perfectly cooked pierogi every time.
Troubleshooting Pierogi Cooking Issues
If pierogi stick during cooking, dust with flour. For uneven cooking, stir gently. If dough tears, patch with a small piece of extra dough.
Fixing Tough or Sticky Dough
If the dough feels tough or sticky, adjust the consistency by adding a little more flour or water. Knead gently until smooth. Overworking can make it tough, so mix just until combined. If too sticky, dust with flour and knead briefly. For toughness, add a splash of warm water. Letting the dough rest for 30 minutes can improve texture. Ensure ingredients are at room temperature for optimal mixing. Avoid over-flouring during rolling to maintain dough elasticity. A balanced dough is key for perfect pierogi texture. Always knead on a floured surface to prevent sticking.
Preventing Pierogi from Breaking Apart
To prevent pierogi from breaking, ensure the dough is well-rested and evenly rolled. Avoid overfilling, as this can cause seams to split. Seal edges tightly by crimping with a fork or pressing firmly. Gently place pierogi in boiling water to avoid sudden impact. Cook in batches to prevent overcrowding, reducing movement in the pot. Use a slotted spoon to remove them carefully. Proper sealing and gentle handling are key to intact, delicious pierogi. Always cook at a steady simmer, not a rolling boil. Handle with care to maintain their shape and structure.
Adjusting Cooking Time for Perfect Doneness
Cooking pierogi to the right doneness requires attention to timing. Boil fresh pierogi for 5-7 minutes after they float, while frozen ones need 7-9 minutes; Pan-frying requires 3-4 minutes per side until golden brown. Check for a tender texture and slight puffing. Avoid overcooking, as this can make them tough. Adjust time based on size and filling. Use a timer and monitor closely to ensure perfectly cooked pierogi every time, achieving a delicate balance of texture and flavor. Proper doneness ensures a satisfying, authentic experience. Always test one if unsure. Adjustments may be needed for different fillings and methods, ensuring optimal results. This careful approach guarantees the best outcome for your dish.
Storing and Reheating Pierogi
Store pierogi in an airtight container in the fridge for up to 3 days or freeze for up to 3 months. Reheat by boiling or pan-frying until warm and crispy.
Proper Storage Techniques
To maintain freshness, store pierogi in an airtight container in the refrigerator for up to 3 days or freeze for up to 3 months. For freezer storage, place them on a baking sheet lined with parchment paper until frozen solid, then transfer to a sealed container or freezer bag. Avoid rinsing before storing, as excess moisture can cause sticking. Proper storage ensures pierogi remain tender and flavorful for future meals.
Reheating Pierogi Without Losing Flavor
For optimal flavor, reheat pierogi in a skillet with a little butter or oil over medium heat until golden brown. Alternatively, boil them briefly in salted water until they float. For a crispy texture, pan-fry after boiling. Avoid overheating to prevent drying out. Serve with toppings like sour cream, caramelized onions, or bacon bits to enhance the flavor. Proper reheating ensures pierogi retain their tender texture and delicious taste, keeping them fresh and appetizing.

Nutritional Information
Kasia’s Pierogi are a hearty dish, with approximately 200-300 calories per serving. They contain carbs from dough, protein from fillings, and moderate fat, offering B vitamins and minerals.
Calorie and Nutrient Breakdown
Kasia’s Pierogi typically range from 250-350 calories per serving, depending on fillings. They are rich in carbohydrates (40-50g) from the dough, with moderate protein (8-12g) and fat (10-15g). The dish provides essential nutrients like B vitamins from the dough and potassium from potato fillings. Cheese fillings add calcium, while meat options offer iron and zinc. A serving also includes about 3-4g of fiber, supporting digestive health. This balanced mix makes pierogi a satisfying and nutritious meal option.
Healthier Alternatives and Modifications
For a healthier twist, use whole wheat flour in the dough and opt for lean proteins like turkey or chicken in fillings. Reduce cheese content and substitute with low-fat alternatives. Baking pierogi instead of frying cuts calories and fat. Add steamed vegetables or herbs for extra nutrients and flavor. Using egg whites instead of whole eggs in the dough can also lower cholesterol. These modifications maintain taste while offering a more balanced nutritional profile.
Variations and Creative Twists
Kasia’s Pierogi offers a variety of creative twists, from sweet strawberry and blueberry fillings to savory meat and spinach options, blending traditional Polish flavors with modern innovations.
Vegetarian and Vegan Pierogi Options
Kasia’s Pierogi offers delicious vegetarian and vegan options, perfect for plant-based diets. The dough can be adapted by replacing eggs with flax or chia seeds and using plant-based milk. Fillings include sautéed spinach, mushrooms, and vegan cheese, ensuring rich flavors without animal products. For a hearty option, try potato and pea mixtures or lentil-based fillings. These variations maintain the authentic taste while catering to dietary preferences, making them a great choice for both vegetarians and vegans alike.
Modern Fusion Fillings
Modern fusion pierogi fillings offer creative twists on traditional recipes, blending global flavors with Polish heritage. Try unique combinations like kimchi and bulgogi beef for a Korean-inspired taste or spicy shrimp with mango salsa for a tropical twist. For a Mediterranean flair, mix feta, olives, and sun-dried tomatoes. These innovative fillings cater to adventurous eaters while maintaining the comforting essence of pierogi. Experiment with bold flavors to create a truly modern culinary experience that delights the palate and explores global cuisines.
Specialty Pierogi for Different Occasions
Specialty pierogi are perfect for marking celebrations or themed events. For holidays, try cranberry and orange zest pierogi for a festive touch, or chocolate-filled varieties for dessert. Wedding pierogi can be mini-sized with elegant fillings like brie and fig. Themed parties might feature colorful beet or spinach dough for visual appeal. Seasonal fillings, such as pumpkin for fall or strawberry for summer, add a unique twist. These creative options make pierogi a versatile and memorable dish for any special occasion, ensuring a delightful and personalized experience for guests.