
KickAss MPPT Solar Controller Instructions: A Comprehensive Guide
This guide provides detailed instructions for installing‚ configuring‚ and maintaining KickAss MPPT solar controllers‚ ensuring optimal performance and longevity of your solar power system.
KickAss MPPT solar controllers are designed to maximize energy harvest from your solar panels‚ offering superior efficiency compared to traditional PWM controllers. These controllers‚ available in 20A and 40A models‚ cater to diverse system sizes and power requirements.
They intelligently track the maximum power point of your solar array‚ adapting to changing conditions like temperature and sunlight intensity. KickAss prioritizes user-friendliness with clear LCD displays and intuitive settings.
Support resources‚ including comprehensive user manuals and setup guides‚ are readily available on the KickAss Products support portal. These resources ensure a smooth installation and configuration process‚ empowering users to harness the full potential of their solar investment.
Understanding MPPT Technology
Maximum Power Point Tracking (MPPT) is a sophisticated technology that optimizes the energy conversion process in solar charging systems. Unlike PWM controllers‚ MPPT controllers don’t simply connect the solar panel directly to the battery. Instead‚ they actively seek the voltage and current combination that yields the highest power output from the panels.
This is crucial because solar panel output varies with sunlight and temperature. KickAss MPPT controllers continuously adjust to these changes‚ ensuring the battery receives the maximum possible charge. This results in significantly increased energy yields‚ especially in suboptimal conditions‚ and a faster return on investment.
Effectively‚ MPPT ‘steps down’ the higher voltage from the solar panels to a voltage suitable for charging the battery‚ doing so efficiently and minimizing energy loss.
Controller Models: 20A vs. 40A
KickAss offers both 20A and 40A MPPT solar controllers‚ catering to different system sizes and power requirements. The 20A model is ideal for smaller off-grid systems‚ typically supporting up to 260W of solar panels with a 12V battery‚ or 520W with a 24V system. It’s a cost-effective solution for basic setups like sheds‚ cabins‚ or small RVs.
The 40A controller‚ however‚ is designed for larger‚ more demanding applications. It can handle up to 520W of solar input with a 12V battery and 1040W with a 24V system. This makes it suitable for whole-house power‚ larger RVs‚ or systems with significant energy consumption. Choosing the right amperage depends on your total solar panel wattage and battery voltage.
Safety Precautions
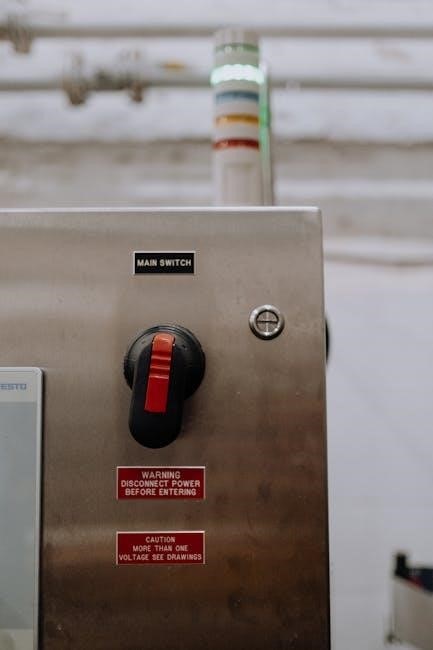
Prioritize safety when installing and operating your KickAss MPPT solar controller. Always disconnect all power sources – solar panels and battery – before making any connections. Never work with electrical components in wet conditions; ensure a dry environment. Use appropriately sized wiring and fuses to prevent overheating and potential fire hazards.
Avoid short-circuiting the solar panels or battery‚ as this can cause severe damage and injury. Wear appropriate personal protective equipment (PPE)‚ including insulated gloves and eye protection. Ensure adequate ventilation around the controller to prevent overheating. Regularly inspect wiring for damage and replace as needed. Improper installation can void the warranty and create dangerous situations.

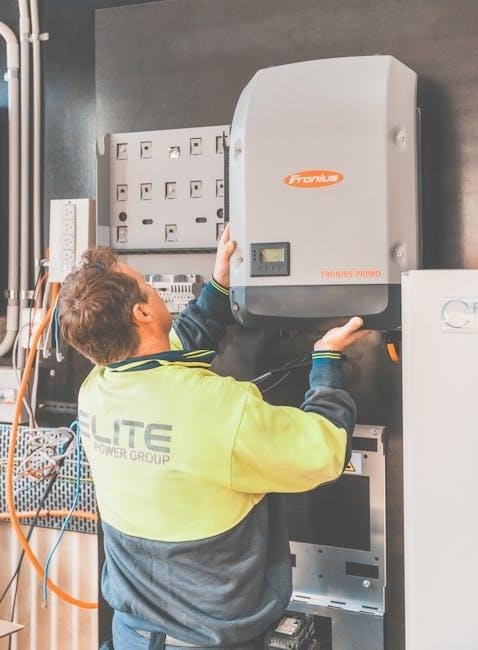
Installation Guide
Proper installation is crucial for optimal performance. This section details wiring diagrams‚ connecting solar panels‚ battery procedures‚ and load connection instructions for your KickAss controller.
Wiring Diagram Overview
Understanding the wiring diagram is fundamental to a successful installation. The KickAss MPPT controller requires careful connection of solar panels‚ batteries‚ and loads. Typically‚ solar panels connect to designated input terminals‚ clearly labeled for positive and negative polarity.
Battery connections are equally critical‚ ensuring correct polarity to avoid damage. Load connections are made to output terminals‚ often with options for direct or timed operation. Refer to the specific diagram for your 20A or 40A model‚ available in the user manual on the KickAss support portal.
Always double-check all connections before powering on the system. Incorrect wiring can lead to controller malfunction or‚ in severe cases‚ safety hazards. The diagrams illustrate wire gauge recommendations based on current carrying capacity.
Connecting Solar Panels
Begin by ensuring the solar panels are disconnected from any load during the connection process. Using appropriately sized wiring‚ connect the positive (+) terminal of the solar panel array to the positive input terminal on the KickAss controller. Similarly‚ connect the negative (-) terminal of the array to the negative input terminal.
Pay close attention to polarity; reversed polarity can damage the controller. For multiple panels in series‚ connect them end-to-end‚ maintaining correct polarity throughout the string. Parallel connections require combining positive wires and negative wires separately.
Consult the controller’s manual for maximum input voltage and current limits. Secure all connections tightly to prevent arcing or disconnections. Verify connections with a multimeter before proceeding to the next step.
Battery Connection Procedures
Before connecting the battery‚ double-check the battery voltage matches the controller’s settings. Connect the positive (+) terminal of the battery to the positive battery terminal on the KickAss controller‚ and the negative (-) to the negative terminal. Crucially‚ ensure the controller is turned OFF during this process to prevent short circuits and potential damage.
Use appropriately sized cables rated for the battery’s current capacity. A fuse or circuit breaker should be installed as close as possible to the battery’s positive terminal for overcurrent protection. Tighten all connections securely to minimize resistance and ensure reliable operation.
After connection‚ verify the battery voltage on the controller’s display. Incorrect voltage readings indicate a wiring error that must be corrected before proceeding.
Load Connection Instructions
Connect your DC loads to the designated load terminals on the KickAss MPPT controller. Observe correct polarity – positive (+) to positive and negative (-) to negative. Ensure the load’s voltage is compatible with the controller’s output voltage settings to avoid damage.
For larger loads‚ utilize appropriately sized wiring and consider incorporating a fuse or circuit breaker near the load for safety. The controller’s load output may have a current limit; do not exceed this limit.
Configure load control parameters within the controller’s settings (see section 3.3) to define when the load is energized or de-energized based on battery voltage levels. Verify proper load operation after connection.

Configuration and Settings
Customize your KickAss controller by setting battery type‚ charging parameters‚ and load control options for optimal performance and tailored system functionality.
Setting Battery Type
Accurately configuring the battery type is crucial for optimal charging and preventing damage. The KickAss MPPT controller supports various battery chemistries‚ including Sealed Lead Acid (SLA)‚ Flooded Lead Acid‚ Gel‚ and Lithium-ion (LiFePO4).
Access the settings menu via the LCD screen and navigate to the ‘Battery Type’ option. Select the appropriate battery type from the available list. Incorrect selection can lead to undercharging or overcharging‚ significantly reducing battery lifespan; Refer to your battery manufacturer’s specifications for recommended charging voltages. The controller automatically adjusts charging parameters based on the selected battery type‚ optimizing performance and ensuring longevity. Double-check your selection before saving the changes.
Adjusting Charging Parameters
Fine-tuning charging parameters maximizes battery performance and lifespan. Key settings include Bulk Voltage‚ Absorption Voltage‚ Float Voltage‚ and Equalization Voltage (for applicable battery types). Access these settings through the controller’s menu system.
Carefully adjust these values based on your battery manufacturer’s recommendations. Higher bulk and absorption voltages facilitate faster charging‚ while appropriate float voltage maintains a full charge without overcharging. Equalization‚ used periodically for flooded lead-acid batteries‚ helps prevent sulfation. Incorrect settings can damage the battery; always consult the battery’s datasheet. Monitor battery voltage during charging to verify proper operation and adjust parameters as needed for optimal results.

Setting Load Control Parameters
Load control parameters dictate how the controller manages power delivery to connected loads. Key settings include Load Voltage Disconnect (LVD) and Load Voltage Reconnect (LVR). LVD defines the battery voltage at which the load is disconnected to prevent deep discharge‚ while LVR sets the voltage at which it’s reconnected.
Adjust these values based on the load’s requirements and battery specifications. Setting appropriate thresholds protects the battery from damage and ensures continuous operation of essential devices. Some controllers offer timer-based load control‚ allowing scheduled on/off cycles. Carefully consider the load’s power consumption and the battery’s capacity when configuring these settings for reliable performance.

Display and Indicators
The LCD screen and LED indicators provide real-time system status‚ including battery voltage‚ charging current‚ and error messages for easy monitoring.
Understanding the LCD Screen
The KickAss MPPT controller’s LCD screen is your primary interface for monitoring system performance. It displays crucial data like battery voltage‚ showcasing the current state of charge and overall health. Charging current is prominently featured‚ indicating the rate at which solar energy is being transferred to the batteries.
You’ll also find information on solar panel voltage and power‚ allowing you to verify optimal panel operation. Load current displays the power being drawn by connected devices. The screen also cycles through historical data and displays any active error codes‚ providing valuable troubleshooting information. Familiarizing yourself with these indicators ensures proactive system management and quick identification of potential issues.
Interpreting LED Indicators
KickAss MPPT controllers utilize LED indicators to provide quick visual status updates. A solid green “Charging” LED signifies normal operation‚ indicating energy transfer from the panels to the battery. A flashing red “Fault” LED signals an error condition‚ requiring immediate attention and troubleshooting – consult the error code section.
The “Battery Full” LED‚ when illuminated‚ confirms the battery bank has reached its designated full charge level. A pulsing amber “Equalization” LED indicates the controller is performing an equalization charge cycle‚ optimizing battery health. Understanding these simple LED cues allows for at-a-glance system monitoring‚ even from a distance‚ ensuring prompt response to any operational anomalies.
Error Codes and Troubleshooting
KickAss controllers display error codes on the LCD screen to pinpoint issues. Code “E1” typically indicates low battery voltage‚ suggesting insufficient solar input or a failing battery. “E2” signals over-voltage protection activation‚ potentially caused by excessive panel voltage – check wiring and panel specifications.
“E3” denotes a short circuit in either the solar panel or battery wiring; inspect connections thoroughly. If “E4” appears‚ it indicates a reverse polarity connection‚ requiring immediate correction to prevent damage. For persistent errors‚ consult the KickAss support portal or contact their technical team‚ providing the specific error code for efficient assistance. Always disconnect power before troubleshooting wiring.

Advanced Features
KickAss controllers offer remote monitoring‚ data logging for performance analysis‚ and firmware updates to enhance functionality and compatibility with evolving solar technologies.
Remote Monitoring Capabilities
KickAss MPPT controllers boast impressive remote monitoring features‚ allowing users to oversee their solar system’s performance from virtually anywhere with an internet connection. This capability utilizes dedicated applications or web-based platforms‚ providing real-time data on crucial parameters like battery voltage‚ charging current‚ and load consumption.
Users can establish alerts and notifications for critical events‚ such as low battery voltage or controller errors‚ ensuring prompt intervention and preventing potential system failures. This proactive approach minimizes downtime and maximizes the efficiency of your solar setup. The remote access also simplifies troubleshooting and allows for efficient system optimization‚ even when physically distant from the installation site.
Data Logging and Analysis
KickAss MPPT controllers excel in data logging‚ meticulously recording historical performance data for in-depth analysis. This stored information encompasses vital metrics like solar panel output‚ battery charge/discharge cycles‚ and load usage patterns over extended periods.
Users can download this data for comprehensive evaluation using compatible software‚ revealing trends and identifying areas for system improvement. Analyzing this historical data allows for optimized charging parameters‚ predictive maintenance scheduling‚ and a deeper understanding of energy consumption habits. This feature is invaluable for maximizing system efficiency‚ extending battery lifespan‚ and ensuring long-term reliability of your solar investment.
Firmware Updates
Maintaining up-to-date firmware is crucial for optimal performance and access to the latest features on your KickAss MPPT controller. KickAss regularly releases firmware updates to enhance functionality‚ improve system stability‚ and address potential bugs.
These updates are typically delivered via a USB connection or‚ in some models‚ wirelessly. The update process is generally straightforward‚ guided by on-screen prompts. Always follow the provided instructions carefully to avoid interrupting the update‚ which could potentially damage the controller. Regularly checking for and installing firmware updates ensures your system benefits from the newest advancements and operates at peak efficiency.

Maintenance and Support
Regular cleaning and inspection are vital for reliable operation. KickAss provides comprehensive warranty details and dedicated support channels for assistance.
Cleaning and Inspection
To ensure optimal performance and longevity of your KickAss MPPT solar controller‚ regular cleaning and inspection are crucial. Dust and debris accumulation can impede airflow‚ leading to overheating and reduced efficiency. Inspect the controller monthly for any signs of corrosion‚ loose connections‚ or damaged wiring.
Use a soft‚ dry cloth to gently wipe down the exterior of the controller. Avoid using water or cleaning solutions‚ as these can damage the internal components. Check the fan (if equipped) to ensure it’s functioning correctly and free from obstructions. Periodically examine the heatsink for dust buildup and carefully remove it with compressed air. A proactive approach to maintenance will help prevent potential issues and maximize the lifespan of your investment.
Warranty Information
KickAss Products offers a warranty on its MPPT solar controllers‚ protecting against defects in materials and workmanship. The standard warranty period is typically 12 months from the date of purchase‚ though this can vary depending on the specific model and region. Proof of purchase is required to validate any warranty claim.
The warranty covers repair or replacement of the faulty unit at KickAss’s discretion. It does not cover damage resulting from misuse‚ improper installation‚ neglect‚ accidents‚ or unauthorized modifications. Claims should be directed to KickAss Support‚ providing detailed information about the issue and the controller’s serial number. Review the full warranty terms on the KickAss Products website for complete details and limitations.
Contacting KickAss Support
For assistance with your KickAss MPPT solar controller‚ several support channels are available. The primary resource is the KickAss Products Support Portal (https://supportportal.kickassproducts.com.au/en-GB)‚ offering a comprehensive knowledge base‚ FAQs‚ and user manuals.
You can submit support requests directly through the portal‚ detailing your issue and providing relevant information like the controller model and serial number. Email support is also available‚ and response times are generally prompt. Check the website for the most current contact email address. For urgent matters or complex technical issues‚ consider contacting KickAss through their official social media channels for quicker assistance.