manual jack

What is a Manual Jack?

A manual jack is a portable, cost-effective tool used to lift vehicles, enabling tire changes or repairs. It operates via leverage and a fulcrum system to raise vehicles safely.

1.1 Types of Manual Jacks

Manual jacks come in various designs tailored for specific needs. The scissor jack is compact and often included with vehicles for basic tire changes. The floor jack is heavier-duty, offering higher lifting capacity and faster operation. Bottle jacks are versatile, with a cylindrical shape and wide range of weight limits. Lastly, hi-lift jacks are rugged, used for off-road vehicles and situations requiring extreme height adjustments. Each type caters to different vehicle sizes, lifting requirements, and user preferences, ensuring there’s a suitable option for every scenario.

1.2 Basic Components of a Manual Jack

A manual jack consists of several key components. The lifting arm is the metal beam that raises the vehicle. The fulcrum provides leverage, enabling the arm to lift heavy loads. A handle is used to pump or crank, applying force. The base ensures stability, while caster wheels on some models enhance mobility. For added safety, many jacks include a locking mechanism to secure the arm at the desired height. These components work together to ensure efficient and safe operation, making manual jacks essential tools for vehicle maintenance and repairs.

How to Use a Manual Jack

Position the jack under the vehicle’s lift point, raise it slowly, and ensure stability. Always use jack stands for added safety during lifting and maintenance.

2.1 Preparing the Vehicle for Jacking

Before using a manual jack, ensure the vehicle is on a level, stable surface and apply the parking brake. Engage the transmission in park (automatic) or first gear (manual) for added safety. Turn off the engine and all electrical systems to prevent accidents. Place wheel chocks around the tires to secure the vehicle and prevent rolling. Gather all necessary tools, such as the jack, jack stands, and spare tire, and position them within easy reach. Always refer to the vehicle’s manual to locate the designated lift points to avoid damaging the car’s frame or undercarriage.

2.2 Step-by-Step Lifting Process

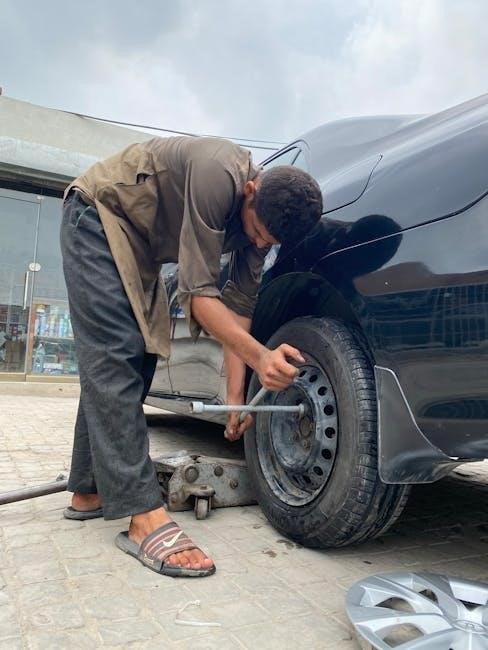
Position the manual jack under the vehicle’s designated lift point, ensuring it is stable and evenly placed. Slowly raise the jack by turning the handle clockwise, applying consistent pressure. Continue lifting until the vehicle reaches the desired height for tire removal or maintenance. If using jack stands, place them near the jack and lower the vehicle onto them for added support. Always ensure the vehicle is stable before proceeding with any work underneath. Avoid sudden movements and maintain control throughout the process to ensure safety and prevent accidents.

2.3 Using Jack Stands for Safety

Jack stands are essential for ensuring safety while working under a vehicle. Always place them on level ground near the jack for added support. Position the stands under the vehicle’s frame or axle, following the manufacturer’s guidelines. After raising the vehicle with the jack, carefully lower it onto the stands. Never rely solely on the jack for support when working underneath, as it can shift or fail. Jack stands provide stability and prevent accidents, offering peace of mind during repairs or maintenance. Always check the stands’ stability before starting work and ensure they are rated for the vehicle’s weight. This step is crucial for personal safety and preventing potential damage to the vehicle or tools.

Safety Guidelines for Manual Jacks

Always use jack stands for added safety when lifting vehicles. Ensure the surface is level and stable. Check the jack’s weight limit before use. Never work under an unsupported vehicle.

3;1 Importance of Jack Stands

Jack stands are essential for ensuring stability and safety when working under a lifted vehicle. They provide a secure support system, preventing the vehicle from falling off the jack. By placing jack stands on firm, level ground, users can create a stable environment for repairs or maintenance. Always choose stands rated for the vehicle’s weight and position them correctly under the chassis. Using jack stands minimizes the risk of accidents, offering peace of mind while working underneath. Never rely solely on a jack—always use stands for optimal safety.

3.2 Weight Limits and Stability

Manual jacks have specific weight limits that must be respected to ensure safe operation. Exceeding the maximum capacity can lead to instability or collapse. Always check the jack’s weight rating and match it to your vehicle’s weight. Stability is critical; place the jack on a firm, level surface to prevent tipping. Uneven ground or soft surfaces can compromise safety. Use jack stands for added stability, especially for extended work. Ensure the vehicle is securely supported before starting any repairs. Ignoring weight limits or stability precautions can result in accidents or damage. Always prioritize safety by adhering to the jack’s specifications and guidelines.

Maintenance and Care

Regularly lubricate moving parts with appropriate fluids like ATF or engine oil. Store the jack in a clean, dry place to prevent rust and ensure longevity.

4.1 Lubricating the Jack

Regular lubrication is essential for maintaining the smooth operation of a manual jack. Use ATF, power steering fluid, compressor oil, or 0W engine oil to lubricate moving parts. Avoid heavy oils, as they can attract dust and cause sticking. Clean the jack thoroughly before applying lubricant to remove dirt and grime. Pay special attention to the pivot points and any gears or screws. Lubricate every few months or when you notice resistance in the mechanism. Proper lubrication ensures the jack remains efficient and reliable for lifting tasks. Always refer to the manufacturer’s recommendations for the best lubricant to use on your specific jack model;

4.2 Storage Tips

Proper storage is crucial to maintain the functionality of a manual jack. Store it in a clean, dry place to prevent rust and corrosion. Avoid exposing it to direct sunlight or moisture. Position the jack upright to ensure oil remains in the reservoir and doesn’t leak. Keep it away from children and pets for safety. If storing for an extended period, apply a light coat of oil to protect metal parts. Regularly inspect the jack for damage or wear before use. Store it in a secure location, such as a toolbox or garage, to prevent accidental damage. Always follow the manufacturer’s storage recommendations for optimal preservation.

Choosing the Right Manual Jack

Choosing the right manual jack involves considering your vehicle’s weight, the lift height needed, and durability. Select a jack with a sturdy build and reliable mechanism always.

5.1 Considering Vehicle Weight

When selecting a manual jack, it is crucial to consider your vehicle’s weight to ensure the jack can handle the load safely and effectively. Most manual jacks are designed for specific weight ranges, typically catering to cars, trucks, or SUVs. Using a jack with a lower weight capacity than your vehicle’s weight can lead to instability or even failure, posing serious safety risks. Always check the manufacturer’s specifications to confirm the jack’s weight limit matches or exceeds your vehicle’s gross weight. This ensures reliable performance and prevents potential accidents during lifting. Choosing the right capacity is essential for both functionality and safety.

5.2 Key Features to Look For

When choosing a manual jack, look for key features that enhance safety, durability, and ease of use. A sturdy, rust-resistant steel construction ensures long-term reliability. Opt for a jack with a wide base for improved stability and a smooth, ergonomic handle for better grip and control. Consider jacks with overload protection to prevent exceeding weight limits. Additional features like a built-in jack stand or a locking mechanism can add extra safety. Portability is also important, so a lightweight design with a carrying handle is ideal. Ensure the jack meets industry safety standards and comes with a warranty for added peace of mind. These features ensure reliable performance and safe operation.

Troubleshooting Common Issues

Common issues with manual jacks include sticking mechanisms, instability, or difficulty lifting. To address these, ensure the jack is clean and well-lubricated. Check for any debris or rust that may interfere with movement. If the jack wobbles, verify the surface is level and sturdy. For models with a slow or stuck lifting mechanism, apply a silicone-based spray or grease to moving parts. If the jack fails to hold weight, inspect for worn seals or damaged components. Always use jack stands for added safety. For persistent problems, consult the user manual or contact a professional. Regular maintenance can prevent many of these issues, ensuring reliable performance and safety.

proportional vs non proportional worksheet pdf

Proportional relationships involve a constant ratio between two variables, forming a straight line graph passing through the origin. Understanding these relationships is fundamental for analyzing real-world applications, such as cost calculations and scientific models.

1.1 Definition and Basics of Proportional Relationships

A proportional relationship is a linear relationship where one quantity is a constant multiple of another. This means that as one variable increases, the other increases at a steady rate. The basic form of a proportional relationship is ( y = kx ), where ( k ) is the constant of proportionality. This relationship is fundamental in mathematics and real-world applications, such as physics and economics. In proportional relationships, the ratio ( rac{y}{x} ) remains constant, and the graph of the relationship is a straight line passing through the origin. Understanding these basics is essential for identifying and working with proportional relationships in various contexts.

1.2 Key Characteristics of Proportional Relationships

Proportional relationships exhibit distinct characteristics that distinguish them from non-proportional ones. A key feature is that the ratio of the two variables remains constant, meaning ( y/x = k ), where ( k ) is the constant of proportionality. Another hallmark is that the graph of a proportional relationship is a straight line that passes through the origin (0,0). Additionally, when one variable is zero, the other must also be zero, as there is no y-intercept. These relationships are directly proportional, meaning as one variable increases, the other increases at a consistent rate. These characteristics simplify modeling and prediction in various real-world scenarios, making proportional relationships a foundational concept in mathematics and science.

1.3 Difference Between Proportional and Non-Proportional Relationships

Proportional relationships are characterized by a constant ratio between two variables, whereas non-proportional relationships lack this consistency. In proportional relationships, the graph is a straight line passing through the origin, and the equation is of the form ( y = kx ), where ( k ) is the constant of proportionality. Non-proportional relationships, however, do not follow this pattern and may have a varying ratio or a different equation form, such as ( y = mx + b ), where ( b
eq 0 ). Understanding this distinction is crucial for accurately identifying and analyzing relationships in tables, graphs, and real-world scenarios, as it directly impacts predictions and modeling.

Identifying Proportional vs Non-Proportional Relationships

Proportional relationships have a constant ratio, while non-proportional relationships vary. Identifying them involves analyzing tables, graphs, and equations, ensuring accurate classification and practical application.

2.1 Analyzing Tables for Proportionality

Proportional tables demonstrate a consistent ratio between two variables, where y divided by x remains constant. To analyze, calculate the ratio for each pair and check for consistency. If the ratio varies, the relationship is non-proportional. For example, if y = 2x, the table will show doubling y for every x, indicating proportionality. Conversely, if y increases irregularly, it is non-proportional. This method helps identify patterns and classify relationships accurately. Such analysis is crucial for understanding real-world applications, like budgeting or scientific data interpretation, where distinguishing proportional from non-proportional relationships is essential for accurate predictions and decision-making;

2.2 Understanding Graphs of Proportional and Non-Proportional Relationships

A proportional relationship is represented by a straight line graph passing through the origin, indicating a constant rate of change. The slope remains consistent, reflecting the constant of proportionality. For example, if y = 3x, the graph will be a straight line with a slope of 3. Non-proportional relationships, however, do not pass through the origin and may have varying slopes. Their graphs can be straight or curved but will not exhibit the same consistent rate of change. Analyzing these visual differences helps in identifying whether a relationship is proportional or not, which is essential for interpreting data accurately in various fields like science, economics, and engineering.

2.3 Using Equations to Determine Proportionality

To determine if a relationship is proportional, examine its equation. Proportional relationships can be expressed as ( y = kx ), where ( k ) is the constant of proportionality. If the equation fits this form, the relationship is proportional. For instance, ( y = 4x ) shows proportionality with a constant of 4. Non-proportional relationships, however, cannot be simplified to this form and often include additional terms, such as ( y = 2x + 3 ). By analyzing the structure of the equation, you can identify whether the relationship is proportional or not, making equations a reliable tool for determining proportionality in various mathematical and real-world scenarios.

Equations and Constants of Proportionality

Proportional relationships are represented by equations of the form ( y = kx ), where ( k ) is the constant of proportionality, defining the ratio between variables.

3.1 Writing Equations for Proportional Relationships

Proportional relationships can be expressed using the equation ( y = kx ), where ( k ) represents the constant of proportionality. To write such an equation, identify the constant ratio between the two variables. For example, if a table shows that ( y ) is always twice ( x ), the equation becomes ( y = 2x ). The constant ( k ) can be determined by dividing ( y ) by ( x ) for any pair of values. This equation form highlights the direct relationship between variables, simplifying predictions and calculations. Understanding how to derive and apply these equations is essential for analyzing proportional data in various contexts, such as finance, physics, and everyday problem-solving.

3.2 Highlighting the Constant of Proportionality

The constant of proportionality, denoted as ( k ), represents the ratio of ( y ) to ( x ) in a proportional relationship. It is calculated by dividing ( y ) by ( x ) for any corresponding pair of values. For example, if ( y = 6 ) when ( x = 2 ), the constant ( k ) is ( 3 ). This constant remains consistent across all data points in a proportional relationship. Identifying ( k ) is crucial as it defines the steepness of the straight line in a graph and simplifies predictions. The constant of proportionality also helps distinguish proportional relationships from non-proportional ones, where ( k ) varies. Understanding ( k ) is essential for solving real-world problems involving direct variation.

3.3 Unit Rate in Proportional Relationships

The unit rate in a proportional relationship represents the ratio of one variable to another when the second variable is one. It is derived from the constant of proportionality (k) and simplifies comparisons. For example, if y = 4x, the unit rate is 4, meaning y increases by 4 for every 1 unit increase in x. This concept is essential for understanding rates like speed or price per unit. The unit rate is often highlighted in equations as the coefficient of x, making it easy to interpret. Identifying the unit rate helps in solving problems involving ratios and proportions efficiently, especially in real-world applications such as budgeting or scaling recipes.

Real-World Applications of Proportional Relationships

Proportional relationships are essential in budgeting, scaling recipes, and engineering, where constant ratios simplify complex calculations and ensure accuracy in real-world scenarios and problem-solving.

4.1 Practical Examples of Proportional Relationships

Proportional relationships are evident in everyday scenarios. For instance, the cost of apples is directly proportional to the number purchased, maintaining a constant price per pound. Similarly, in cooking, ingredients like sugar and flour often follow proportional ratios to ensure recipe consistency. In construction, the amount of water needed for mixing concrete is proportional to the amount of cement used. These real-world examples demonstrate how proportional relationships simplify calculations and ensure accuracy. By identifying such patterns, individuals can apply proportional reasoning to efficiently manage resources and solve practical problems across various fields, from household budgeting to engineering projects.

4.2 Careers Requiring Analysis of Proportional Relationships

Careers in engineering, economics, and data science frequently involve analyzing proportional relationships. Engineers use proportionality to design scalable systems, ensuring structural integrity and efficiency. Economists rely on proportional models to predict market trends and policy impacts. Data scientists identify proportional patterns in datasets to inform business decisions. Additionally, chefs, pharmacists, and educators use proportional reasoning in their daily tasks. For instance, chefs adjust recipes proportionally for different numbers of diners, while pharmacists calculate dosages based on patient weight. Teachers also use proportional concepts to simplify complex ideas for students. Proficiency in proportional relationships is a valuable skill across diverse industries, enabling professionals to solve real-world problems effectively.

Creating Effective Worksheets on Proportional Relationships

Creating effective worksheets involves clear instructions, proportional and non-proportional examples, interactive elements to enhance engagement, and space for students to show their work and reasoning.

5.1 Designing Proportional vs Non-Proportional Tables

When designing worksheets, creating clear proportional and non-proportional tables is essential. For proportional tables, ensure a constant ratio between variables, such as y/x remaining consistent across rows. Non-proportional tables should demonstrate varying ratios, making it easy for students to identify the difference. Use simple, realistic data to illustrate concepts effectively. Include examples where proportional relationships pass through the origin on a graph, while non-proportional ones do not. Provide clear instructions and space for students to analyze and differentiate between the two types of relationships. This helps reinforce understanding and application of proportional and non-proportional relationships in real-world contexts.

5.2 Developing Graph-Based Exercises

Graph-based exercises are an effective way to visually distinguish between proportional and non-proportional relationships. For proportional relationships, ensure graphs are straight lines passing through the origin, reinforcing the constant ratio concept. Non-proportional graphs should exhibit curves or lines that do not pass through the origin, highlighting variability. Provide clear instructions for plotting points and drawing lines. Include examples where students can identify and label proportional and non-proportional relationships. Encourage analysis of slopes and intercepts to deepen understanding. Offer exercises with multiple graphs side-by-side for comparison. Include answer keys or hints to facilitate self-checking and learning. This visual approach helps students grasp the differences intuitively and applies to real-world data analysis.

mike mulligan and his steam shovel pdf

Explore the timeless tale of Mike Mulligan and his loyal steam shovel, Mary Anne, as they face challenges in a rapidly modernizing world. This beloved story, crafted by Virginia Lee Burton, emphasizes perseverance, friendship, and the enduring spirit of tradition. Through vivid illustrations and a captivating narrative, it highlights the importance of adaptability and the emotional bond between man and machine. The book has become a classic in children’s literature, offering universal lessons about hard work and innovation. Its enduring popularity ensures it continues to inspire readers of all ages.

1.1 Overview of the Story

Mike Mulligan and His Steam Shovel tells the story of Mike Mulligan and his trusty steam shovel, Mary Anne, as they face the challenges of modern machinery. Once indispensable, they struggle to find work in a world dominated by newer, faster technology. Determined to prove their worth, they take on a final project: digging the foundation for a new town hall in a small country town. Their journey highlights perseverance, friendship, and the enduring value of hard work.

1.2 Author Background: Virginia Lee Burton

Virginia Lee Burton (1909–1965) was a celebrated author and illustrator of children’s books. Known for her vivid storytelling and intricate illustrations, she wrote seven books, including Mike Mulligan and His Steam Shovel. Burton’s work often personified machines, reflecting her fascination with technology and its impact on society. Her legacy endures as a pioneer in children’s literature, blending art and narrative to captivate young readers.

Plot Summary of “Mike Mulligan and His Steam Shovel”

Mike Mulligan and his steam shovel, Mary Anne, struggle against modern machinery, eventually finding redemption by digging a town hall in a small community.

2.1 Mike Mulligan and His Steam Shovel, Mary Anne

Mike Mulligan and his trusty steam shovel, Mary Anne, share a deep bond, having worked together on countless projects. Mary Anne, a beautiful red steam shovel, symbolizes dedication and perseverance. Together, they face challenges from modern machinery, showcasing their unwavering commitment to their craft and their unbreakable partnership. Their journey highlights the importance of teamwork and loyalty.

2.2 The Challenge of Modern Machinery

Mike Mulligan and Mary Anne face increasing competition from modern machinery, including gasoline, electric, and diesel shovels. These new machines are faster and more efficient, leading to a decline in demand for steam-powered shovels. This challenge forces Mike and Mary Anne to seek opportunities in smaller towns, where their traditional methods might still be valued. Their journey reflects the struggle between old and new technologies.

2.3 The Town Hall Project and Its Climax

Mike Mulligan and Mary Anne find hope in a small town’s town hall project. Determined to prove their worth, they work tirelessly to dig the foundation. Racing against time, they face a climactic moment when their efforts must align perfectly. This pivotal challenge showcases their unwavering resolve and the unbreakable bond between man and machine, highlighting the essence of their partnership.

Themes and Symbols in the Book

Central themes include perseverance, friendship, and adaptability. Mary Anne symbolizes loyalty and tradition, while the struggle with modern machinery reflects the clash between progress and nostalgia, resonating deeply with readers.

3.1 Perseverance and Determination

Mike Mulligan’s unwavering determination to prove Mary Anne’s value despite modern machinery’s rise is a core theme. Facing job losses, they adapt and persevere, showcasing resilience. Their journey to a small town highlights Mike’s resolve to succeed, emphasizing hard work and adaptability. The story inspires readers to embrace challenges with grit and creativity, celebrating the triumph of perseverance over adversity.

3.2 The Struggle Between Tradition and Modernity

The story vividly portrays the clash between old and new, as Mike Mulligan and Mary Anne face competition from modern machinery. Their journey reflects the emotional struggle of letting go of tradition while embracing progress. The tale highlights the bittersweet nature of technological advancement, ultimately showing how adaptability and innovation can lead to success without losing the essence of tradition.

Mike Mulligan and His Steam Shovel PDF Availability

The PDF version of “Mike Mulligan and His Steam Shovel” is widely available online, offering convenient access to Virginia Lee Burton’s cherished tale for readers worldwide.

4.1 Sources for Downloading the PDF

The PDF of “Mike Mulligan and His Steam Shovel” can be found on various online platforms, including educational websites and virtual libraries. Sites like vk.com and others offer free access, while some platforms require purchase. Ensure compliance with copyright laws when downloading, as availability varies by region and platform. Always verify the legality of the source to avoid infringement issues.

4.2 Legal Considerations for eBook Downloads

Downloading “Mike Mulligan and His Steam Shovel” as a PDF requires adherence to copyright laws. Ensure the source is authorized to avoid legal issues. Purchasing from official retailers supports the author and publisher. Some versions may be available in the public domain, depending on your region. Always verify the legality of the download to respect intellectual property rights and avoid potential penalties.

Adaptations and Interpretations

The story has been adapted into stage productions and audiobooks, with activity kits and educational resources available, enhancing its reach and educational impact.

5.1 Stage Productions and Audiobook Versions

The story has been adapted into engaging stage productions, bringing Mike Mulligan and Mary Anne to life through theatrical performances. Audiobook versions, featuring dynamic narration and sound effects, offer an immersive experience for listeners. These adaptations highlight the emotional depth of the tale, making it accessible to new audiences while preserving its timeless charm and educational value for students.

5.2 Educational Resources and Activity Kits

Educational resources and activity kits based on the book enhance learning experiences. These include vocabulary and spelling units, comprehension exercises, and creative projects. Designed for educators, they provide structured activities to engage students. Worksheets and puzzles help reinforce themes like perseverance and friendship, making the story a valuable tool for interactive and meaningful classroom experiences.

Legacy of the Book

Mike Mulligan and His Steam Shovel has left a lasting impact on children’s literature, celebrating perseverance and friendship. Its timeless themes continue to captivate readers.

6.1 Impact on Children’s Literature

Mike Mulligan and His Steam Shovel has become a beloved classic in children’s literature, celebrated for its timeless themes of perseverance and friendship. Virginia Lee Burton’s unique storytelling and vibrant illustrations have captivated young readers, making it a staple in classrooms and homes. The book’s enduring popularity highlights its ability to connect with audiences, inspiring lessons on determination and innovation for generations.

6.2 Cultural Relevance and Timelessness

Mike Mulligan and His Steam Shovel remains culturally relevant, resonating with themes of tradition versus modernity. Its universal lessons on adaptability and perseverance transcend time, appealing to diverse audiences. Virginia Lee Burton’s story continues to charm readers, highlighting the emotional bond between Mike and Mary Anne, making it a timeless tale cherished across generations and cultures alike.

Characters in “Mike Mulligan and His Steam Shovel”

Mike Mulligan, a determined steam shovel operator, and his loyal companion Mary Anne, embody the story’s heart. Their partnership exemplifies perseverance and the human-machine bond.

7.1 Mike Mulligan: The Protagonist

Mike Mulligan, the story’s central character, is a dedicated and skilled steam shovel operator; His unwavering determination and loyalty to his steam shovel, Mary Anne, define his character. Together, they face challenges from modern machinery, showcasing Mike’s resourcefulness and deep commitment to proving Mary Anne’s value. His journey highlights themes of perseverance and the human-machine bond.

7.2 Mary Anne: The Steam Shovel

Mary Anne, Mike Mulligan’s trusty steam shovel, is more than just a machine; she is a loyal companion and a symbol of tradition and hard work. With her bright red color and steadfast reliability, Mary Anne embodies the spirit of dedication and perseverance. Her partnership with Mike highlights the emotional bond between operator and machine, showcasing her as a character in her own right.

Vocabulary and Spelling Units Based on the Book

Vocabulary and spelling units based on Mike Mulligan and His Steam Shovel enhance learning, with activities like word lists and worksheets to improve language skills and comprehension.

8.1 Educational Value for Students

The book enhances reading skills and introduces students to themes of perseverance and adaptability. Vocabulary and spelling units based on the story help students develop language skills. Activities like word searches and comprehension exercises engage learners. The narrative also exposes students to historical industrial concepts, fostering curiosity and critical thinking. These educational resources align with curriculum goals, making the book a valuable tool for interactive learning experiences.

8.2 Sample Worksheets and Activities

Engage students with vocabulary exercises, comprehension questions, and creative projects inspired by the story. Worksheets include word searches, puzzles, and drawing activities featuring Mike Mulligan and Mary Anne. These resources, available in PDF format, encourage interactive learning and reinforce key themes. Teachers can also use discussion guides to explore the story’s lessons on perseverance and innovation, fostering deeper understanding and critical thinking skills.

Reviews and Reception

Critics and readers alike have praised “Mike Mulligan and His Steam Shovel” for its timeless charm and universal lessons. The story has been celebrated for its ability to connect with audiences of all ages, making it a cherished classic in children’s literature. Its educational value and heartfelt narrative continue to resonate deeply.

9.1 Critical Acclaim and Reader Feedback

Mike Mulligan and His Steam Shovel has garnered widespread critical acclaim for its heartfelt narrative and timeless themes. Readers praise its ability to evoke emotions, highlighting the bond between Mike and Mary Anne. The story’s universal lessons about perseverance and adaptability resonate deeply, making it a cherished classic in children’s literature. Its enduring popularity is a testament to its emotional depth and relatability.

9.2 Comparisons with Other Classic Tales

Mike Mulligan and His Steam Shovel is often compared to The Little Engine That Could and The Giving Tree for its timeless themes of perseverance and friendship. Like The Very Hungry Caterpillar, it uses simple yet profound storytelling to convey life lessons. The emotional depth and universal appeal of Burton’s work place it alongside other beloved classics in children’s literature, ensuring its lasting relevance.

The Story’s Message for Modern Readers

Mike Mulligan and His Steam Shovel reminds us of the importance of perseverance and friendship in the face of change. It highlights the value of tradition, adaptability, and innovation, offering timeless lessons for modern readers about embracing progress while honoring the past.

10.1 Lessons About Hard Work and Innovation

Mike Mulligan and His Steam Shovel teaches the value of hard work and innovation. Mike’s determination to succeed, even as newer machines replace traditional ones, shows resilience. The story highlights how creativity and perseverance can overcome challenges, emphasizing that innovation doesn’t mean discarding the past but adapting it to meet new demands, inspiring readers to embrace change while honoring tradition.

10.2 Environmental and Technological Insights

The story subtly explores the environmental impact of outdated machinery and the rise of modern technology. As Mike Mulligan and Mary Anne face competition from gasoline, electric, and diesel shovels, the narrative highlights the tension between tradition and progress. It reflects on how technological advancements, while efficient, can sometimes overshadow the value of older, reliable methods, offering a nuanced view of industrial evolution and its consequences.

Mike Mulligan and His Steam Shovel remains a timeless tale, offering universal lessons on perseverance, friendship, and adaptability. Its enduring appeal continues to captivate readers of all ages.

11.1 Final Thoughts on the Book’s Significance

Mike Mulligan and His Steam Shovel is a profound exploration of tradition vs. modernity, highlighting the emotional bond between Mike and Mary Anne. Its themes of perseverance and innovation resonate deeply, making it a cherished classic in children’s literature. The story’s timeless appeal lies in its ability to connect with readers emotionally and intellectually, offering lessons relevant across generations.

11.2 Recommendations for Further Reading

For readers who enjoyed Mike Mulligan and His Steam Shovel, consider exploring other classics by Virginia Lee Burton, such as The Little House. Additional recommendations include The Grouchy Ladybug by Eric Carle and The Very Hungry Caterpillar. These stories share similar themes of perseverance and growth, offering engaging experiences for both children and adults. Activity kits and educational resources tied to the book are also available for deeper exploration.

chamberlain liftmaster manual

Welcome to the Chamberlain LiftMaster manual, your comprehensive guide to understanding and maintaining your garage door opener. This manual covers safety, installation, programming, troubleshooting, and maintenance to ensure optimal performance and longevity of your device.

1.1 Overview of Chamberlain LiftMaster Garage Door Openers

Chamberlain LiftMaster garage door openers are renowned for their reliability, durability, and advanced features. Offering a range of models, including belt-drive, chain-drive, and wall-mount systems, they cater to diverse needs. These openers feature quiet operation, robust construction, and cutting-edge technology like myQ smart home integration. Designed for both residential and commercial use, they ensure seamless and secure garage door operation. With energy-efficient designs and long-lasting performance, LiftMaster openers are a trusted choice for homeowners seeking convenience and safety. Their innovative solutions enhance garage accessibility and security.

1.2 Importance of Reading the Manual

Reading the Chamberlain LiftMaster manual is essential for safe and proper installation, operation, and maintenance of your garage door opener. It provides critical safety precautions, step-by-step instructions, and troubleshooting tips to ensure optimal performance. Failure to follow the manual can lead to accidents, void warranties, or cause malfunctions. The manual also helps users understand advanced features, such as myQ technology, and how to program remote controls or keyless entry systems. By following the guidelines, you can extend the lifespan of your opener and ensure reliable operation for years to come.

Safety Guidelines and Precautions

Ensure proper installation, align safety sensors correctly, and avoid hazards. Regular maintenance and adherence to guidelines prevent accidents and ensure reliable operation of your LiftMaster opener.

2.1 Safety Reversing Sensors: Installation and Adjustment

The safety reversing sensors are critical for preventing accidents. Mount them 6 inches above the floor, aligned and facing each other. Ensure no obstructions block their path. Adjust the sensors for proper alignment and test the door’s reversal feature after installation. Refer to the manual for specific model adjustments, such as the 84335EML or 94333E models. Always test the sensors after any adjustments to ensure proper function and safety compliance. This step is essential for reliable and safe garage door operation.

2.2 General Safety Precautions for Installation and Operation

Always disconnect power before servicing your LiftMaster opener. Ensure the garage area is clear of obstacles and tripping hazards. Follow the manufacturer’s instructions precisely to avoid accidents. Never install or operate the opener in hazardous environments. Regularly inspect and test safety features, such as reversing sensors, to ensure proper function. If unsure about any step, consult a professional. Keep the manual accessible for future reference and pass it on to subsequent owners. Safety is paramount to prevent injuries and ensure reliable operation.

Installation Instructions

Follow the step-by-step guide in the manual for proper assembly and installation. Ensure all components are aligned and securely mounted. Refer to safety guidelines for precautions.

3.1 Step-by-Step Assembly Guide for LiftMaster Openers

This section provides detailed instructions for assembling your LiftMaster opener, including unpacking components, attaching rails, and connecting motor units. Follow each step carefully to ensure proper alignment and functionality. Begin by assembling the rail segments and attaching the motor carriage. Secure all bolts tightly and refer to the provided diagrams for visual guidance. Proper assembly is crucial for safe and efficient operation. Always wear safety gloves and ensure the work area is clear of obstacles during assembly.

3.2 Detailed Installation Process for Chamberlain Models

Installing a Chamberlain LiftMaster garage door opener requires careful preparation and adherence to safety guidelines. Begin by unpacking all components and ensuring the garage door is balanced. Attach the rail segments to the motor unit and secure them with bolts. Mount the opener to the ceiling, ensuring proper alignment with the door. Connect the emergency release handle and test the door’s operation. Refer to the diagrams provided for precise measurements and connections. Always wear safety gloves and ensure the area is clear of obstacles during installation. Proper alignment is crucial for smooth operation.

Programming Your LiftMaster Remote Control

Programming your LiftMaster remote involves syncing it with the opener. Press the learn button, then test the remote to ensure proper connection and operation.

4.1 Programming the 375UT Universal Remote Control

To program the 375UT remote, locate the learn button on your LiftMaster opener. Press and hold it until the LED lights up. Then, press the remote button you wish to program. Test the remote to ensure it controls the door. Repeat for additional buttons if needed. Ensure compatibility with your specific LiftMaster model. Refer to the manual for detailed steps and troubleshooting tips to ensure proper synchronization.

4.2 Setting Up Wireless Keyless Entry Systems

Setting up the wireless keyless entry system enhances convenience and security for your garage door. Mount the keypad securely outside the garage, ensuring clear visibility. Enter your PIN and test the system to confirm proper operation. Refer to your LiftMaster model’s compatibility to ensure seamless integration. Follow the manual’s step-by-step guide for syncing the keypad with your opener. This feature allows easy access without a remote, perfect for homeowners seeking modern and reliable solutions.

Troubleshooting Common Issues

Troubleshoot common issues by checking sensors, power sources, and remote functionality. Ensure proper alignment and test door operation. Refer to the manual for detailed solutions.

5.1 Diagnosing Issues with Remote Controls

Diagnosing remote control issues begins with checking battery strength and ensuring proper alignment with the opener. Verify programming by consulting the manual or testing the remote from various distances. Weak signals or interference from nearby devices can disrupt functionality. Replace batteries if they are dead or weak. If issues persist, re-sync the remote with the opener by following the manual’s reset procedure. For advanced troubleshooting, consult the Chamberlain LiftMaster manual or contact customer support for further assistance to resolve connectivity or signal problems effectively.

5.2 Fixing Common Problems with Garage Door Operation

Common issues with garage door operation often stem from misaligned safety sensors or obstructed paths. Ensure sensors are clean, properly aligned, and free from blockages. If the door reverses unexpectedly, check for obstructions and adjust sensor sensitivity. For power-related issues, verify the opener is plugged in and circuit breakers are functioning. If the door doesn’t respond, try resetting the system by disconnecting and reconnecting power. For persistent problems, consult the Chamberlain LiftMaster manual or contact customer support for specialized assistance to restore smooth operation.

Maintenance and Upkeep

Regular maintenance ensures your Chamberlain LiftMaster opener operates efficiently. Clean sensors, lubricate moving parts, and inspect chains or belts for wear. Replace worn components promptly.

6.1 Routine Maintenance Checks for Optimal Performance

Perform regular checks to ensure your Chamberlain LiftMaster opener runs smoothly. Clean the safety sensors and tracks, and lubricate moving parts like rollers and hinges. Inspect chains or belts for wear and tighten loose screws. Check the garage door balance and spring tension, as an unbalanced door can strain the opener. Test the emergency release handle and ensure proper alignment of the door and opener. Replace worn parts promptly to prevent operational issues. Schedule annual professional inspections for advanced diagnostics and adjustments.

6.2 Replacing Wearable Parts: Belts, Chains, and Rollers

Regularly inspect belts, chains, and rollers for wear, such as cracks, fraying, or excessive noise. Replace belts if they show signs of stretching or damage, and chains if links are loose or rusted. Rollers should be replaced if they no longer glide smoothly or show visible wear. To replace these parts, disconnect power, remove the old component, and install the new one securely. Lubricate moving parts to maintain smooth operation. Always refer to your Chamberlain LiftMaster manual for specific replacement instructions and compatibility.

Warranty and Support Information

Chamberlain LiftMaster products come with a limited warranty covering parts and labor. Models like 8360 and 3265 are included. For support, visit www.liftmaster.eu or call 49 (0) 6838 907 172.

7.1 Understanding the LiftMaster Warranty Terms

The LiftMaster warranty offers a one-year limited coverage for parts and labor, ensuring protection against defects in materials and workmanship. Models like the 8360 and 3265 are included. Registration is required to activate the warranty. Damage from misuse or improper installation may void coverage. For warranty claims, contact Chamberlain’s customer support at 49 (0) 6838 907 172 or visit www.liftmaster.eu. This ensures your investment remains secure and functional, with dedicated support available for any issues.

7.2 Contacting Chamberlain Customer Support

For assistance, contact Chamberlain customer support at 49 (0) 6838 907 172 or visit www.liftmaster.eu. Their team is available to address queries, provide troubleshooting guidance, and help with warranty claims. Additionally, extensive resources, including manuals, FAQs, and repair guides, are accessible online. For technical issues, ensure to have your model number ready. Support is available in multiple languages, catering to diverse user needs. Chamberlain’s dedicated team ensures prompt resolution, maintaining your garage door opener’s efficiency and longevity. Reach out for expert assistance whenever needed.

Compatibility and Accessories

Explore compatible models and accessories for LiftMaster openers, including remotes, keyless entry systems, and myQ technology, to enhance functionality and convenience for your garage door system.

8.1 Compatible Models and Accessories Overview

LiftMaster openers are compatible with a wide range of models, including 375UT, 940EV, and 3265-267, ensuring seamless integration with various garage door systems. Accessories like wireless keyless entry, remotes, and myQ technology enhance functionality. These devices are designed to work with Chamberlain and LiftMaster models, offering convenience and security. Compatibility extends to multiple brands, making it easy to upgrade or replace existing systems. Accessories are available for specific models, providing tailored solutions for unique needs. Explore the full range to find the perfect fit for your garage door opener, ensuring optimal performance and enhanced features.

8.2 Using myQ Technology with LiftMaster Openers

myQ technology integrates seamlessly with LiftMaster openers, enabling smartphone control and monitoring of your garage door. By linking your opener to the myQ app, you can receive real-time notifications and operate your door remotely. This feature enhances security and convenience, allowing you to grant access to guests or monitor activity from anywhere.Compatible with select LiftMaster models, myQ ensures a smarter and more connected garage experience, offering peace of mind and modern functionality. Upgrade your garage with this innovative solution for enhanced control and accessibility.

yealink t53w manual

The Yealink T53W is an advanced SIP phone designed for seamless communication, offering HD audio, Wi-Fi, and Bluetooth connectivity. Its intuitive interface and touchscreen display enhance productivity, making it ideal for modern business environments.

Overview of the Yealink T53W Phone

The Yealink T53W is an advanced SIP phone designed for efficient business communication. It features an adjustable 3.7-inch graphical LCD display, HD audio, and support for Wi-Fi and Bluetooth connectivity. This phone is ideal for professionals seeking a user-friendly device with enhanced productivity features. Its sleek design and intuitive interface make it suitable for various work environments, ensuring seamless integration into modern office setups.

Key Features and Benefits

The Yealink T53W offers HD audio quality, ensuring crystal-clear voice calls. It supports Wi-Fi and Bluetooth connectivity, enabling flexible communication. The phone features 8 programmable line keys, allowing customization for speed dialing or feature access. Its intuitive interface and ergonomic design enhance user comfort. Additionally, the T53W supports advanced call management features like call forwarding, transfer, and three-way conferencing, making it a versatile tool for modern business needs.

Technical Specifications of the Yealink T53W

The Yealink T53W features a 3.7-inch graphical LCD, supports Wi-Fi and Bluetooth connectivity, and includes USB ports for headset compatibility, ensuring robust performance in business environments.

Display and Hardware Features

The Yealink T53W features a high-resolution 3.7-inch graphical LCD display, offering a clear and vibrant interface. The phone includes an adjustable screen angle for optimal viewing comfort. Hardware highlights include a built-in USB port for easy headset connectivity, a robust keypad with navigation keys, and a dedicated headset jack. The intuitive design ensures seamless navigation and operation, making it user-friendly for all levels of expertise. Its compact form factor and durable construction ensure long-lasting performance in busy work environments.

Connectivity Options (Wi-Fi, Bluetooth, etc.)

The Yealink T53W supports dual-band Wi-Fi for reliable wireless connectivity and Bluetooth for pairing with headsets or other devices. It also features a USB port for wired headset connections. These options ensure flexible communication in various environments, allowing users to stay connected seamlessly. The phone’s advanced connectivity capabilities make it ideal for both desk and mobile workers, enhancing productivity and convenience in modern workplaces.

Installation and Setup Guide

The Yealink T53W setup involves connecting to power, network, and completing initial configuration. Follow the quick start guide for seamless installation and provisioning.

Unboxing and Physical Installation

When unboxing the Yealink T53W, you’ll find the phone, stand, power cable, Ethernet cable, and quick start guide. Place the phone on a flat surface and attach the stand if needed. Connect the power cable to the phone and a nearby outlet. Attach the Ethernet cable to the phone and your network. Ensure all cables are securely connected for proper functionality. Once physically installed, the phone is ready for network connection and initial setup. Follow the quick start guide for step-by-step instructions.

Connecting to a Network

To connect the Yealink T53W to your network, start by using the Ethernet cable for a wired connection. Plug one end into the phone’s Ethernet port and the other into your router. For wireless setup, go to the phone’s menu, select Settings, then Network Settings, and choose your Wi-Fi network. Enter the password when prompted. Ensure Bluetooth is enabled if using wireless headsets. The phone will automatically connect to the network, allowing you to make calls and access features. Refer to the manual for detailed guidance.

Initial Configuration and Provisioning

After connecting the Yealink T53W to your network, access the web interface by entering the phone’s IP address in a browser. Navigate to Settings > Provisioning. Enter the provisioning server URL or download the configuration file. Save and apply the settings to complete the initial setup. The phone will automatically update and provision, ensuring all features are enabled. Refer to the manual for detailed instructions or contact your IT administrator for assistance with custom configurations.

Advanced Features of the Yealink T53W

The Yealink T53W offers advanced call management features like call forwarding, voicemail, and three-way conferencing. Its intuitive interface supports efficient communication and enhances collaboration in professional settings.

Call Forwarding and Transfer Options

The Yealink T53W offers robust call forwarding and transfer features, enabling efficient call management. Users can forward calls to another extension or external number based on specific conditions like “Always,” “Busy,” or “No Answer.” The phone supports both blind transfers, where the call is sent directly to the destination without announcement, and consulted transfers, allowing the user to confirm the transfer with the recipient before completing it. These options streamline communication workflows and enhance productivity in dynamic business environments.

Voicemail and Call History Management

The Yealink T53W simplifies voicemail and call history management, ensuring efficient communication. Users can easily access voicemail messages directly from the phone’s interface or via the dedicated voicemail key. The call history feature allows viewing missed, dialed, and received calls, with options to redial or save numbers to contacts. Additionally, calls can be parked and retrieved from any phone, enhancing collaboration. These features streamline message and call tracking, making it easier to stay connected and manage interactions effectively.

Three-Way Conference Calling

The Yealink T53W supports three-way conference calling, enabling seamless collaboration. During an active call, users can add a third participant by pressing the Conference soft key. The phone intuitively guides through the process, allowing easy management of participants. This feature is ideal for team discussions or client meetings, ensuring efficient communication without the need for external tools. The T53W’s advanced audio technology ensures clear sound quality for all participants, making it a reliable solution for multi-party conversations in dynamic business environments.

Customization and Personalization

The Yealink T53W allows users to personalize their experience with customizable wallpapers, ringtones, and soft keys, ensuring a tailored interface that enhances efficiency and user satisfaction.

Setting Up Speed Dial Keys

Setting up speed dial keys on the Yealink T53W streamlines communication by allowing quick access to frequently called numbers. Users can assign unused line keys to specific contacts or extensions. To configure, press and hold an unused line key, select a contact from the directory, and save the setting. This feature enhances productivity by reducing dialing time and simplifying everyday operations, ensuring efficient call management and user convenience.

Customizing Wallpapers and Ringtones

Customizing wallpapers and ringtones on the Yealink T53W enhances personalization, allowing users to tailor the phone to their preferences. Wallpapers can be uploaded via the web interface or manually, while ringtones can be selected from pre-installed options or custom files. This feature ensures a more engaging and personalized user experience, making the phone uniquely suited to individual or professional environments.

Configuring Soft Keys for Efficiency

Configuring soft keys on the Yealink T53W enhances productivity by allowing users to customize shortcuts for frequently used features. Soft keys can be programmed to perform actions like call forwarding, speed dial, or accessing directories. This customization streamlines workflows, reducing the need for manual navigation. Users can easily assign functions to specific keys through the phone’s intuitive interface or the web-based management portal, ensuring quick access to essential tools during calls or daily tasks.

Troubleshooting Common Issues

Troubleshooting the Yealink T53W involves resolving connectivity, audio, and firmware issues. Resetting the device, updating firmware, or checking network settings often resolves common problems. Consult the manual for detailed solutions.

Resolving Connectivity Problems

Connectivity issues with the Yealink T53W can often be resolved by checking network settings, ensuring stable Wi-Fi or Ethernet connections, and restarting the device. If problems persist, verify Bluetooth or Wi-Fi signal strength, reset network configurations, or update firmware. For detailed troubleshooting steps, refer to the official Yealink T53W manual, which provides comprehensive guides to diagnose and fix connectivity-related problems effectively.

Addressing Audio and Call Quality Issues

For the Yealink T53W, poor call quality can often be resolved by adjusting settings like noise reduction or echo cancellation. Ensure the handset, speakerphone, or headset is functioning properly. Check network stability and avoid interference sources. Restarting the phone or updating firmware may also improve audio performance. Refer to the Yealink T53W manual for detailed troubleshooting guides to optimize call clarity and resolve audio-related problems effectively.

User Manual and Additional Resources

The official Yealink T53W manual provides comprehensive guides for setup, features, and troubleshooting. Additional resources include online support, FAQs, and video tutorials for optimal usage.

Downloading and Navigating the Official Manual

To access the Yealink T53W manual, visit the official Yealink website. Navigate to the support section, select your model, and download the PDF manual. The manual covers installation, configuration, and troubleshooting. Use bookmarks for quick navigation or search specific features using keywords. Ensure you have the latest version for accurate information. The guide is structured logically, starting with basic setup and progressing to advanced features, making it easy to follow for both new and experienced users.

Accessing Online Support and FAQs

For comprehensive support, visit the official Yealink website. Navigate to the support section, where you’ll find detailed FAQs, troubleshooting guides, and downloadable resources. Use the search function to quickly locate specific topics or filter by product model. The website also offers user manuals, quick start guides, and firmware updates. Additionally, Yealink provides online forums and customer service options for further assistance. These resources ensure easy access to solutions and updates for optimal use of your Yealink T53W phone.

manual nikon d810

The Nikon D810 is a high-performance DSLR renowned for exceptional image quality and versatility. Its comprehensive manual guides users through advanced features, ensuring optimal photography experiences.

1.1 Overview of the Nikon D810

The Nikon D810 is a high-resolution DSLR camera featuring a 36.3MP FX-format sensor, no optical low-pass filter, and ISO 64-12800. It supports full HD video and includes built-in interval shooting. The camera is versatile for landscape, portrait, and action photography. The comprehensive manual guides users through advanced features, ensuring optimal performance across various shooting scenarios and settings.

1.2 Importance of the User Manual

The Nikon D810 user manual is essential for unlocking the camera’s full potential. It provides detailed explanations of features, settings, and troubleshooting tips, ensuring users understand advanced functions. The manual also guides users through customizing settings and optimizing image quality. Available online and via the Nikon Manual Viewer 2 app, it serves as a comprehensive resource for mastering the D810’s capabilities effectively.

Key Features of the Nikon D810

The Nikon D810 features a high-resolution 36.3MP sensor, delivering exceptional image quality. It supports full HD video with manual controls and advanced autofocus for precise photography.

2.1 Sensor and Image Quality

The Nikon D810 is equipped with a 36.3-megapixel full-frame CMOS sensor, ensuring extraordinary image detail and dynamic range. It captures images with minimal noise, even in low-light conditions. The absence of an optical low-pass filter enhances sharpness, making it ideal for landscape, portrait, and fine-art photography. This sensor delivers superior performance across various lighting scenarios.

2.2 Video Recording Capabilities

The Nikon D810 offers advanced video features, including full HD 1080p recording at 60/50/30/25/24p. It supports manual exposure control, allowing precise adjustments for professional results. Additionally, the camera features zebra stripes for overexposure monitoring and a flat picture profile for enhanced color grading flexibility. These capabilities make it a versatile tool for both photographers and videographers seeking high-quality video output.

2.3 Autofocus and Metering Systems

The Nikon D810 features a 51-point autofocus system, including 15 cross-type sensors, ensuring precise focus acquisition even in challenging lighting conditions. The advanced metering system utilizes a 91,000-pixel RGB sensor for accurate exposure control, enhancing both still and video capture. These systems work seamlessly together, providing versatile performance for photographers in various shooting scenarios, from portraits to dynamic action shots.

Getting Started with the Nikon D810

Unbox and set up your Nikon D810, ensuring all accessories are included. Charge the battery and insert memory cards to begin exploring its advanced features and controls.

3.1 Unboxing and Initial Setup

Unboxing the Nikon D810 reveals the camera body, battery, charger, strap, USB cable, and a detailed user manual. Initial setup involves installing the battery, inserting memory cards, and familiarizing yourself with the camera’s layout. The manual provides step-by-step guidance to ensure a smooth start, helping you understand each component and prepare for first use effectively.

3.2 Charging the Battery and Inserting Memory Cards

Charge the Nikon D810’s battery using the provided EH-5b charger until the indicator turns green. Insert the battery into the camera, ensuring it clicks securely into place. Next, open the memory card slot on the side and insert compatible SD, SDHC, or SDXC cards. The manual recommends formatting cards in the camera for optimal performance and reliability during use.

3.4 Basic Camera Controls and Layout

The Nikon D810 features an intuitive control layout, with the mode dial on top for selecting shooting modes. The multi-selector on the rear enables menu navigation and focus point selection. Key buttons like Fn and ISO simplify quick adjustments. The camera’s ergonomic design ensures comfortable handling, with controls strategically placed for efficient operation during photography sessions, enhancing overall usability and creativity.

Shooting Modes and Settings

The Nikon D810 offers versatile shooting modes, including Manual, Aperture Priority, and Shutter Priority, providing photographers with precise control over exposure settings for diverse shooting scenarios.

4.1 Understanding the Mode Dial

The Nikon D810’s mode dial offers intuitive access to various shooting modes, including Auto, P, A/Av, M, and Scene modes. This feature allows photographers to quickly switch between settings, ensuring optimal results in different lighting conditions and creative scenarios. The manual provides detailed guidance on utilizing each mode effectively for professional outcomes. Proper use enhances workflow and image quality significantly.

4.2 Customizing Settings for Different Genres

The Nikon D810 allows precise customization for various photography genres, such as landscape, portrait, wildlife, and macro. Users can adjust white balance, autofocus modes, and ISO settings to suit specific needs. The manual provides tips for optimizing camera configurations, ensuring tailored results. This flexibility enables photographers to achieve professional-grade images across diverse shooting scenarios effortlessly.

Advanced Customization Options

The Nikon D810 offers extensive customization options, including custom shooting modes and advanced autofocus settings, allowing photographers to tailor the camera to their specific needs effectively.

5.1 Configuring Custom Shooting Modes

Configuring custom shooting modes on the Nikon D810 allows photographers to save personalized settings for quick access. Users can store preferences like aperture, shutter speed, and ISO in dedicated modes (U1, U2, U3), making it easy to switch between setups for different genres such as portrait, landscape, or wildlife photography efficiently.

5.2 Adjusting Autofocus and Exposure Settings

The Nikon D810 allows users to fine-tune autofocus and exposure settings for precise control. Adjustments include AF mode selection, focus tracking, and customizing exposure compensation. These tweaks enhance accuracy, ensuring sharp focus and balanced lighting, tailored to diverse shooting scenarios, from dynamic action to intricate still-life compositions, for professional-grade results consistently. Customization options empower photographers to adapt settings to their creative vision seamlessly.

Image Quality and Processing

The Nikon D810 delivers exceptional image quality with precise control over RAW and JPEG formats. Advanced processing options enable users to optimize settings for professional-grade results effortlessly.

6.1 Understanding File Formats (JPEG, RAW, etc.)

The Nikon D810 offers versatile file formats, including JPEG for immediate sharing and RAW for detailed post-processing. RAW files capture extensive image data, enabling superior flexibility in editing, while JPEGs provide compressed, ready-to-use files. Understanding these formats is crucial for optimizing workflow and achieving desired results in photography.

6.2 Optimizing Image Settings for Professional Results

For professional results, the Nikon D810 allows precise customization of image settings. Adjusting white balance, ISO, and picture controls ensures accurate color representation. Utilizing RAW files provides maximum flexibility in post-processing, enabling detailed adjustments to exposure, contrast, and sharpness. Fine-tuning these settings enhances image quality, delivering sharp, vibrant, and professional-grade photographs tailored to specific creative visions and genres.

Video Recording and Features

The Nikon D810 excels in video recording, offering full manual control and high-quality output. Features like adjustable ISO, shutter speed, and aperture ensure precise cinematic results.

7.1 Full Manual Control for Video

The Nikon D810 offers full manual control during video recording, allowing precise adjustments to ISO, shutter speed, and aperture. This feature enables filmmakers to achieve their desired aesthetic by tailoring settings to specific scenes. Manual focus can also be used for enhanced creativity, ensuring sharpness and depth in every frame. This level of control is particularly beneficial for professional videographers seeking cinematic quality.

7.2 Managing Storage and Workflow

The Nikon D810 supports dual memory card slots, allowing for efficient storage management. Users can set overflow recording, enabling seamless switching to the second card when the first is full. This feature is ideal for extended shoots. Additionally, the camera’s workflow is enhanced by compatibility with the Nikon Manual Viewer 2 app, which streamlines remote adjustments and ensures a smooth post-production process.

Accessories and Software

The Nikon D810 offers a variety of accessories and software to enhance functionality. The Nikon Manual Viewer 2 app provides easy access to manuals, while compatible lenses and additional accessories streamline your workflow for professional results.

8.1 Compatible Lenses and Accessories

The Nikon D810 supports a wide range of Nikon F-mount lenses, including AF-S, AF, and DX lenses, ensuring versatility for various photography needs. Additionally, accessories like external flash units, remote controllers, and battery grips enhance functionality. Using genuine Nikon accessories guarantees optimal performance and compatibility, preserving the camera’s advanced capabilities for professional-grade results in every shot.

8.2 Using the Nikon Manual Viewer 2 App

The Nikon Manual Viewer 2 app offers a convenient way to access the D810’s user manual on smartphones or tablets. It allows users to download and view guides anytime, anywhere, providing instant access to troubleshooting, settings, and advanced features. This app ensures that photographers can quickly reference camera functions, optimizing their shooting experience without carrying the physical manual.

Maintenance and Troubleshooting

Regular cleaning and software updates ensure optimal performance. Troubleshooting guides help resolve common issues like bright spots in images, ensuring the D810 operates flawlessly for professional results.

9.1 Cleaning and Maintaining the Camera

Regularly clean the camera’s sensor, mirror, and lens to prevent dust buildup. Use a soft brush or swab with compressed air for the sensor. Avoid liquids, as they can damage components. Store the camera in a dry place and update firmware periodically to ensure optimal functionality and extend its lifespan for professional use.

9.2 Solving Common Issues

Address common issues like bright spots in long exposures or crop mode by updating firmware. Ensure proper battery charging and card formatting. For autofocus errors, recalibrate lenses. Check Nikon’s service advisories for specific solutions. Use the manual viewer app for troubleshooting guides, ensuring your D810 operates smoothly and delivers professional results consistently, as detailed in the manual. Always refer to official resources for accurate fixes.

Advanced Shooting Techniques

Master long exposure, low-light photography, and explore tips for landscape, portrait, and wildlife genres. These techniques enhance creativity and maximize the Nikon D810’s capabilities effectively.

10.1 Mastering Long Exposure and Low-Light Photography

The Nikon D810 excels in capturing stunning images in challenging lighting conditions. For long exposures, use bulb mode and manual ISO control to achieve artistic effects like light trails or starry skies. In low-light scenarios, leverage the camera’s exceptional noise reduction capabilities and wide dynamic range to produce crisp, detailed photos. A tripod and remote shutter release are essential for minimizing camera shake and blur.

10.2 Tips for Landscape, Portrait, and Wildlife Photography

For landscape photography, use a wide-angle lens and low ISO to capture sharp, detailed scenes. In portrait mode, an 85mm lens enhances subject isolation, while focusing on the eyes ensures emotional depth. Wildlife photography demands a telephoto lens, fast shutter speeds, and continuous AF to freeze dynamic moments. Utilize the D810’s FX-format sensor for stunning results across all genres, ensuring every frame tells a story.

The Nikon D810 is a powerful tool for capturing stunning images across various genres. Its comprehensive manual ensures mastery of its features, empowering photographers to explore their full creative potential.

11.1 Summary of Key Takeaways

The Nikon D810 excels in delivering exceptional image quality, versatility, and customization options. Its robust manual provides in-depth guidance for mastering advanced features. key highlights include superior sensor performance, enhanced autofocus, and extensive video capabilities. The camera caters to diverse photography genres, from landscapes to wildlife. Utilizing the manual ensures optimal use of its functionalities, while additional resources offer further learning opportunities for photographers of all levels.

11.2 Resources for Further Learning

For deeper mastery, explore the Nikon Manual Viewer 2 app, offering detailed guides anytime. Thom Hogan’s Complete Guide to the Nikon D810 provides in-depth insights. Nikon’s official website offers firmware updates, tutorials, and troubleshooting tips. Online forums and workshops dedicated to Nikon users also serve as valuable resources for enhancing photography skills and resolving common issues effectively.

a concise introduction to logic 13th edition pdf

Book Details

ISBN-10: 1305958098

ISBN-13: 978-1305958098

Edition: 13th

Publisher: Cengage Learning

Publication Date: January 1‚ 2017

1.1 ISBN-10: 1305958098

. This code is essential for purchasing‚ cataloging‚ and verifying the book’s authenticity. It ensures buyers access the correct edition‚ avoiding confusion with earlier versions. The ISBN-10 is widely recognized in academic and retail settings‚ making it a reliable reference for students and educators seeking the specific 13th edition of this popular logic textbook.

1.2 ISBN-13: 978-1305958098

. It is used by retailers‚ libraries‚ and publishers to catalog and verify the book. This code ensures accurate identification and avoids confusion with other editions or formats. The ISBN-13 is essential for purchasing‚ inventory‚ and accessing the correct version of the textbook‚ whether in print or digital formats like PDF.

1.3 Edition: 13th

is the latest iteration of this widely acclaimed textbook. It offers improved clarity‚ comprehensiveness‚ and updated content to enhance learning. Known for its friendly and thorough presentation‚ this edition has solidified its position as the leading logic textbook in North America; Its relevance and accessibility make it an invaluable resource for students and educators alike‚ ensuring it remains a cornerstone in logic education.

1.4 Publisher: Cengage Learning

‚ ensuring updated and relevant content for students and educators. The publisher’s focus on accessibility and innovation has made it a trusted name in education‚ offering resources in various formats‚ including PDF and eBooks‚ to meet diverse learning needs.

1.5 Publication Date: January 1‚ 2017

was published on January 1‚ 2017. This edition maintains the book’s reputation for clarity and comprehensiveness‚ making it a widely used resource in logic studies. Its publication date ensures updated content‚ aligning with contemporary educational standards. The book’s popularity has led to its availability in various formats‚ including PDF and eBook‚ catering to both students and educators seeking accessible and engaging learning materials.

Features of the 13th Edition

The 13th edition offers unmatched clarity‚ comprehensive coverage‚ and a friendly tone‚ making it the most widely used logic textbook in North America. It includes updated content.

2.1 Clarity and Comprehensiveness

The 13th edition is renowned for its exceptional clarity and thoroughness‚ ensuring complex concepts are accessible to all learners. Its well-organized structure enhances understanding‚ making it a leader in logic education.

2.2 Friendly and Thorough Presentation

The textbook offers a friendly tone and detailed explanations‚ creating an engaging learning experience. Its approachable language and structured content make it suitable for students and educators alike‚ ensuring a smooth understanding of logic fundamentals.

2.3 Updated Content and Relevance

The 13th edition features updated content to ensure relevance in modern academic and practical contexts. It incorporates real-world applications of logic‚ making it a valuable resource for both students and educators. The text remains clear and well-organized‚ maintaining its reputation as a leading introductory logic textbook.

Availability and Formats

The 13th edition is available as a PDF and on popular e-book platforms. It can be purchased or rented online through various retailers‚ including Amazon and Cengage.

3.1 PDF Version Availability

The 13th edition is widely available in PDF format‚ offering a convenient and portable option for readers. Platforms like instantebmart.com and dirzon provide direct download links. The PDF is optimized for digital devices‚ ensuring clarity and ease of use. Additionally‚ online marketplaces such as ebookgrade offer the PDF version for instant access‚ making it accessible to students and professionals worldwide. This format is ideal for those preferring digital reading experiences;

3.2 E-Book Platforms

Major e-book platforms like ebookgrade and login.cengage.com offer the 13th edition in digital formats. These platforms ensure easy access to the text‚ with features like adjustable fonts and search functionality. Readers can purchase or rent the e-book directly‚ making it accessible on various devices. Additionally‚ platforms like instantebookmart.com provide seamless downloads‚ catering to users seeking convenience and flexibility in their learning materials.

3.3 Online Purchase and Rental Options

The 13th edition can be purchased or rented online through platforms like Cengage‚ Amazon‚ and other digital retailers. Options include digital access‚ paperback rentals‚ and e-book versions. Many platforms offer discounts‚ with savings up to 80% on rentals and 90% on used copies. Additionally‚ coupon codes are available for further price reductions. This flexibility ensures accessibility for students and educators seeking affordable learning resources.

Target Audience

  • Students studying logic and critical thinking.
  • Educators seeking comprehensive teaching materials.
  • General readers interested in logical reasoning.

4.1 Students of Logic and Critical Thinking

This edition is tailored for students seeking a strong foundation in logical reasoning and argumentation. Its clear‚ friendly‚ and thorough presentation makes complex concepts accessible. The text is widely used in academic settings‚ ensuring students grasp both theoretical and practical aspects of logic. With updated content‚ it remains a vital resource for understanding propositional and predicate logic‚ inductive reasoning‚ and real-life applications.

4.2 Educators and Instructors

Educators benefit from the textbook’s structured approach‚ making it easy to create engaging lesson plans; The 13th edition offers instructor-specific resources‚ including online support and community forums. These tools enhance teaching effectiveness and provide additional materials for classroom use. The clarity and comprehensiveness of the text ensure that instructors can effectively convey logical concepts to their students‚ fostering a deeper understanding of critical thinking and argumentation.

4.3 General Readers Interested in Logic

General readers interested in logic will find the 13th edition accessible and engaging. The clear‚ friendly‚ and thorough presentation makes complex concepts understandable. The PDF version is widely available‚ offering convenience for readers who prefer digital formats. This text is ideal for those seeking to improve critical thinking skills and apply logical principles in real-life scenarios‚ making it a valuable resource for anyone exploring logic beyond formal education.

Key Topics Covered

This edition covers propositional and predicate logic‚ inductive reasoning‚ fallacies‚ and real-life applications‚ providing an essential overview of logical principles and their practical uses.

5.1 Propositional and Predicate Logic

The 13th edition thoroughly explains propositional logic‚ covering truth tables‚ logical equivalences‚ and natural deduction. It also delves into predicate logic‚ introducing quantifiers‚ validity‚ and translations. Clear examples and exercises guide students through mastering these fundamental concepts‚ establishing a solid foundation for advanced logical reasoning. The text’s clarity ensures that complex ideas are accessible to all learners‚ making it an ideal resource for both beginners and those seeking to refine their understanding of logical structures.

5.2 Inductive Reasoning and Fallacies

This section explores inductive reasoning‚ focusing on probabilistic arguments and generalizations from specific instances. It also examines common fallacies‚ such as hasty generalizations‚ appeals to emotion‚ and straw man arguments. Practical examples help students identify and avoid these errors in reasoning. The text emphasizes the importance of critical thinking in evaluating evidence and arguments‚ providing a clear framework for distinguishing strong inductive reasoning from flawed logical pitfalls.

5.3 Applications of Logic in Real-Life Scenarios

This section demonstrates how logical principles apply to everyday situations‚ enhancing analytical skills. It covers logical reasoning in fields like computer science‚ law‚ and problem-solving. Real-world examples illustrate how logic improves decision-making‚ identifies biases‚ and evaluates arguments. The text also explores logical structures in programming and artificial intelligence‚ emphasizing the practical relevance of logical thinking in modern industries and personal life.

Supplementary Resources

Instructor-specific resources‚ study guides‚ and online support are available to enhance learning. These materials provide additional practice‚ teaching tools‚ and community forums for deeper understanding and engagement with the content.

6.1 Instructor-Specific Resources

Instructors can access teaching tools‚ test banks‚ and presentation slides through Cengage Learning’s platform. These resources are designed to support course preparation and delivery. The 13th edition offers enhanced materials‚ including customizable slides and assessment options‚ to engage students effectively. Instructors can visit login.cengage.com to explore these resources‚ ensuring a comprehensive and dynamic classroom experience tailored to their specific needs.

6.2 Study Guides and Companion Materials

Supplementary study guides and companion materials are available to enhance understanding. These include practice exercises‚ summaries‚ and interactive quizzes. The materials align with the textbook’s content‚ offering students additional opportunities to master logic concepts. They are accessible online‚ providing flexible learning support for students seeking to deepen their comprehension of propositional and predicate logic‚ inductive reasoning‚ and real-life applications of logic.

6.3 Online Support and Community Forums

Online support and community forums provide students with additional resources and interaction opportunities. Platforms like Cengage Learning’s official website and forums allow students to discuss topics‚ share insights‚ and seek help. These spaces foster collaboration and problem-solving‚ offering a dynamic environment for mastering logic concepts. Additionally‚ official support channels ensure access to troubleshooting and resources‚ enhancing the learning experience for students using the 13th edition PDF.

Access and Purchase Information

The 13th edition is available for direct purchase‚ rental‚ or digital access through platforms like Cengage Learning and online retailers‚ with options for discounts and coupons.

7.1 Direct Purchase Options

The 13th edition can be directly purchased from Cengage Learning’s official website‚ as well as from reputable online retailers such as Amazon and Barnes & Noble. The paperback version is priced at $204.95‚ while the e-book is available for $79.95. Additionally‚ the PDF version can be downloaded from platforms like ebookgrade and dirzon. Payment options include credit cards and PayPal‚ ensuring a secure and convenient transaction process for buyers worldwide.

7.2 Rental and Digital Access Options

The 13th edition can be rented digitally through platforms like instantebmart and dirzon‚ offering flexible access for students. Rental periods vary‚ with options for 60 or 120 days. Digital access is also available through Cengage Learning’s platform‚ providing e-book versions for $79.95. Additionally‚ some retailers offer discounted rental rates‚ making it a cost-effective choice for temporary use without the need for a physical copy.

7.3 Discount and Coupon Availability

Coupons and discounts for the 13th edition are available through various platforms. Rental options offer up to 80% off on textbook rentals and 90% on used copies. Digital access discounts are also provided‚ with bundle deals for students. Seasonal promotions and limited-time offers can be found on retailer websites. Visit platforms like instantebmart or dirzon for exclusive coupon codes and discounted rates.

usas manual

The USAS Manual provides comprehensive guidance for financial accounting, specifically designed for Ohio school districts and state agencies. It outlines core functions, transaction recording, and compliance standards, ensuring accurate financial reporting and accountability. The manual is regularly updated to reflect changes in accounting practices and regulatory requirements, making it an essential resource for treasurers and financial professionals. Access the latest version on the Ohio Auditor’s website under the Resources menu.

1.1 What is the USAS Manual?

The Uniform School Accounting System (USAS) Manual is a comprehensive guide designed to standardize financial accounting practices for Ohio school districts and state agencies. It provides detailed instructions for recording day-to-day transactions, ensuring compliance with state regulations and accounting standards. The manual covers key functions such as accounts management, transaction processing, and financial reporting; It serves as a primary resource for treasurers and financial officers, offering clarity on coding structures, payment processing, and compliance requirements. Regular updates ensure the manual aligns with current accounting practices and legal changes. Accessible online, it is an indispensable tool for maintaining accurate and transparent financial records.

1.2 Importance of the USAS Manual for Financial Accounting

The USAS Manual is essential for maintaining standardized financial accounting practices across Ohio school districts and state agencies. It ensures compliance with state laws, regulations, and accounting standards, providing a consistent framework for recording transactions. By following the manual, financial officers can accurately track expenses, manage funds, and prepare reports, ensuring transparency and accountability. Its guidelines help prevent errors, streamline processes, and align financial practices with industry best practices. Regular updates keep the manual relevant, addressing evolving accounting requirements. This standardized approach fosters credibility and trust in financial reporting, making the USAS Manual a cornerstone of effective financial management for public entities.

1.3 Recent Updates to the USAS Manual (May 2025 Release)

The May 2025 release of the USAS Manual introduces significant updates to align with current accounting standards and regulatory requirements. Key changes include revised account codes, enhanced transaction tracking, and improved security protocols. Appendix A of the manual now details effective dates and action items, ensuring users understand implementation timelines. The update also addresses prior system limitations, offering clearer guidance on payment processing and financial reporting. Additionally, new features such as automated error corrections and advanced reporting tools enhance user efficiency. These updates reflect ongoing efforts to modernize financial accounting practices, providing treasurers with a robust framework for accurate and compliant financial management. The manual remains a critical resource for maintaining accountability and transparency in public finance.

Key Features of the USAS Manual

The USAS Manual offers core functions for managing financial transactions, generating reports, and ensuring secure access. It provides tools for tracking accounts, processing payments, and maintaining compliance with accounting standards.

2.1 Overview of USAS Core Functions

The USAS core functions provide a robust framework for managing financial operations. Key features include transaction processing, account management, and report generation. These functions enable users to record and track financial data efficiently, ensuring compliance with accounting standards. The system supports both online and batch processing, allowing for flexible transaction handling. Additionally, security measures are integrated to protect sensitive information and ensure only authorized access. The core functions also include tools for payment processing, document tracking, and financial reporting, making it a comprehensive solution for financial management. These features are essential for maintaining accurate and transparent financial records, which are critical for auditing and decision-making purposes.

2.2 Accounts, Transactions, and Reporting in USAS

The USAS system is structured around accounts, which are categorized using specific codes to organize financial data. These codes enable precise tracking of income, expenses, and assets. Transactions are recorded in real-time, ensuring up-to-date financial records. The system supports both online and batch processing, allowing for efficient transaction management. Reporting is a key feature, with options to generate detailed financial statements, summaries, and compliance reports. Users can customize reports to meet specific needs, such as budget analysis or audit requirements. The integration of accounts, transactions, and reporting ensures seamless financial oversight and accountability. This structure is designed to simplify complex financial tasks while maintaining accuracy and transparency.

2.3 Security and Access Management in USAS

The USAS system prioritizes security and access management to safeguard financial data. Access is controlled through user roles and permissions, ensuring only authorized personnel can perform sensitive tasks. Encryption protocols protect data during transmission and storage. Audit trails track all system activities, promoting transparency and accountability. Users are required to authenticate via secure login methods, and passwords are subject to strength requirements. The system also supports multi-factor authentication for enhanced security. Regular updates and patches ensure compliance with evolving security standards. These measures collectively maintain the integrity and confidentiality of financial records, preventing unauthorized access and potential breaches. This robust security framework is essential for maintaining trust in the system and protecting sensitive information.

Getting Started with USAS

Getting started with USAS involves registration, secure login, and familiarizing yourself with the interface. Initial setup includes creating user profiles and configuring preferences for smooth operation.

3.1 Registration and Login Procedures

Registration for USAS typically involves creating a user account through the official portal. Users must provide essential details, such as name, email, and organization affiliation, to access the system. Once registered, a secure login process ensures authenticated entry into the platform. Credentials are verified to maintain data integrity and user privacy. Multi-factor authentication may be required for enhanced security. If credentials are forgotten, a password recovery option is available. New users are advised to review the system’s terms of use and privacy policies before proceeding. Detailed login guides and troubleshooting tips are accessible via the USAS support portal. Always ensure connections are secure to protect sensitive information. For assistance, contact the designated support team or refer to the official documentation provided during registration.

3.2 Navigating the USAS Interface

The USAS interface is designed to be user-friendly, with a clear dashboard and intuitive navigation. Upon login, users are greeted by a main menu that provides quick access to core functions such as accounts, transactions, and reporting. The interface is divided into logical sections, each corresponding to specific tasks or financial operations. A search bar and breadcrumb navigation aid in locating specific features or records efficiently; Context-sensitive help icons and tooltips are available throughout the system to guide users. Customizable favorites and shortcuts allow users to tailor their experience, streamlining access to frequently used tools. The interface also includes a notifications panel to alert users of system updates or pending actions. This organized layout ensures seamless navigation and optimal productivity for financial accounting tasks.

3.3 Setting Up User Profiles and Preferences

Setting up user profiles and preferences in USAS ensures a personalized and secure experience. Users can create individual profiles with unique login credentials and roles, determining access levels based on organizational requirements. Customizable preferences include display settings, default views, and notification alerts. Security features allow administrators to assign permissions, restricting access to sensitive data and functions. Profiles can be tailored to meet specific job responsibilities, enhancing efficiency and compliance. Regular updates to user profiles ensure alignment with changing roles or organizational needs. This feature-rich setup promotes accountability and streamlines workflow, making it essential for effective financial management within the system. Proper configuration ensures seamless integration of user preferences with USAS functionality.

Payment Processing in USAS

USAS facilitates efficient payment processing through online and batch transactions, managing payee types, distribution methods, and ensuring accurate financial disbursements for organizational accountability.

4.1 Online and Batch Payment Processing

USAS offers two primary payment processing methods: online and batch. Online processing allows real-time transaction entry and approval, ideal for urgent payments. Batch processing enables bulk transactions, enhancing efficiency for large volumes. Both methods ensure data integrity through robust edits, including funding and data element checks. Approved documents are tracked via the Document Tracking subsystem, while the Payment Processing function handles final transaction steps. Security features prevent unauthorized access, ensuring compliance with financial regulations. These methods streamline payment workflows, reduce errors, and maintain audit trails for transparency. The system supports both TINS and non-TINS payees, with specific rules for each type to ensure accurate disbursements.

4.2 Understanding Payee Types (TINS and Non-TINS Payees)

USAS distinguishes between TINS and Non-TINS payees to manage payments effectively. TINS payees, maintained by the Comptroller’s office, are identified by numbers starting with 1, 3, or 7. These payees are part of the statewide vendor file and cannot be modified within USAS. Non-TINS payees, defined within USAS, begin with 0 and are used for internal tracking, such as 1099 reporting. TINS payees are used for payment-generating transactions, while Non-TINS payees are restricted to non-payment purposes. This distinction ensures accurate payment processing and compliance with state accounting standards, streamlining financial operations for agencies and schools. Proper classification of payee types is crucial for maintaining data integrity and efficient transaction management.

4.3 Payment Distribution Types and Disbursement Methods

USAS utilizes Payment Distribution Types (PDTs) to guide how payments are processed and disbursed. PDTs determine if a payment is issued as a warrant or direct deposit and whether it should be held or expedited. The Disbursement Method Indicator (DMI) further specifies payment handling instructions, such as overriding due dates. Payments can be distributed as warrants, accompanied by remittance advice, or through direct deposit for faster processing. The system assigns unique payment numbers for tracking and accountability. PDTs default to values in the TINS vendor file but can be overridden at the batch or transaction level. This flexibility ensures payments are processed accurately and efficiently, adhering to regulatory requirements and agency needs. Proper configuration of PDTs and DMIs is essential for seamless disbursement operations.

Advanced Features of USAS

USAS offers advanced features like document tracking, payment error correction, and detailed financial reporting tools, enabling users to manage and analyze transactions efficiently and accurately. These tools enhance accountability and streamline complex financial workflows, providing a robust framework for organizational oversight and decision-making. The system ensures seamless integration of tracking, corrections, and reporting processes, making it a comprehensive solution for financial management. This advanced functionality supports compliance with accounting standards and promotes transparency in financial operations, while also offering customizable options to meet specific organizational needs. The features are designed to optimize productivity and reduce operational errors, ensuring accurate and timely financial reporting. Additionally, the system’s advanced capabilities enable users to generate insights from financial data, aiding in strategic planning and resource allocation. Overall, these features make USAS an indispensable tool for modern financial accounting and management.

5.1 Document Tracking and Approval Processes

The USAS Manual details how the Document Tracking Subsystem streamlines approval workflows, ensuring transparency and accountability. Users can monitor document statuses, edit, approve, or reject transactions, and track changes in real-time. This feature integrates seamlessly with payment processing, allowing for efficient management of financial approvals. The system maintains a complete audit trail, recording all actions and modifications for compliance and auditing purposes. Additionally, it supports version control, preventing unauthorized alterations and ensuring data integrity. By automating approval processes, USAS reduces administrative delays and enhances overall operational efficiency. This subsystem is crucial for maintaining organized and auditable financial records, aligning with regulatory requirements and promoting fiscal responsibility.

5.2 Handling Payment Errors and Corrections

The USAS Manual outlines robust mechanisms for identifying and correcting payment errors, ensuring fiscal accuracy and compliance. Users can edit or cancel payments through the Document Tracking Subsystem, which provides a clear audit trail for accountability. The system enforces data element and funding edits during processing to prevent errors. For TINS payees, corrections must align with Comptroller guidelines, while Non-TINS payees allow direct updates in USAS. The manual emphasizes timely resolution of payment issues to avoid processing delays. By addressing errors systematically, USAS maintains data integrity and ensures payments are accurate and compliant with financial regulations. This feature is essential for managing payment discrepancies efficiently and minimizing financial risks.

5.3 Generating Reports and Analyzing Financial Data

The USAS Manual provides robust tools for generating reports and analyzing financial data, enabling users to track expenditures, revenues, and performance metrics efficiently. Users can create customized financial statements, transaction summaries, and compliance reports through the system’s reporting features. Advanced filters and sorting options allow for precise data extraction, while export capabilities enable further analysis in external tools like spreadsheets. The manual emphasizes the importance of regular reporting to ensure transparency and accountability. By leveraging these features, users can make data-driven decisions, identify trends, and optimize financial management. This functionality is critical for maintaining accurate records and meeting regulatory requirements, ensuring seamless financial oversight and planning.

intermatic switch timer instructions

Intermatic switch timers are versatile digital devices designed to control electrical appliances, offering programmable scheduling, energy efficiency, and convenience. They are ideal for residential and commercial applications.

Installation Steps

  1. Turn off power, prepare tools, and follow manual instructions to mount and wire the timer securely. Test functionality after installation to ensure safety and efficiency properly.

2.1. Mounting the Timer

Mounting the Intermatic timer is the first step in installation. Locate a suitable spot near the electrical circuit, ensuring easy access. Turn off the power supply before beginning. Use screws to secure the timer to the wall or electrical box, ensuring it is level and firmly fastened. For outdoor installations, position the timer at least 24 inches above ground level and use a weatherproof cover if required. Align the timer’s red indicator light with the upper screw hole of the wall plate for proper installation. Double-check the alignment and tighten all screws to prevent any movement or loose connections. Proper mounting ensures stability and longevity of the timer. Always refer to the manual for specific mounting recommendations based on your timer model.

2.2. Wiring the Timer

Wiring the Intermatic timer requires careful attention to ensure proper functionality. Begin by turning off the power supply at the circuit breaker to avoid electrical shock. Connect the green wire to the grounding screw in the electrical box or to a grounding wire if present. For plastic boxes, use the grounding method provided. Attach the black wire to the “LINE” terminal and the white wire to the “NEUTRAL” terminal. If your timer controls a light or appliance, connect the red or “LOAD” wire to the corresponding terminal. Tighten all twist connectors securely to prevent loose connections. Double-check the wiring configuration against the timer’s instruction manual to ensure accuracy. Use a multimeter to verify the absence of voltage before proceeding. Proper wiring ensures safe and reliable operation of the timer.

Programming Instructions

Press the reset button to clear memory, then set the current time and day. Enter switching times by selecting a memory location and choosing on/off times using the mode button.

3.1. Setting the Time and Day

To begin programming, press the reset button to clear any existing memory. Next, set the current time and day by using the mode button to navigate through the options. Use the + or ⏤ buttons to adjust the hour and minute values as needed. Once the correct time is displayed, press the ON/OFF button to confirm. Ensure the timer is in automatic mode for scheduled operations. This step is crucial for accurate scheduling of your appliances or lighting systems. Always verify the time and day settings before proceeding to schedule on/off times. Proper setup ensures reliable performance and energy efficiency. If the timer has an astronomical feature, it may automatically adjust for dawn and dusk times based on your location. Double-check all settings to avoid any programming errors.

3.2. Scheduling On/Off Times

After setting the time and day, use the mode button to access the scheduling menu. Select a memory location to program your desired on/off times. Enter the start and end times using the + or ⏤ buttons, and press ON/OFF to confirm. For recurring schedules, ensure the timer is in automatic mode. You can program multiple on/off events daily, tailoring the timer to your specific needs. Some models allow random or manual modes for flexibility. Review all programmed times to ensure accuracy. If needed, adjust or delete events using the reset or back buttons. Proper scheduling ensures efficient energy use and seamless operation of connected devices or lighting systems. Always test the timer after programming to verify its functionality. This step ensures your schedule runs smoothly without errors.

Features and Functionality

Intermatic switch timers offer a range of advanced features to enhance user experience. They include astronomical scheduling, which automatically adjusts on/off times based on sunrise and sunset. Models like the DT620 and ETW Series provide wireless connectivity, allowing control via smartphone apps. These timers also feature random mode to simulate occupancy, improving home security. Additionally, they offer energy monitoring to track usage and optimize savings. Some units come with weatherproof designs, making them suitable for outdoor use. With backlit displays and touch-sensitive controls, programming is intuitive. Many models support multiple schedules, accommodating complex routines. Overall, Intermatic timers combine versatility, efficiency, and ease of use, catering to various electrical control needs. Their robust functionality ensures reliable operation and long-term durability. These features make them a practical choice for modern households and businesses.

Maintenance and Upkeep

Regular maintenance ensures optimal performance of Intermatic switch timers. Users should periodically inspect wires for damage or wear, tightening connections as needed. For outdoor timers, check weatherproof covers to ensure they remain sealed and protect against moisture. Dusting the unit with a soft cloth prevents debris buildup. Additionally, updating software or firmware when available maintains functionality and security. For mechanical timers, lubricating moving parts can extend their lifespan. Always refer to the user manual for specific maintenance instructions tailored to your model. Proper upkeep prevents malfunctions and ensures reliable operation. Addressing issues promptly helps maintain efficiency and safety. Regular checks also prevent potential hazards, keeping your system running smoothly. By following these steps, users can enjoy long-term functionality from their Intermatic timers.

Troubleshooting Common Issues

Troubleshooting Intermatic switch timers involves addressing common issues like incorrect time display, failed switching, or unresponsive controls. First, reset the timer by pressing the reset button to clear memory. Ensure the power source is stable and the timer is properly grounded. For wiring issues, check connections and verify that wires are securely attached. If the timer fails to switch, inspect the schedule settings to ensure they are programmed correctly. For display problems, check for firmware updates or consult the user manual. If issues persist, contact technical support for assistance. Regularly reviewing the timer’s operation and addressing minor issues promptly can prevent more serious problems. Always refer to the user manual for model-specific troubleshooting steps.

Safety Precautions

When installing or operating an Intermatic switch timer, always follow safety guidelines to avoid hazards. Turn off power at the circuit breaker before handling wires or the timer. Use insulated tools and ensure the timer is properly grounded to prevent electric shock. Keep the timer out of reach of children and avoid exposing it to moisture or extreme temperatures. For outdoor use, install the timer at least 24 inches above ground level and plug it into a weatherproof outlet. Never modify the timer’s casing or wiring, as this can lead to malfunction or fire risks. Always follow the manufacturer’s instructions and local electrical codes. If unsure, consult a licensed electrician for safe installation and operation.

Technical Support and Resources

For assistance with Intermatic switch timers, visit the official website at supportintermatic.energy for comprehensive resources. You can access user manuals, installation guides, and troubleshooting tips. Contact their customer support team via phone at 7 (495) 108-11-82 or through the website for inquiries. Additionally, instructional videos and tutorials are available online to guide you through setup and programming. Ensure to register your product for warranty and updates. For complex issues, consult a licensed electrician or refer to the detailed documentation provided with your timer. Utilize these resources to maximize the functionality and longevity of your Intermatic switch timer.

Popular Models and Their Specifications

Intermatic offers a range of timer models designed for various applications. The DT17 Digital Timer is known for its user-friendly interface and programmable scheduling, ideal for indoor lighting control. The DT620 Astronomical Timer is popular for landscape lighting, featuring automatic adjustments based on sunrise and sunset times. The DT122k model includes advanced features like button navigation and memory programming, making it a favorite for smart home integration. For simpler needs, the T101 Mechanical Timer offers reliable 24-hour control with manual override. These models cater to different user preferences, ensuring efficient and convenient control of electrical devices. Each model is built with durability and ease of use in mind, making them suitable for both residential and commercial settings.

Intermatic switch timers offer a reliable and efficient way to manage electrical appliances, providing convenience and energy savings. With models like the DT17, DT620, and T101, users can choose the timer that best fits their needs. These timers are designed for easy installation, programming, and maintenance, making them suitable for both residential and commercial use. By following the provided instructions and guidelines, users can ensure optimal performance and longevity of their timers. Whether for lighting, HVAC, or other applications, Intermatic timers are a practical solution for modern households and businesses. Their robust features, combined with excellent technical support, make them a trusted choice for automating electrical systems;

nissan manual transmission fluid

Overview of Nissan Manual Transmission Fluid

Nissan manual transmission fluid is essential for lubrication, reducing friction, and cooling components. It ensures smooth gear shifts and protects the transmission from wear. Nissan recommends using API GL-4 75W-90 fluid for optimal performance and longevity.

1.1 Importance of Manual Transmission Fluid

Manual transmission fluid is crucial for smooth gear operation, reducing friction, and preventing overheating. It lubricates gears, synchronizers, and bearings, ensuring consistent performance. Without proper fluid levels and quality, the transmission can overheat, wear excessively, or fail prematurely. Regular checks and maintenance are essential to extend the lifespan of the manual transmission system.

1.2 Nissan Manual Transmission Fluid Types

Nissan manual transmissions typically require API GL-4 75W-90 fluid, a high-performance gear oil. Synthetic and conventional options are available, with synthetic offering better durability and temperature resistance. Nissan NS-3 and Red Line MT-90 are popular choices, ensuring optimal lubrication and protection for gears and synchronizers, while meeting the manufacturer’s specifications for performance and longevity.

Signs of Low or Degraded Manual Transmission Fluid

Low or degraded fluid causes noises, slipping gears, slow engagement, and a burning smell. These issues indicate the need for immediate fluid replacement to prevent damage.

2.1 Noises from the Transmission

Noises from the transmission, such as grinding, clunking, or whining, are common signs of low or degraded manual transmission fluid. These sounds indicate worn components or insufficient lubrication, which can lead to costly repairs if ignored. Regular fluid checks and timely replacements are crucial to maintain smooth operation and prevent damage.

2.2 Burning Smell

A burning smell from the transmission indicates degraded or overheated fluid. This occurs when the fluid breaks down due to excessive heat from friction, losing its lubricating properties. The smell can also result from burning transmission components. Addressing this issue promptly is crucial to prevent irreversible damage and costly repairs.

2.3 Transmission Leaks

Transmission leaks are a common issue, often caused by worn seals, gaskets, or damaged pans. They can lead to fluid loss, reducing lubrication and causing premature wear. If unaddressed, leaks can result in costly repairs. Regular inspections and prompt repair are essential to maintain optimal transmission performance and prevent further damage.

2.4 Slipping Gears

Slipping gears indicate worn clutches, bands, or low fluid levels. This can cause hesitation or failure to engage gears smoothly. If left unaddressed, it may lead to complete transmission failure. Regular fluid checks and maintenance are crucial to prevent such issues and ensure smooth gear operation in Nissan manual transmissions.

2.5 Slow Gear Engagement

Slow gear engagement occurs when the transmission fluid is degraded or low, causing delays in clutch pack and synchronizer operation. This can lead to hesitation during acceleration or shifting, especially noticeable in manual transmissions. Addressing fluid levels and condition promptly is essential to restore smooth and responsive gear engagement in Nissan vehicles.

How to Check Nissan Manual Transmission Fluid Level

To check the fluid level, warm up the engine, locate the transmission dipstick, and ensure the car is on level ground. Pull out the dipstick, wipe it clean, and insert it again to get an accurate reading. The fluid level should be just below the dipstick’s notch.

3.1 Warm-Up the Engine

Before checking the manual transmission fluid, it’s crucial to warm up the engine by driving for 5-10 minutes. This ensures the fluid circulates evenly and provides an accurate level reading. A cold engine may give a misleading measurement, so driving beforehand is essential for precise results.

3.2 Locating the Transmission Dipstick

The transmission dipstick is typically found under the hood, often near the front of the engine or on the driver’s side. It may be labeled, but its exact location can vary by Nissan model. Consulting the owner’s manual or a diagram specific to your vehicle is recommended for precise identification. Once located, it provides easy access for checking the fluid level. Always ensure the vehicle is parked on a level surface before proceeding. This step is crucial for an accurate measurement and to prevent any potential damage to the transmission system. By following these guidelines, you can efficiently locate and use the dipstick for maintaining your Nissan’s manual transmission health. Regular checks help maintain optimal performance and longevity of the transmission. If unsure, referencing a repair manual or seeking advice from a mechanic can provide additional clarity and guidance. Proper maintenance is key to ensuring smooth gear operation and preventing costly repairs down the line. Stay informed and proactive to keep your Nissan running smoothly for years to come.

3;3 Checking the Fluid Level

Once the dipstick is located, pull it out and wipe it clean with a lint-free cloth. Insert it back fully and pull it out again to get an accurate reading. The fluid level should be at the bottom of the dipstick hole. If it’s below the minimum mark, add the recommended fluid type. Ensure not to overfill, as this can cause damage. Check the fluid’s color and consistency—clean fluid is translucent and light amber. If it appears dark or gritty, a fluid change is necessary. Always refer to your Nissan’s manual for specific instructions, as procedures may vary slightly by model. Proper fluid level maintenance is vital for the transmission’s health and performance. Regular checks can prevent issues like slipping gears or slow engagement, ensuring a smooth driving experience. Keep track of your maintenance schedule to avoid potential problems. A well-maintained transmission contributes to the overall longevity and efficiency of your vehicle. Stay vigilant and proactive to keep your Nissan in optimal condition.

Recommended Fluid for Nissan Manual Transmissions

Nissan recommends using API GL-4 75W-90 fluid for manual transmissions. Synthetic fluids are preferred for better performance and durability. Always follow Nissan’s guidelines to avoid damage.

4.1 API GL-4 75W-90 Fluid

The API GL-4 75W-90 fluid is Nissan’s specified choice for manual transmissions. It offers excellent lubrication, wear protection, and temperature stability. Its viscosity ensures smooth gear shifts in both cold and hot conditions, making it ideal for maintaining transmission health and performance. Always use this grade to meet Nissan’s standards.

4.2 Synthetic vs. Conventional Fluid

Synthetic fluid offers superior performance in extreme temperatures, better wear protection, and improved lubrication compared to conventional fluid. While synthetic is more expensive, it provides enhanced durability and smoother gear shifts. Conventional fluid is a cost-effective option but may not perform as well in high-stress conditions. Both types meet Nissan’s standards for manual transmissions.

When to Change Nissan Manual Transmission Fluid

Nissan recommends changing manual transmission fluid every 30,000 to 60,000 miles. Signs like difficulty shifting or grinding noises also indicate a needed change.

5.1 Mileage Recommendations

Nissan recommends changing manual transmission fluid every 30,000 to 60,000 miles, depending on driving conditions. Synthetic fluids may last up to 80,000 miles. Regular checks ensure optimal performance and prevent premature wear. Always consult the owner’s manual for specific guidelines tailored to your vehicle.

5.2 Signs Indicating a Need for Change

If the fluid appears dark, gritty, or has a burning smell, it’s time for a change. Noises, slipping gears, or slow engagement are additional indicators. If the fluid level is low or degraded, replacement is necessary to prevent damage. Regular checks can help identify these issues early.

Tools and Materials Needed for Fluid Change

A socket set, drain pan, and new fluid filter are essential. Additional materials include rags, safety gloves, and the correct replacement fluid for your Nissan transmission.

6.1 Socket Set

A socket set is crucial for draining the transmission fluid. It includes various sizes to fit bolts and plugs. Ensure compatibility with your Nissan’s specifications to avoid stripping or damage. Using the correct sockets helps prevent leaks and ensures a secure reassembly after the fluid change. Safety and precision are key during this process.

6.2 Drain Pan

A drain pan is essential for safely catching the old transmission fluid during a change. Choose a durable, large-capacity pan to prevent spills. It protects surfaces and makes cleanup easier. Ensure the pan is positioned correctly under the transmission before draining to avoid environmental contamination and messy cleanup. This step is vital for a smooth process.

6.3 New Fluid Filter

A new fluid filter ensures clean transmission fluid flows through the system. It prevents contaminants from causing damage and maintains optimal performance. Replace the filter during every fluid change to avoid clogs and wear. Choose a high-quality filter compatible with your Nissan model for the best results and extended transmission life. This step is critical for longevity.

Adding Transmission Fluid Stabilizers

Transmission fluid stabilizers enhance performance by improving lubrication and reducing wear. They help maintain fluid viscosity and protect against thermal degradation, ensuring smoother gear shifts and extended transmission life.

7.1 Benefits of Using Stabilizers

Transmission fluid stabilizers provide enhanced lubrication, reducing friction and wear on moving parts. They help maintain fluid viscosity, prevent thermal degradation, and improve gear engagement smoothness. Stabilizers also protect against corrosion and extend the life of the transmission. Brands like Lucas Oil offer stabilizers that complement Nissan manual transmission fluids, ensuring optimal performance and durability.

7.2 Recommended Stabilizer Brands

Lucas Oil Stabilizer is a top choice for Nissan manual transmissions, offering superior friction reduction and wear protection. Red Line MT-90 also enhances fluid performance and gear engagement. These brands are trusted for their quality and compatibility, ensuring optimal transmission function and longevity while maintaining factory specifications and recommendations.

Nissan Manual Transmission Fluid vs. Other Brands

Nissan NS-3 fluid is tailored for Nissan transmissions, offering excellent lubrication and wear protection. Comparing with Red Line MT-90 and Lucas Oil, each has unique benefits but NS-3 is specifically designed for Nissan systems, ensuring optimal performance and compatibility, while others may offer higher viscosity or additive packages.

8.1 Nissan NS-3 Fluid

The Nissan NS-3 fluid is specifically designed for Nissan manual transmissions, offering superior lubrication and wear protection. It meets Nissan’s exact specifications, ensuring optimal performance and longevity. While it is ideal for vehicles under warranty, alternative fluids like Red Line MT-90 can also be used, but NS-3 remains the recommended choice for compatibility and reliability.

8.2 Red Line MT-90 Fluid

Red Line MT-90 is a high-performance synthetic fluid designed for manual transmissions, offering excellent lubrication and friction control. It is a popular alternative to Nissan’s NS-3, providing superior thermal stability and wear protection. Many enthusiasts prefer MT-90 for its enhanced performance in both hot and cold conditions, making it a reliable choice for Nissan manual transmissions.

8.3 Lucas Oil Stabilizer

Lucas Oil Stabilizer is a popular additive for manual transmissions, enhancing fluid performance and protecting components from wear. It improves friction control, reduces noise, and stabilizes fluid viscosity under extreme temperatures. Many Nissan owners use it to boost transmission durability and smooth operation, especially in high-stress conditions, making it a trusted choice for manual transmission maintenance.

Maintenance Tips for Nissan Manual Transmissions

Regular fluid checks and timely replacements are crucial. Avoid extreme temperatures and ensure proper warming up before driving. This extends transmission life and performance reliably;

9.1 Regular Fluid Checks

Regular fluid checks ensure optimal transmission performance. Always warm up the engine, locate the dipstick, and verify the level is within the recommended range. Clean the dipstick thoroughly before reinserting to avoid contamination. This simple practice helps prevent premature wear and maintains smooth gear operation, ensuring reliability and longevity of the transmission system.

9.2 Avoiding Extreme Temperatures

Extreme temperatures can degrade manual transmission fluid, affecting its lubricating properties. Prolonged exposure to heat may cause fluid breakdown, leading to increased friction and wear. Parking in shaded areas and avoiding prolonged driving in extreme conditions can help protect the fluid. Using high-quality, temperature-stable fluids, like Nissan-recommended ones, ensures optimal performance in varying conditions.

DIY vs. Professional Transmission Fluid Change

A DIY fluid change can save costs but requires mechanical skills and tools. Professional service ensures accuracy and peace of mind, especially for complex systems.

10.1 Cost Comparison

DIY transmission fluid changes are cost-effective, with fluid and tools costing between $50-$150. Professional services range from $150-$300, depending on labor rates and location. DIY saves money but requires time and mechanical skills, while professional service offers convenience and expertise, ensuring the job is done correctly.

10.2 Time and Effort

A DIY fluid change typically takes 1-2 hours, depending on your mechanical aptitude and access to tools. Professional services usually take 1-3 hours, depending on workshop schedules. DIY requires gathering materials and following steps carefully, while professionals handle the process efficiently, saving personal time and effort for a convenient solution.