
Electrolux Washing Machine Instruction Manual: A Comprehensive Guide
Welcome! This manual details installation‚ operation‚ maintenance‚ and troubleshooting for your Electrolux washing machine‚ ensuring optimal performance and longevity․
Congratulations on choosing an Electrolux washing machine! This appliance is designed to deliver exceptional cleaning performance and convenience‚ simplifying your laundry routine․ This manual serves as a comprehensive guide‚ providing essential information to maximize your machine’s capabilities․ Before first use‚ please carefully review the safety instructions and installation guidelines detailed within․
We encourage you to register your appliance online to access exclusive benefits‚ including updated information on features‚ safety notifications‚ and better living services․ Familiarize yourself with the machine’s components and control panel to ensure efficient operation․ This manual will walk you through each step‚ from loading laundry to selecting appropriate wash programs and performing routine maintenance․
Safety Information & Important Warnings
Important Safety Instructions: To reduce the risk of fire‚ electric shock‚ or injury‚ always follow these basic precautions․ Read all instructions before using the washing machine․ Ensure proper grounding and never operate with a damaged cord or plug․ Do not use extension cords․
Keep children and pets away during operation․ Never open the door during a wash cycle․ Only use detergents specifically designed for washing machines․ Disconnect the appliance before cleaning or maintenance․ Do not attempt to repair the machine yourself; contact qualified service personnel․ Failure to adhere to these warnings may void your warranty and create a hazardous situation․
Machine Overview & Parts Identification
Familiarize yourself with your Electrolux washing machine! Key components include the control panel‚ detergent dispenser‚ washing drum‚ and filter․ The control panel manages wash programs and settings․ The detergent dispenser has compartments for pre-wash‚ main wash‚ and fabric softener․
The drum holds the laundry‚ while the filter traps lint and debris․ Locate the access panel for filter cleaning․ Understand the purpose of each part for efficient operation and maintenance․ Refer to diagrams within this manual for precise locations and identification of all machine components․ Proper understanding ensures safe and effective use․
Control Panel Explained
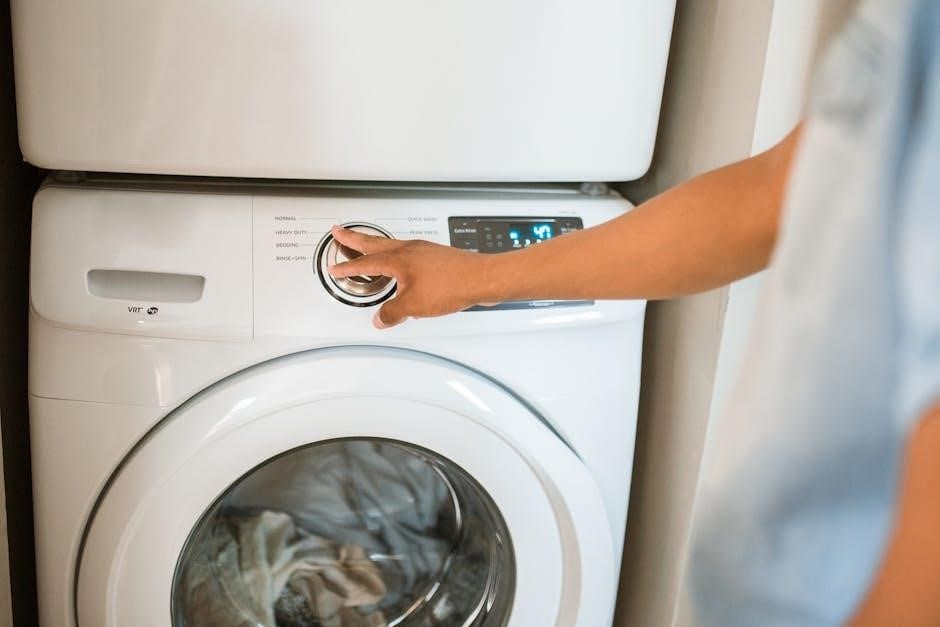
The control panel is your command center! It features a program selector dial to choose wash cycles – cottons‚ synthetics‚ delicates‚ and more․ Buttons adjust temperature‚ spin speed‚ and activate special functions like extra rinse or stain removal․
An LED display shows the remaining wash time and selected settings․ The start/pause button initiates or halts the cycle․ Explore the symbols and indicators for each function․ Understanding the control panel allows you to customize washes for optimal cleaning and fabric care․ Refer to the program guide for detailed cycle descriptions․

Detergent Dispenser Details
The detergent dispenser is typically divided into three compartments․ The first (marked I or 1) is for pre-wash detergent‚ used for heavily soiled items․ The second (marked II or 2) accepts main wash detergent – powder or liquid․ Use the correct amount based on load size and soil level․
The third compartment (often marked with a flower symbol) is for fabric softener․ Never pour detergent directly into the drum! Always use the dispenser to ensure proper dilution and prevent residue․ Regularly clean the dispenser to avoid clogs and ensure optimal performance․
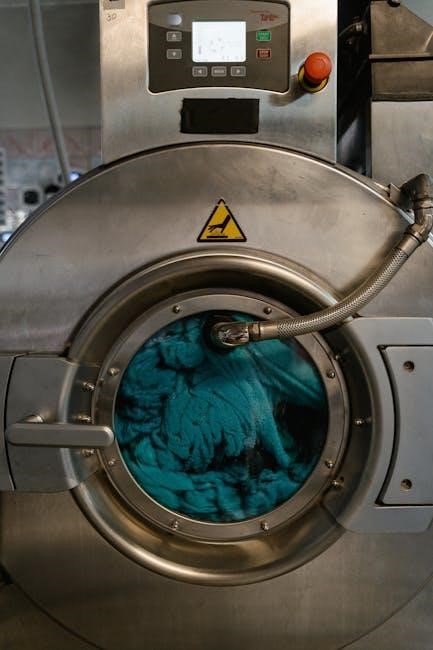
Drum & Filter Location
The washing machine drum is the stainless steel inner compartment where laundry is placed․ Avoid overloading to ensure effective cleaning and prevent damage․ The filter‚ crucial for preventing blockages‚ is typically located behind a small access panel at the front bottom of the machine․
Consult your specific model’s diagram for precise location․ Regularly cleaning the filter – at least monthly – removes lint‚ debris‚ and small objects․ Always unplug the machine before accessing the filter․ A clogged filter can cause drainage issues and affect wash performance․
Installation Guide
Proper installation is vital for optimal performance and to avoid issues․ Begin by removing all shipping bolts – failure to do so will cause damage․ Position the machine on a level‚ stable surface․ Connecting water supply hoses requires careful attention to hot and cold water inlets‚ ensuring tight connections to prevent leaks․
Electrical connection must adhere to local codes‚ utilizing a grounded outlet․ Leveling the washing machine is crucial; adjust the feet until the machine is stable and doesn’t wobble․ Refer to the detailed diagrams in this manual for visual guidance throughout the installation process․
Connecting Water Supply Hoses
Carefully attach the water supply hoses to both the washing machine and your home’s water faucets․ Ensure the hot and cold water connections are not reversed – typically‚ red indicates hot and blue indicates cold․ Hand-tighten the connections first‚ then use pliers to gently tighten another half-turn․
Inspect hoses for kinks or damage before connecting․ Periodically check connections for leaks after installation and during subsequent washes․ Use only the supplied hoses or Electrolux-approved replacements․ Never reuse old hoses․ Proper connection prevents water damage and ensures efficient operation․
Electrical Connection Requirements
Ensure your household electrical system meets the washing machine’s requirements – typically a dedicated‚ grounded 120V‚ 60Hz circuit․ Never use extension cords or adapters; connect directly to a properly grounded outlet․ The appliance should be properly earthed for safety․
Verify the voltage matches the machine’s specifications (found on the rating label)․ Incorrect voltage can cause damage or pose a fire hazard․ If you are unsure about your electrical system‚ consult a qualified electrician before installation․ Always disconnect power before performing any maintenance․
Leveling the Washing Machine
Proper leveling is crucial to minimize vibration and noise during operation․ Use a spirit level to check the machine’s stability on the floor․ Adjust the adjustable feet‚ located at the bottom corners‚ by rotating them clockwise or counterclockwise․
Continue adjusting until the machine is perfectly level in both directions – front-to-back and side-to-side․ Tighten the lock nuts against the machine’s base to secure the feet in position․ An unleveled machine can experience excessive movement‚ potentially causing damage or safety hazards․ Re-check leveling periodically․
Operating Instructions
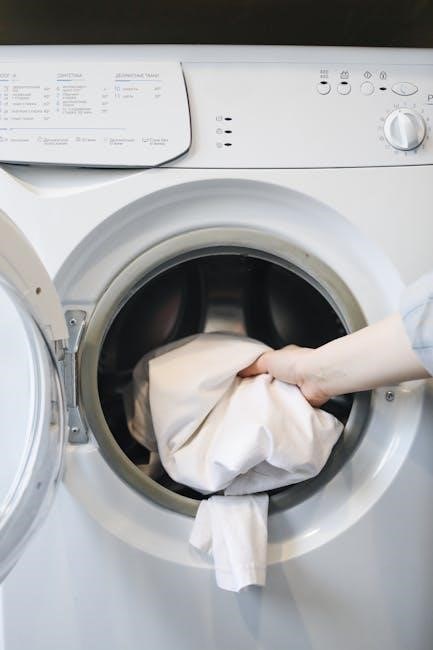
Before first use‚ ensure the washing machine is correctly installed and leveled․ Load laundry loosely into the drum‚ avoiding overloading․ Select the appropriate wash program based on fabric type and soil level using the control panel․
Add detergent and any desired additives to the designated dispenser compartments․ Press the ‘Start’ button to begin the wash cycle․ The machine will automatically fill with water‚ wash‚ rinse‚ and spin․ Always wait for the cycle to complete before opening the door․
Loading Laundry Correctly
Distribute items evenly within the drum to maintain balance during the wash and spin cycles․ Avoid overloading; consult the machine’s capacity guidelines – typically indicated by weight․ Loosely place garments into the drum‚ preventing tightly packed bundles․
Separate delicate items and place them in a mesh laundry bag for protection․ Check pockets for any objects like coins or keys․ Close zippers and fasten hooks to prevent snagging․ Do not wash items labeled ‘Dry Clean Only’ in the machine․
Selecting Wash Programs
Consult the program table on your machine or in this manual to choose the appropriate cycle for your laundry․ Consider fabric type – cottons‚ synthetics‚ delicates‚ woolens each require specific settings․ Adjust temperature based on garment care labels; lower temperatures save energy․

Spin speed impacts moisture removal; higher speeds shorten drying time but can wrinkle fabrics․ Utilize pre-wash for heavily soiled items․ Eco programs offer energy-efficient washing․ Special programs like steam or quick wash cater to specific needs․
Using Detergents & Additives
Always use detergents specifically designed for washing machines‚ following the manufacturer’s instructions․ Powder‚ liquid‚ or pods are suitable‚ but dosage varies based on load size and soil level․ Overuse can cause residue; underuse may result in insufficient cleaning․
Utilize the correct dispenser compartment for detergent‚ fabric softener‚ and bleach․ Avoid mixing bleach with other additives․ Consider using a laundry additive for stain removal or brightening․ Regularly check and clean the dispenser to prevent clogs and ensure optimal performance․
Special Features & Programs
Electrolux washing machines offer innovative features to enhance your laundry experience․ Wi-Fi connectivity allows remote control and monitoring via a dedicated app‚ providing convenience and peace of mind․ Steam programs refresh clothes‚ reduce wrinkles‚ and sanitize fabrics‚ ideal for delicate items․
The Delay Start function lets you schedule washes to coincide with off-peak energy rates or your preferred time․ Explore specialized programs like Quick Wash‚ Eco Mode‚ and Wool cycle for tailored cleaning․ Registering your appliance unlocks access to better living services and safety updates․
Wi-Fi Connectivity Setup & App Control
Connect your Electrolux washing machine to your home Wi-Fi network for enhanced control and convenience․ Download the Electrolux Life app (available on iOS and Android) and follow the in-app instructions to pair your machine․ Ensure a stable 2․4 GHz Wi-Fi connection during setup․
Once connected‚ remotely start or pause cycles‚ receive notifications about wash completion‚ and access helpful tips and diagnostics․ The app also allows you to download specialized wash programs and monitor energy consumption․ Enjoy peace of mind knowing you can manage your laundry from anywhere!
Steam Programs – Benefits & Usage
Electrolux steam programs offer superior fabric care by gently loosening dirt and wrinkles․ Steam cycles are ideal for delicate items‚ reducing the need for harsh chemicals and minimizing fabric damage․ Benefits include improved hygiene‚ reduced ironing‚ and enhanced stain removal․
To use a steam program‚ select the appropriate cycle on the control panel – options may include ‘Steam Refresh’ or ‘Steam Care’․ Ensure the water tank is filled before starting․ These programs utilize lower temperatures‚ preserving fabric quality while delivering exceptional cleaning results․ Enjoy fresher‚ softer laundry with the power of steam!
Delay Start Function – How to Use
The Delay Start function allows you to conveniently schedule wash cycles to begin at a later time․ To activate‚ first select your desired wash program‚ temperature‚ and any additional options․ Then‚ press the ‘Delay Start’ button repeatedly to set the desired delay time‚ typically in hours․

The display will show the estimated start time․ Once set‚ press the ‘Start/Pause’ button․ The machine will remain in standby mode until the programmed start time is reached․ This feature is perfect for taking advantage of off-peak energy rates or ensuring laundry is fresh when you need it․
Maintenance & Cleaning
Regular maintenance ensures your Electrolux washing machine operates efficiently and extends its lifespan․ Key areas include the detergent dispenser‚ drum‚ and filter․ Periodically clean the detergent dispenser to prevent residue buildup‚ which can affect wash performance․ The drum benefits from regular cleaning cycles‚ utilizing a dedicated drum cleaning program or a hot wash with a cleaning agent․
Crucially‚ the filter requires routine cleaning to remove lint and debris․ A clogged filter can lead to drainage issues․ Refer to the ‘Filter Cleaning Procedures’ section for detailed instructions․ Consistent cleaning prevents odors and maintains optimal hygiene․
Cleaning the Detergent Dispenser
To clean the dispenser‚ first remove it from the washing machine – consult your model’s specific instructions for removal․ Rinse each compartment thoroughly under warm running water‚ using a soft brush to dislodge any lingering detergent or fabric softener residue․ Stubborn buildup can be tackled with a mild cleaning solution‚ ensuring complete rinsing afterward․
Inspect the dispenser for blockages in the nozzles․ Remove any obstructions to ensure proper flow․ Dry the dispenser completely before reinserting it into the machine․ Regular cleaning – ideally monthly – prevents clogs and maintains optimal detergent distribution․
Filter Cleaning Procedures
Locate the washing machine’s filter – typically behind a small access panel at the front‚ lower portion of the machine․ Prepare for potential water spillage by placing towels and a shallow container nearby․ Carefully open the access panel and unscrew the filter cap‚ turning it counterclockwise․
Remove the filter and clean it thoroughly under running water‚ removing lint‚ hair‚ coins‚ and other debris․ Inspect the filter housing for any obstructions․ Reinstall the cleaned filter‚ ensuring it’s securely tightened․ Regular filter cleaning – every 1-3 months – prevents drainage issues and prolongs machine life․
Drum Cleaning Cycle – Step-by-Step
Initiate the drum cleaning cycle by selecting the appropriate program – often labeled “Drum Clean” or similar – on your Electrolux washing machine․ Ensure the drum is empty; no laundry should be inside․ Add a washing machine cleaner specifically designed for drum cleaning‚ following the product’s dosage instructions․
Start the cycle and allow it to run completely‚ typically at a higher temperature․ This process removes detergent residue‚ mildew‚ and odors․ After completion‚ wipe down the drum interior with a clean cloth․ Repeat this cycle every 1-3 months‚ or more frequently with heavy usage‚ to maintain optimal hygiene․
Troubleshooting Common Issues

Encountering problems? This section addresses frequent issues․ Error codes displayed indicate specific malfunctions – consult the detailed code list within this manual for diagnosis․ Drainage problems often stem from a clogged filter; regularly clean it․
Leaks or water issues require immediate attention; check hose connections and the door seal․ If the machine won’t start‚ verify the power supply and door is securely closed․ For persistent issues‚ consult a qualified technician․ Always disconnect power before attempting any repairs․ Refer to the full manual for detailed guidance․
Error Codes & Their Meanings

Decoding error messages is crucial for effective troubleshooting․ A displayed code signals a specific problem within the washing machine’s system․ For example‚ a code related to water intake suggests a supply issue or blocked hose․ Drainage errors indicate a clogged pump or drain hose․
Refer to the comprehensive table in this manual for a complete list of codes and their corresponding solutions․ Ignoring error codes can lead to further damage․ Always attempt the recommended solution before contacting service․ Detailed explanations are provided to guide you through the repair process safely․
Resolving Drainage Problems
Persistent drainage issues often stem from blockages․ First‚ check the drain hose for kinks or obstructions․ Next‚ locate and carefully clean the drain pump filter – a common collection point for lint‚ coins‚ and small items․ Ensure the filter is securely reinstalled to prevent leaks․
If the problem persists‚ verify the drainpipe isn’t clogged․ A partially blocked pipe restricts water flow․ For stubborn clogs‚ consider using a plumbing snake․ Always disconnect power before accessing internal components․ Consult the manual’s diagrams for filter and pump locations․
Addressing Leaks & Water Issues
Leaks can occur from several points․ Initially‚ inspect the water inlet hoses and drain hose connections for tightness․ Ensure the hoses are securely clamped to prevent drips․ Check the door seal for damage or debris; a compromised seal causes leaks during operation․
If water pools inside the drum‚ the drain pump or tub seal might be faulty․ For external leaks‚ examine the detergent dispenser for overflows․ Always disconnect the power supply before investigating internal components․ Refer to the manual’s diagrams for component locations and proper repair procedures․