evviva sciences mold guide

The Evviva Sciences Mold Guide is a comprehensive resource for identifying and understanding mold types‚ offering detailed insights into characteristics‚ growth patterns‚ and associated health risks. It supports users in detecting mold presence through DIY testing kits and provides optional lab analysis for accurate results‚ ensuring a safe and informed environment.

1.1 What is the Evviva Sciences Mold Guide?

The Evviva Sciences Mold Guide is a detailed resource designed to help users identify and understand mold types. It includes a comprehensive mold test kit‚ optional lab analysis‚ and a downloadable guide with images and information on common molds. The guide empowers individuals to detect mold‚ interpret results‚ and take proactive steps to ensure a safe and healthy indoor environment.

1.2 Importance of Mold Identification

Mold identification is crucial for addressing health risks and preventing further contamination. It helps determine the type of mold‚ its potential hazards‚ and necessary remediation steps. Accurate identification ensures effective solutions‚ safeguarding indoor air quality and occupant health. The Evviva Sciences Mold Guide plays a key role in empowering users to make informed decisions for a safer environment.

1.3 Key Components of the Guide

The Evviva Sciences Mold Guide includes detailed information on mold species‚ their characteristics‚ growth patterns‚ and associated health risks. It provides practical strategies for prevention and remediation‚ along with a downloadable mold identification guide for visual reference. The guide also offers insights into optional lab analysis for accurate mold identification‚ ensuring users have comprehensive tools to address mold-related concerns effectively.

Features of the Evviva Sciences Mold Test Kit

The Evviva Sciences Mold Test Kit includes multiple agar petri dishes‚ cotton-tipped swabs‚ and a downloadable mold identification guide. It allows testing of HVAC systems‚ surfaces‚ and air quality‚ providing a versatile solution for comprehensive mold detection and analysis.

2.1 Overview of the Test Kit

The Evviva Sciences Mold Test Kit is a DIY solution designed for detecting mold in homes and offices. It includes 10 agar petri dishes‚ cotton-tipped swabs‚ and a downloadable mold identification guide. The kit allows users to test surfaces‚ HVAC systems‚ and indoor air quality‚ providing a comprehensive tool for identifying mold presence and ensuring accurate results for further analysis or remediation.

2.2 Components Included

The Evviva Sciences Mold Test Kit includes 10 agar petri dishes‚ 10 cotton-tipped swabs‚ and a downloadable mold identification guide. It also offers an optional lab analysis service for professional results. These components provide a complete solution for detecting and identifying mold in various environments‚ ensuring accurate and reliable outcomes for home or office use.

2.3 Advantages of the Kit

The Evviva Sciences Mold Test Kit offers ease of use‚ cost-effectiveness‚ and versatility. It allows testing of multiple areas‚ including HVAC systems and surfaces. The kit’s components enable easy sample collection‚ and optional lab analysis provides professional accuracy. These features make it an ideal choice for comprehensive mold detection and identification‚ ensuring reliable results for home assessments.

How to Use the Mold Test Kit

The Evviva Sciences Mold Test Kit is designed for easy use. Prepare a clean workspace‚ collect samples using swabs‚ incubate petri dishes‚ and compare results with the provided guide for accurate mold detection.

3.1 Step-by-Step Instructions

Prepare a clean workspace and carefully open the petri dishes. Use swabs to collect samples from surfaces or air. Seal dishes and incubate in a cool‚ dark place for 48 hours. After incubation‚ observe growth patterns and compare with the mold identification guide for preliminary results. For precise identification‚ optional lab analysis is available through EMSL.

3.2 Tips for Accurate Results

Ensure a clean workspace to prevent contamination. Use swabs correctly‚ following the guide’s instructions. Incubate dishes in a dark‚ cool area for 48 hours. Avoid direct sunlight and moisture. Compare growth patterns with the mold identification guide for initial insights. For precise results‚ consider optional lab analysis through EMSL‚ ensuring accurate genus-level identification and reliable outcomes.

Understanding Mold Test Results

Understanding mold test results is crucial for effective mold management. The mold identification guide helps visualize growth patterns‚ while optional lab analysis ensures accurate species identification for informed decision-making.

4.1 Interpreting Growth Patterns

The Evviva Sciences Mold Guide aids in interpreting growth patterns by comparing samples to reference images. Patterns like fuzzy‚ powdery‚ or velvety textures help identify mold types. The guide provides visual comparisons‚ enabling users to recognize common species such as Aspergillus or Penicillium; While the guide simplifies initial identification‚ professional lab analysis is recommended for precise species confirmation and effective remediation planning.

4.2 Common Mold Types Identified

The Evviva Sciences Mold Guide identifies common mold types like Aspergillus‚ Penicillium‚ and Cladosporium‚ frequently found in indoor environments. These molds are often detected through visual comparisons using the guide’s images and descriptions. Accurate identification is crucial for understanding health risks and implementing effective remediation strategies‚ making the guide a valuable tool for homeowners and professionals alike.

Health Risks Associated with Mold Exposure

Mold exposure can trigger allergies‚ respiratory issues‚ and infections‚ particularly in vulnerable populations like children‚ the elderly‚ and those with weakened immune systems. The guide helps users understand these risks and their implications for health and safety.

5.1 Common Health Issues

Exposure to mold can lead to allergies‚ respiratory problems‚ and infections‚ particularly in vulnerable populations. The Evviva Sciences Mold Guide highlights these risks‚ emphasizing how prolonged exposure can exacerbate conditions like asthma and weaken immune systems‚ especially in children‚ the elderly‚ and those with pre-existing health conditions.

5.2 Vulnerable Populations

Certain groups are more susceptible to mold-related health issues‚ including infants‚ young children‚ the elderly‚ and individuals with weakened immune systems. People with pre-existing conditions like asthma or chronic lung diseases are also at higher risk. The Evviva Sciences Mold Guide emphasizes the importance of protecting these vulnerable populations from mold exposure to prevent severe health complications.

Mold Prevention and Remediation Strategies

Prevent mold growth by controlling humidity‚ improving ventilation‚ and fixing water leaks promptly. Remediation involves cleaning or replacing contaminated materials and addressing underlying moisture issues effectively.

6.1 Preventing Mold Growth

Preventing mold growth requires controlling humidity‚ fixing water leaks‚ and improving ventilation. Regular inspections and cleaning surfaces can reduce mold risks. The Evviva Sciences Mold Test Kit helps detect mold early‚ allowing prompt action. Addressing moisture issues and promoting a dry environment are crucial for preventing mold growth and maintaining a healthy space.

6.2 Remediation Best Practices

Effective mold remediation involves professional assessment and containment to prevent spore spread. Use personal protective equipment and specialized cleaning solutions. Dispose of contaminated materials safely. The Evviva Sciences Mold Test Kit and EMSL lab analysis help confirm removal success. Post-remediation testing ensures a clean environment‚ while the downloadable guide provides visual references for verifying mold elimination and restoring safety.

The Role of EMSL in Mold Testing

EMSL‚ a leading AIHA EMLAP-accredited lab‚ provides precise mold analysis‚ offering accurate genus-level identification. Their expertise ensures reliable results‚ supporting effective mold remediation strategies and safe environments.

7.1 Overview of EMSL

EMSL is a leading‚ AIHA EMLAP-accredited laboratory specializing in advanced mold testing and analysis. With a focus on accuracy and reliability‚ EMSL provides detailed genus-level mold identification‚ supporting the Evviva Sciences Mold Test Kit by delivering precise results for effective mold remediation strategies and ensuring safer indoor environments through their expertise.

7.2 Benefits of Their Analysis

EMSL’s analysis provides accurate genus-level mold identification‚ crucial for understanding specific mold types and their implications. Their expertise ensures precise results‚ aiding in effective remediation strategies. This detailed analysis supports informed decision-making‚ offering homeowners and professionals reliable data to address mold issues confidently and create a safer indoor environment.

Cost Considerations and Optional Services

The Evviva Sciences Mold Test Kit is affordably priced‚ offering 10 tests for comprehensive mold detection. Optional lab analysis is available for $45 per dish‚ ensuring accurate results.

8.1 Pricing of the Test Kit

The Evviva Sciences Mold Test Kit is priced affordably‚ offering a 10-test option for comprehensive mold detection. Each kit includes agar petri dishes‚ swabs‚ and a downloadable guide. The cost-effective solution provides value for homeowners seeking to assess mold presence‚ with optional lab analysis available for precise results at an additional fee per sample.

8.2 Cost of Lab Analysis

The optional lab analysis for the Evviva Sciences Mold Test Kit incurs an additional fee of $45 per sample. This service‚ conducted by EMSL‚ a leading accredited laboratory‚ provides precise genus-level mold identification. The cost ensures accurate results‚ aiding in targeted remediation efforts and offering peace of mind for homeowners seeking detailed mold assessment.

DIY Mold Testing vs. Professional Services

The Evviva Sciences Mold Test Kit offers a cost-effective‚ user-friendly DIY solution for initial mold detection‚ while professional services provide precise‚ detailed results for severe or complex mold issues.

9.1 Pros and Cons of DIY

The Evviva Sciences Mold Test Kit offers a cost-effective‚ user-friendly DIY solution for initial mold detection. It provides convenience and basic insights but may lack the accuracy of professional lab analysis. While it’s ideal for preliminary assessments‚ DIY testing may not detect all mold species or severity‚ potentially requiring additional lab fees for detailed results.

9.2 When to Hire Professionals

Professional mold testing is recommended when DIY results are inconclusive or mold growth is widespread. Experts like EMSL provide advanced lab analysis for accurate genus-level identification‚ ensuring precise results. Hiring professionals is crucial for severe mold infestations‚ persistent health concerns‚ or when legal documentation is required‚ offering comprehensive solutions and remediation guidance.

Troubleshooting Common Issues

Common issues include contamination or unclear results. Ensure proper sample collection and follow incubation guidelines. For persistent problems‚ consult the guide or opt for professional lab analysis.

10.1 Resolving Testing Issues

Common testing issues include contamination or unclear results. Ensure proper sample collection‚ clean workspace‚ and correct incubation. Follow guide instructions for swabbing and sealing dishes. If issues persist‚ consult the guide or opt for professional lab analysis through EMSL for accurate results and detailed insights.

10.2 Avoiding Contamination

To prevent contamination‚ handle petri dishes and swabs carefully‚ avoiding direct contact with surfaces or air. Work in a clean‚ dust-free space and ensure all materials are sterile. Follow the guide’s instructions for proper swabbing techniques and seal dishes immediately after sampling. Maintain a clean workspace to minimize exposure to airborne particles and potential mold spores.

Environmental Impact of Mold

Mold significantly impacts indoor air quality and degrades building materials‚ posing environmental and health risks. The Evviva Sciences Mold Guide helps address these issues effectively.

11.1 Effects on Indoor Air Quality

Mold growth significantly degrades indoor air quality by releasing spores and mycotoxins‚ which can cause respiratory issues and allergic reactions. The Evviva Sciences Mold Guide emphasizes the importance of early detection and remediation to maintain healthy indoor environments and prevent long-term air quality damage.

11.2 Impact on Building Materials

Mold infestation can severely damage building materials like wood‚ drywall‚ and insulation by breaking down their structural integrity. The Evviva Sciences Mold Guide highlights how unchecked mold growth leads to costly repairs and potential safety hazards‚ underscoring the need for prompt identification and remediation to preserve the durability and safety of buildings.

Case Studies and Success Stories

The Evviva Sciences Mold Guide has empowered numerous users to successfully identify and address mold issues in their homes and offices‚ fostering safer and healthier environments through practical solutions and clear guidance.

12.1 Real-Life Applications

The Evviva Sciences Mold Guide has been instrumental in real-world scenarios‚ empowering users to identify mold in homes‚ offices‚ and HVAC systems. Its detailed instructions and visual aids enable individuals to detect mold accurately‚ ensuring timely remediation. The guide’s practical approach has helped countless users address mold-related issues‚ promoting healthier indoor environments and preventing potential health risks associated with mold exposure.

12.2 Success Stories

Users of the Evviva Sciences Mold Guide have shared numerous success stories‚ highlighting its effectiveness in identifying and addressing mold issues. Homeowners have successfully detected mold in basements and bathrooms‚ while professionals have utilized the guide to pinpoint contamination sources in commercial settings. These real-life applications demonstrate the guide’s practical value in promoting healthier indoor environments and preventing mold-related risks.

The Future of Mold Testing Technology

Advancements in mold testing technology‚ including AI-driven analysis and rapid detection methods‚ are revolutionizing the industry‚ with Evviva Sciences leading innovations for accurate and efficient solutions.

13.1 Emerging Trends

Emerging trends in mold testing include AI-driven analysis‚ rapid detection methods‚ and portable devices for real-time results. These advancements enhance accuracy and efficiency‚ enabling quicker identification of mold species. Evviva Sciences is at the forefront‚ integrating cutting-edge technologies with their test kits to provide users with precise and timely data‚ ensuring better decision-making for mold remediation and environmental safety.

13.2 Role of Evviva Sciences

Evviva Sciences plays a pivotal role in advancing mold testing technology by providing innovative‚ user-friendly solutions. Their test kits and guides empower individuals to identify mold accurately‚ while optional lab analysis through EMSL ensures precise results. Evviva Sciences is committed to making mold testing accessible‚ fostering education‚ and promoting environmental safety through reliable and cutting-edge tools.

The Science Behind Mold Growth

Mold is a fungus‚ not a plant or animal‚ playing a crucial role in decomposing organic matter. It grows by spreading spores that develop into hyphae‚ forming mycelium. Environmental factors like moisture‚ temperature‚ and nutrients significantly influence its growth patterns and reproduction.

14.1 Biology of Mold

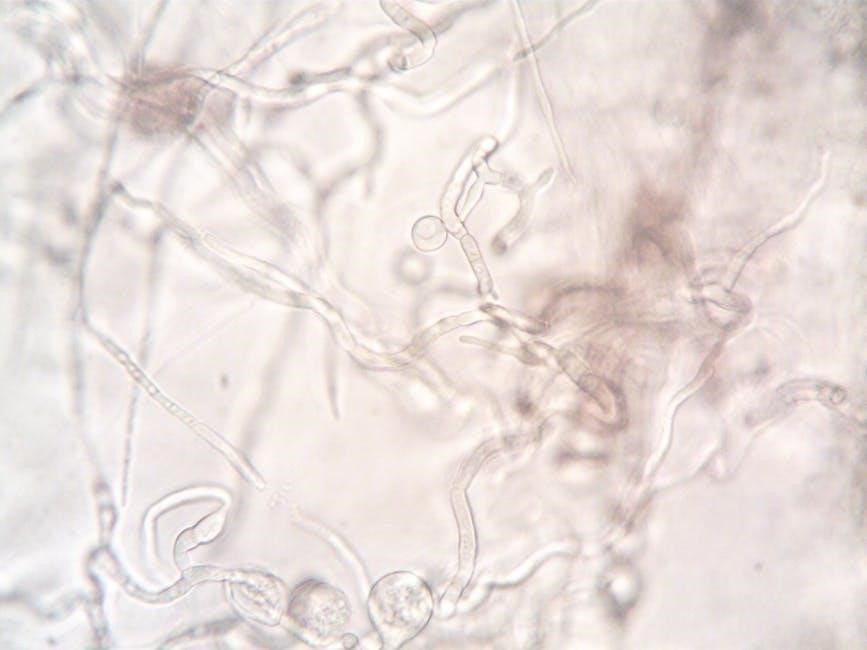
Mold is a type of fungus‚ consisting of hyphae that form a network called mycelium. It reproduces via spores‚ which can be airborne and grow under suitable conditions. Mold plays a key role in decomposing organic matter but can also thrive indoors‚ posing health risks. Understanding its biology is essential for effective identification and remediation‚ as outlined in the Evviva Sciences Mold Guide.

14.2 Factors Influencing Growth

Mold growth is influenced by moisture‚ humidity‚ temperature‚ and the presence of organic matter. Damp environments‚ poor ventilation‚ and water damage create ideal conditions for mold to thrive. The Evviva Sciences Mold Guide highlights these factors‚ emphasizing the importance of controlling humidity and addressing water issues to prevent mold proliferation in indoor spaces.

Legal and Regulatory Considerations

Understanding legal standards and regulations surrounding mold is crucial for compliance and liability. The Evviva Sciences Mold Guide helps users navigate these requirements‚ ensuring adherence to local laws and safety protocols.

15.1 Regulations Surrounding Mold

Understanding mold-related regulations is essential for legal compliance and safety. The Evviva Sciences Mold Guide outlines key laws and standards‚ helping users navigate local and national regulations to avoid liability and ensure safe remediation practices.

15.2 Legal Implications of Mold Presence

Mold presence can lead to legal consequences‚ including lawsuits and financial penalties‚ particularly in cases of negligence or failure to address health risks. The Evviva Sciences Mold Guide helps users understand these implications‚ emphasizing the importance of proper documentation and remediation to avoid legal disputes and ensure compliance with regulatory standards.

The Evviva Sciences Mold Guide empowers users with essential knowledge and tools to identify‚ prevent‚ and address mold-related issues confidently‚ ensuring a safer and healthier environment.

16.1 Summary of the Guide

The Evviva Sciences Mold Guide is a comprehensive resource offering detailed information on mold identification‚ testing‚ and prevention. It includes DIY testing kits‚ health risk insights‚ and remediation strategies‚ ensuring users can address mold issues effectively. The guide also provides optional lab analysis for precise results‚ empowering individuals to create a safer and healthier indoor environment with confidence.

16.2 Final Thoughts

The Evviva Sciences Mold Guide empowers users to take control of their indoor environments by providing essential tools and knowledge for mold identification and prevention. With its comprehensive approach‚ the guide fosters confidence in addressing mold-related concerns‚ ensuring a safer and healthier space. It stands as a valuable resource for proactive mold management and maintaining a clean‚ mold-free home or office.

va cdl manual

The Virginia CDL Manual is a comprehensive guide for commercial driver license applicants, detailing state and federal regulations, safety practices, and licensing requirements․ It includes interactive modules, practice tests, and is available in multiple formats, including PDF and audio versions, to aid in preparation for the CDL exams․

1․1 Overview of the VA CDL Manual

The Virginia CDL Manual is a detailed guide designed to help commercial driver license applicants understand the rules, regulations, and requirements for operating commercial motor vehicles (CMVs) in Virginia․ It is divided into sections covering essential topics such as safe driving practices, pre-trip inspections, and traffic laws․ The manual also includes interactive learning modules and practice test questions to prepare users for the CDL exams․ Available in both PDF and audio formats, the manual is accessible to a wide range of learners․ Additionally, it is supplemented by the Virginia Supplement to the Commercial Driver License Manual, which provides state-specific information․ The manual emphasizes the importance of knowing both federal and state regulations, making it an indispensable resource for anyone seeking a commercial driver license in Virginia․

1․2 Importance of the VA CDL Manual

The Virginia CDL Manual is an essential resource for anyone seeking a commercial driver license in Virginia․ It provides detailed information on federal and state regulations, ensuring drivers understand the legal and safety requirements for operating commercial motor vehicles (CMVs)․ The manual is crucial for preparing for the CDL exams, as it covers topics such as general knowledge, air brakes, and endorsement-specific tests․ Its interactive modules and practice questions help applicants assess their readiness and identify areas for improvement․ Additionally, the manual highlights the importance of safe driving practices and pre-trip inspections, which are critical for reducing accidents and ensuring public safety․ By studying the manual, applicants can gain the knowledge and confidence needed to pass their exams and become responsible commercial drivers․ It is a vital tool for both new and experienced drivers, serving as a comprehensive guide to Virginia’s CDL requirements and regulations․

Eligibility Requirements for a Virginia CDL

To obtain a Virginia CDL, applicants must meet specific requirements, including being at least 18 years old for intrastate and 21 years old for interstate driving․ They must also pass medical certification, prove residency, and provide valid identification and Social Security number․

2․1 Age Requirements

In Virginia, the minimum age to apply for a CDL is 18 years old for intrastate driving (within Virginia only)․ However, to operate a commercial vehicle across state lines or in interstate commerce, applicants must be at least 21 years old․ These age requirements are set by federal regulations to ensure safety and maturity among commercial drivers․ Applicants under 21 are restricted to driving within state borders and cannot transport hazardous materials or operate certain types of vehicles․ The Virginia DMV strictly enforces these age rules, and failure to meet them will result in denial of the application․ It is important to note that these requirements apply to all classes of CDLs, including Class A, B, and C licenses․ Prospective drivers should verify their eligibility based on their intended type of employment and driving scope before applying for a Virginia CDL․

2․2 Medical Certification

Obtaining a Virginia CDL requires passing a medical examination by a Federal Motor Carrier Safety Administration (FMCSA)-certified medical professional․ This ensures that drivers meet federal health standards for operating commercial vehicles safely․ The exam assesses vision, hearing, blood pressure, and overall physical fitness․ Drivers must carry a valid Medical Examiner’s Certificate with them while driving․ Failure to meet medical requirements can result in disqualification from obtaining a CDL․ Certain medical conditions, such as poor vision, hearing loss, or chronic health issues, may prevent eligibility․ The medical certification must be renewed periodically, typically every 2 years, depending on the driver’s health status․ Applicants are required to provide accurate medical history and undergo a thorough evaluation to ensure compliance with federal and state regulations․ This step is critical for maintaining road safety and adhering to the strict standards of commercial driving in Virginia․

2․3 Residency Requirements

To apply for a Virginia CDL, you must be a resident of the state․ Applicants are required to provide proof of residency, such as a valid Virginia driver’s license, utility bills, or other government-issued documents․ The Virginia Department of Motor Vehicles (DMV) verifies residency to ensure compliance with state and federal regulations․ Additionally, applicants must not hold both a Virginia-issued CDL and a Virginia-issued photo ID simultaneously, as this is prohibited by law․ Failure to meet residency requirements or violating this rule can result in penalties, including fines of up to $5,000, jail time of up to 90 days, or both․ The DMV strictly enforces these guidelines to maintain the integrity of the licensing process and ensure public safety․ Residency verification is a critical step in obtaining a CDL in Virginia, and applicants must provide accurate and valid documentation to proceed․

Types of CDLs and Endorsements in Virginia

The Virginia CDL program offers Class A, B, and C licenses, each requiring specific endorsements․ Endorsements include Air Brakes, Combination Vehicles, Passenger Transport, School Buses, Tank Trucks, and Multiple Trailers, ensuring drivers meet specialized skill requirements․

3․1 Class A CDL

A Class A CDL in Virginia is required to operate any combination of vehicles with a gross vehicle weight rating (GVWR) of 26,001 pounds or more, provided the towed vehicle has a GVWR of at least 10,001 pounds․ This license is essential for driving large commercial vehicles like tractor-trailers, double or triple trailers, and other heavy combination vehicles․ To qualify, applicants must be at least 21 years old and pass a series of knowledge and skills tests․ The Class A CDL is the most comprehensive license, allowing drivers to operate a wide range of heavy-duty vehicles․ It also requires specific endorsements, such as Air Brakes or Multiple Trailers, depending on the vehicle type․ The Virginia CDL Manual provides detailed information on the requirements and restrictions for obtaining this license, ensuring drivers are fully prepared for the exams and safe operation of these vehicles․

3․2 Class B CDL

A Class B CDL in Virginia is required to operate heavy straight trucks, buses, and construction vehicles with a gross vehicle weight rating (GVWR) of 26,001 pounds or more․ This license allows drivers to operate vehicles that do not exceed 10,001 pounds when towing․ Common examples include dump trucks, delivery trucks, and city buses․ Applicants must be at least 21 years old and pass the necessary knowledge and skills tests․ The Class B CDL is ideal for drivers who need to operate large, single-unit vehicles but do not require the combination vehicle privileges of a Class A CDL․ Specific endorsements, such as Air Brakes or Passenger, may be required depending on the vehicle type․ The Virginia CDL Manual provides detailed information on the requirements and restrictions for obtaining this license, ensuring drivers are well-prepared for the exams and safe operation of these vehicles․

3․3 Class C CDL

A Class C CDL in Virginia is designed for operating smaller commercial vehicles, typically with a gross vehicle weight rating (GVWR) of less than 26,001 pounds․ This license is often required for drivers of passenger vehicles, such as small buses or shuttles, and vehicles transporting hazardous materials․ To obtain a Class C CDL, applicants must be at least 21 years old and pass the required knowledge and skills tests․ This license is ideal for drivers who need to transport smaller groups of passengers or handle specialized cargo․ Specific endorsements, such as Hazmat or Passenger, may be necessary depending on the type of vehicle or cargo․ The Virginia CDL Manual provides detailed information on the requirements and restrictions for obtaining a Class C CDL, ensuring drivers are prepared for the exams and safe operation of these vehicles․

3․4 Endorsements

Endorsements are additional certifications that can be added to a Virginia CDL to allow drivers to operate specific types of vehicles or transport certain materials․ Common endorsements include Hazmat (for hazardous materials), Tank (for liquid or gaseous materials), Passenger (for vehicles carrying 16+ passengers), and School Bus (for transporting students)․ Each endorsement requires passing a written knowledge test and, in some cases, a skills test․ For example, the Hazmat endorsement also requires a background check and fingerprinting․ Endorsements are crucial for drivers seeking specialized roles, such as transporting hazardous materials or operating school buses․ The Virginia CDL Manual provides detailed information on the requirements for each endorsement, ensuring applicants are well-prepared for the exams․ By obtaining the necessary endorsements, drivers can expand their career opportunities in the commercial driving industry․ The manual also outlines the documentation and fees associated with adding endorsements to a CDL․

Study Materials and Resources

The official Virginia CDL Manual is a primary study resource, offering detailed information on commercial driving laws and regulations․ Additional resources include online practice tests, interactive learning modules, and audio versions for accessibility․ The manual is available in PDF format for easy access․

4․1 Official VA CDL Manual

The Official Virginia CDL Manual is the primary study resource for commercial driver license applicants․ It is available for free in PDF format, making it easily accessible for download and printing․ The manual is divided into sections covering essential topics such as driving safely, pre-trip vehicle inspections, and basic vehicle control․ It also includes detailed information on state and federal regulations, ensuring applicants are well-prepared for the CDL exams․ The manual is supplemented by interactive learning modules and practice test questions to reinforce understanding․ Additionally, it is available in multiple languages, including English and Spanish, and comes with an audio version for those who prefer auditory learning․ The Virginia CDL Manual is a comprehensive guide that aligns with the requirements of the CDL knowledge exams, making it an indispensable tool for anyone seeking a commercial driver’s license in Virginia․

4․2 Online Resources

In addition to the official Virginia CDL Manual, numerous online resources are available to aid in preparing for the CDL exams․ The Virginia DMV website offers a downloadable PDF version of the manual, as well as practice tests and interactive learning modules․ These tools are designed to help applicants familiarize themselves with the exam format and content․ Third-party websites, such as DMVVA Test, provide additional study materials, including practice questions and test tips․ Many of these resources are available in multiple languages, including English and Spanish, to accommodate diverse learners․ Furthermore, some platforms offer audio versions of the manual and interactive modules, catering to different learning styles․ These online resources complement the official manual, offering a comprehensive and flexible study experience for CDL applicants in Virginia․

4․3 Practice Tests

Practice tests are an essential tool for preparing for the Virginia CDL exams․ The official Virginia CDL Manual includes practice questions to help applicants assess their knowledge and identify areas for improvement․ Additionally, the Virginia DMV website offers interactive practice tests that simulate the actual exam format․ These tests cover topics such as general knowledge, air brakes, and combination vehicles, ensuring comprehensive preparation․ Many third-party websites, like DMVVA Test, also provide free practice tests with instant scoring and detailed explanations․ These resources are available in both English and Spanish, catering to a diverse range of applicants․ By utilizing these practice tests, candidates can familiarize themselves with the exam structure, refine their understanding of critical concepts, and build confidence before taking the official CDL exams․ Regular practice is highly recommended to achieve the best results and ensure readiness for the licensing process․

The CDL Application Process

The Virginia CDL application process involves submitting required documents, passing medical certification, and completing knowledge exams․ The VA CDL Manual provides detailed steps and resources to guide applicants through the process efficiently․

5․1 Steps to Apply

To apply for a Virginia CDL, follow these steps:
Ensure you meet the eligibility requirements, including age, residency, and medical certification․
Complete the CDL Application form (available online or at a DMV office)․
Gather required documents, such as proof of identity, residency, and Social Security number․
Pass the mandatory medical examination and obtain a Medical Examiner’s Certificate․
Submit your application and documents to the Virginia DMV․
Pay the applicable fees for the CDL class and endorsements․
Take and pass the required knowledge exams for your CDL class and endorsements․
Schedule and pass the skills test (pre-trip inspection, basic vehicle control, and road test) if required․
Receive your CDL upon successful completion of all steps․
The Virginia CDL Manual provides detailed guidance to help applicants navigate this process smoothly․

5․2 Required Documents

To apply for a Virginia CDL, you must provide specific documents to verify your eligibility․ These include:
Proof of identity, such as a valid U․S․ passport or birth certificate․
Proof of Virginia residency, like a utility bill or lease agreement․
A Social Security card or equivalent to confirm your Social Security number․
A valid Medical Examiner’s Certificate if required for your CDL class․
Immigration documents (if applicable) to prove lawful presence in the U․S․
A completed CDL Application form, available from the Virginia DMV․
Proof of military status or veteran eligibility (if applying for a fee waiver)․
These documents must be original or certified copies, as photocopies are not accepted․ Ensure all paperwork is up to date and valid to avoid delays in processing your application․ The Virginia CDL Manual provides a detailed checklist to help applicants prepare․

5․3 Fees

Applying for a Virginia CDL involves several fees, which vary based on the type of license and endorsements․ The base application fee for a CDL is currently $64, with an additional $6 for each endorsement․ For example, adding a Hazmat endorsement costs $6, while a School Bus endorsement also incurs a $6 fee․ If you need to reapply after a failed skills test, a $30 reapplication fee applies․ Payment can be made via cash, credit card, or check at the DMV office․ Military members may qualify for reduced fees or waivers under specific circumstances․ It’s important to verify the most up-to-date fee structure with the Virginia DMV, as costs are subject to change․ Additionally, falsifying information to obtain a CDL can result in fines up to $5,000 and potential legal action․ Always ensure you provide accurate and complete documentation to avoid penalties․

CDL Knowledge Exams

All Virginia CDL applicants must pass a general knowledge exam and endorsement-specific tests․ The exams assess understanding of safe driving practices, federal regulations, and vehicle operation․ Preparation is key to success․

6․1 General Knowledge Exam

The General Knowledge Exam is a mandatory test for all Virginia CDL applicants․ It covers essential topics such as safe driving practices, vehicle inspection procedures, and federal regulations․ The exam ensures drivers understand the fundamentals of operating a commercial motor vehicle (CMV)․

Key areas include traffic laws, cargo management, and emergency procedures․ The test is a foundation for all CDL classes (A, B, and C) and must be passed before applying for endorsements․
Practice tests and the official Virginia CDL Manual are recommended for preparation․ The exam format typically includes multiple-choice questions, and a passing score is required to proceed in the licensing process․

6․2 Endorsement-Specific Exams

Endorsement-specific exams are required for drivers seeking specialized certifications, such as Air Brakes, Tank Vehicle, or Passenger Transport․ These exams ensure drivers are qualified to operate specific types of commercial vehicles or transport certain cargo․ For example, the Air Brakes endorsement tests knowledge of braking systems, while the Tank Vehicle endorsement covers safe liquid cargo handling․ Each endorsement requires passing a written test and, in some cases, additional skills assessments․ The Virginia CDL Manual provides detailed study materials for each endorsement, including practice questions․ Drivers must identify the endorsements needed for their job and prepare thoroughly to pass these exams․ Failing to obtain the correct endorsements can result in fines or license restrictions․ The exams are administered by the Virginia DMV and are a critical step in obtaining a valid CDL for specialized roles, such as school bus or passenger vehicle operation․

6․3 Test Preparation Tips

Effective preparation is key to passing the Virginia CDL exams․ Start by thoroughly studying the Virginia CDL Manual, which covers all necessary topics, from general knowledge to endorsement-specific information․ Utilize the manual’s interactive modules and practice tests to reinforce your understanding․ Focus on areas where you feel less confident, such as air brakes or pre-trip inspections․ Take advantage of online resources, including practice tests in English and Spanish, to simulate exam conditions․ Review the format of the exams to familiarize yourself with the types of questions and time limits․ Additionally, consider using audio versions of the manual for on-the-go study․ Practice consistently and track your progress to identify weak areas․ Finally, ensure you understand all safety regulations and driving laws, as these are heavily emphasized in the exams․ Proper preparation will help you feel confident and ready to succeed on test day․

list of legal pets in illinois pdf

Understanding the list of legal pets in Illinois is crucial for responsible ownership. This guide outlines permitted pets, ensuring compliance with state laws and promoting animal welfare.

Overview of Legal Pets in Illinois

Illinois regulates pet ownership through state and local laws, ensuring public safety and animal welfare. Common household pets like dogs, cats, and fish are widely permitted, while exotic animals face stricter regulations. Exotic pets, such as certain reptiles and mammals, require special permits. The Illinois Department of Agriculture and local ordinances provide guidelines on permitted and prohibited species. Understanding these laws is essential for responsible pet ownership and avoiding legal issues. This overview highlights the legal framework governing pets in Illinois, helping owners make informed decisions.

Importance of Knowing Legal Pet Restrictions

Understanding legal pet restrictions in Illinois is vital for ensuring compliance with state and local laws. These regulations protect public health, safety, and animal welfare while preventing potential legal consequences. Knowing permitted and prohibited pets helps owners avoid fines and legal issues. Additionally, awareness of licensing and vaccination requirements ensures responsible pet ownership. Legal restrictions also safeguard ecosystems by limiting invasive species. Familiarizing oneself with these rules promotes harmony between pets, owners, and communities, fostering a safe and responsible environment for all.

Structure of the Article

This article provides a comprehensive overview of legal pets in Illinois, organized into clear sections for easy navigation. It begins with an introduction, followed by sections on common household pets, exotic pets, reptiles, birds, fish, small mammals, livestock, and insects. Legal considerations, such as state laws, local ordinances, permits, and licensing requirements, are also covered. The article concludes with a focus on responsible pet ownership, including vaccination and microchipping guidelines. This structured approach ensures readers can quickly access the information they need to make informed decisions about pet ownership in Illinois.

Common Household Pets in Illinois

Dogs, cats, birds, and fish are the most common household pets in Illinois, popular for their companionship and relatively low-maintenance care.

Dogs

Dogs are one of the most popular pets in Illinois, with breeds ranging from small lap dogs to large working dogs. They are known for their loyalty and companionship. Many families choose dogs for their ability to adapt to various living situations, from apartments to houses with yards. Legal requirements for dog ownership include proper licensure, vaccination, and microchipping. Illinois law also mandates that dogs be kept under control in public spaces to ensure community safety. Regular grooming and exercise are essential for their well-being.

Cats

Cats are highly popular pets in Illinois due to their independence and low-maintenance care. They are well-suited for both urban and suburban living. Legal requirements for cat ownership include proper vaccination and spaying/neutering to prevent feral populations. Illinois law encourages microchipping to ensure lost cats are reunited with their owners. While there are no specific breed restrictions, local ordinances may regulate outdoor cat populations to protect wildlife. Cats remain a beloved choice for many Illinois residents due to their affectionate and self-sufficient nature.

Fish

Fish are a popular and low-maintenance pet choice in Illinois, with many species being perfectly legal to keep. Freshwater fish, such as goldfish and tropical species, are widely kept in home aquariums. Saltwater fish are also permitted, though they require more specialized care. Illinois law does not restrict most fish species, making them a versatile option for pet owners. They are ideal for small spaces and require minimal interaction, making them a great choice for busy individuals or families looking for a calming and visually appealing pet.

Birds

Birds are a popular and legally permitted pet in Illinois, offering companionship and vibrant personalities. Domestic birds, such as canaries, parakeets, and cockatiels, are widely kept as pets. Larger birds like parrots and macaws are also legal but require more space and specialized care. Illinois law allows the ownership of most bird species, provided they are not classified as wildlife. Wild birds, such as native species, are protected under state and federal laws, making them illegal to keep without proper permits. Birds remain a favorite choice for many due to their unique traits and relatively low-maintenance care.

Exotic Pets in Illinois

Exotic pets in Illinois are subject to specific regulations. Exotic pets include unusual animals like hedgehogs, sugar gliders, and certain reptiles. Ownership requires adherence to state and local laws, ensuring the welfare of both pets and communities. Proper permits and licenses are often mandatory for exotic pet ownership in Illinois.

Legal Definitions of Exotic Pets

In Illinois, exotic pets are defined as animals not traditionally kept as pets, such as reptiles, amphibians, certain mammals, and birds. Legal definitions vary, but exotic pets generally exclude domesticated animals like dogs, cats, and livestock. The Illinois Department of Agriculture and Department of Natural Resources regulate exotic pet ownership. These definitions help distinguish between common household pets and non-traditional species requiring special permits. Understanding these legal distinctions is crucial for compliance with state and local regulations.

Permitted Exotic Pets

In Illinois, certain exotic pets are permitted for ownership without special permits. These include reptiles like ball pythons, corn snakes, and bearded dragons, as well as small mammals such as hedgehogs and sugar gliders. Some birds, like parrots and cockatiels, are also allowed under state law. These pets are considered legal as long as they are not on the prohibited list and meet specific care and housing requirements. Ownership of permitted exotic pets is popular among enthusiasts, offering unique companionship opportunities.

Prohibited Exotic Pets

In Illinois, certain exotic pets are prohibited due to safety and environmental concerns. These include large carnivores like lions, tigers, and bears, as well as wolves and primates. Some venomous snakes, such as cobras and vipers, are also banned. Additionally, invasive species like Burmese pythons are prohibited to protect local ecosystems. Ownership of these animals is restricted to ensure public safety and prevent ecological harm. Always check state regulations before considering exotic pets to avoid legal issues.

Special Permits for Exotic Pets

In Illinois, certain exotic pets require special permits to ensure responsible ownership. These permits are typically issued by state agencies like the Illinois Department of Natural Resources. For example, permits may be granted for educational purposes, scientific research, or public display. The application process involves demonstrating adequate facilities and care for the animal. Permits are often restricted to specific species and situations, ensuring that exotic pet ownership aligns with public safety and conservation goals. Always consult state regulations before seeking a permit.

Reptiles and Amphibians as Pets

Reptiles and amphibians are popular pets in Illinois due to their calm nature and relatively low maintenance. Species like corn snakes, bearded dragons, and geckos are common choices.

Legal Status of Reptiles in Illinois

In Illinois, reptiles and amphibians are regulated under state wildlife laws. Most common pet species, like corn snakes and bearded dragons, are legal without permits. However, venomous snakes, alligators, and certain native species are prohibited. The Illinois Department of Natural Resources enforces these regulations to protect public safety and native ecosystems; Owners must ensure their pets are not invasive or endangered. Permits may be required for specific species or for breeding purposes. Always check local ordinances, as they may impose additional restrictions.

Popular Reptilian Pets

Bearded dragons and corn snakes are among the most popular reptilian pets in Illinois due to their docile nature and manageable care. Leopard geckos and crested geckos are also favored for their small size and colorful appearance. Ball pythons and king snakes are sought after by enthusiasts for their calm temperament. These species are widely accepted as pets and are bred in captivity, ensuring their legality and availability. They are often recommended for both novice and experienced reptile owners in the state.

Caring for Reptilian Pets

Caring for reptilian pets in Illinois requires attention to their specific needs. Proper housing, such as terrariums or aquariums, is essential, with adequate ventilation and space. Heating and lighting are critical, as many species need UVB light for calcium metabolism. A balanced diet tailored to the species is vital, whether carnivorous, herbivorous, or omnivorous. Fresh water should always be available, and the environment should be cleaned regularly. Substrate choices must be safe for the pet, avoiding loose materials that can cause respiratory issues. Regular veterinary check-ups ensure the health and well-being of these unique animals.

Birds as Pets in Illinois

Birds are popular pets in Illinois, with diverse species ranging from domestic to exotic. Their vibrant colors and unique sounds make them delightful companions. Always research local regulations to ensure compliance with ownership laws.

Domestic Birds

Domestic birds, such as parakeets, cockatiels, and canaries, are popular pets in Illinois. They are known for their vibrant colors, melodious songs, and affectionate nature. These birds are generally legal to keep as pets and are considered low-maintenance compared to other pets. Domestic birds require a spacious cage, a balanced diet of seeds and vegetables, and regular social interaction. Many species are easy to care for, making them ideal for families or first-time pet owners. Always ensure compliance with local regulations regarding bird ownership in Illinois.

Wild Birds and Legal Restrictions

In Illinois, wild birds are protected under state and federal laws, making them illegal to keep as pets without special permits. The Illinois Wildlife Code prohibits the capture or possession of native bird species, including songbirds, raptors, and waterfowl. Exceptions exist for licensed rehabilitation centers or educational programs. Violations can result in fines and penalties. Residents are encouraged to appreciate wild birds in their natural habitat rather than keeping them in captivity. This ensures the conservation and well-being of these animals.

Captive-Bred Birds

Captive-bred birds are a popular choice for pet enthusiasts in Illinois, offering a legal alternative to wild birds. These birds are raised in controlled environments, ensuring they adapt well to domestic life. Many species, such as parakeets and cockatiels, are commonly kept as pets. Illinois law allows the possession of captive-bred birds, provided they are obtained from licensed breeders. Owners must adhere to local regulations, which may include obtaining permits for certain species. Proper care and attention to these birds’ needs are essential for their well-being.

Fish and Aquatic Pets

Fish and aquatic pets are popular in Illinois, with many species permitted. Goldfish, guppies, and betta fish are common choices. Illinois allows various freshwater and saltwater species, regulated by state aquarium trade laws; These pets are ideal for small spaces and offer diverse care requirements, making them versatile options for enthusiasts.

Freshwater Fish

Freshwater fish are widely permitted as pets in Illinois, with species like guppies, goldfish, and betta fish being popular choices. Native Illinois fish, such as bluegill and sunfish, are also legal for aquariums. Many colorful freshwater aquarium fish, including neon tetras and cichlids, are allowed under state regulations. Illinois permits a variety of freshwater species, making them a popular choice for both beginners and experienced aquarium enthusiasts. These fish thrive in well-maintained tanks and are a great option for those interested in aquatic pets.

Saltwater Fish

Saltwater fish are permitted in Illinois, with popular species including clownfish and damselfish. However, certain exotic varieties may require special permits under state regulations. Their care demands high-quality filtration systems and stable water parameters, making them suitable for experienced aquarium enthusiasts. Illinois allows a range of marine species, provided owners adhere to legal guidelines and maintain proper aquarium conditions. This ensures both the well-being of the fish and compliance with local laws.

Small Mammals as Pets

Small mammals like rabbits, guinea pigs, and hedgehogs are popular pets in Illinois, offering affectionate companionship with proper care and housing. They are legally permitted statewide.

Rabbits

Rabbits are legal and popular pets in Illinois, with many breeds like Dutch Dwarf and Lionhead being favorites. They require proper housing, a balanced diet, and regular veterinary care. Rabbits are social animals and thrive in safe, spacious environments. Illinois law permits keeping rabbits as pets, but releasing them into the wild is regulated. Owners must ensure they are not releasing non-native species, as this can harm local ecosystems. Proper licensing and adherence to local ordinances are essential for responsible rabbit ownership in the state;

Guinea Pigs

Guinea pigs are legal and popular small mammals kept as pets in Illinois. They are friendly, social animals that thrive in pairs or groups. Proper care includes a spacious cage with hiding places, a balanced diet of hay, vegetables, and pellets, and regular cleaning. Illinois law permits keeping guinea pigs as pets without special permits. They are low-maintenance and ideal for families with children, provided owners ensure their environment is clean and safe. Guinea pigs are not considered exotic and are widely accepted as household pets in the state.

Hedgehogs

Hedgehogs are legal pets in Illinois and have gained popularity for their unique appearance and calm demeanor. They require minimal space and a proper diet of commercial hedgehog food or insects. Illinois law allows keeping hedgehogs without special permits, but owners must ensure proper care. Hedgehogs are low-maintenance, quiet, and suitable for apartment living. They are not considered exotic pets in Illinois, making them an accessible choice for many residents. Proper housing and a wheel for exercise are essential for their well-being.

Livestock as Pets

Livestock such as cows, goats, and sheep can be kept as pets in Illinois, subject to local zoning laws and regulations ensuring proper care and safety.

Domestic Livestock

Domestic livestock, such as cows, goats, and sheep, are commonly kept as pets in Illinois, provided they comply with local zoning regulations. These animals are typically raised for companionship or small-scale farming purposes. Ownership requires proper enclosure and adherence to health standards to ensure both animal welfare and community safety. Additionally, some municipalities may require special permits for keeping livestock, especially in urban or suburban areas. Owners must also ensure that their property size and layout accommodate the needs of these animals effectively.

Miniature Livestock

Miniature livestock, such as pygmy goats, miniature donkeys, and small-breed cattle, are gaining popularity as unique pets in Illinois; These animals are often kept for companionship or small-scale farming. While they are smaller in size, they still require adequate space, proper care, and suitable housing; Ownership of miniature livestock is subject to local zoning laws and may require special permits, especially in non-rural areas. Additionally, owners must ensure these animals are bred for domestic purposes and not considered exotic or invasive species under state regulations.

Insects as Pets

Insects like stick insects and praying mantis are legal pets in Illinois. They are low-maintenance and popular for their unique characteristics. Some species may require permits.

Legal Status of Insect Pets

In Illinois, most insects are legal to keep as pets, with exceptions for invasive or harmful species. Common legal insects include stick insects, praying mantis, and certain beetles. The state permits keeping insects for educational or hobby purposes, provided they do not pose ecological risks. Some insects, like the Asian longhorned beetle, are prohibited due to environmental concerns. The Illinois Department of Agriculture regulates invasive species to protect native ecosystems. Owners must ensure their insect pets do not threaten local biodiversity.

While no specific permits are required for most insect pets, residents should verify local ordinances. Some municipalities may have additional restrictions. Always check the legality of specific insect species before keeping them as pets in Illinois.

Popular Insect Pets

In Illinois, stick insects, praying mantis, and darkling beetles are popular insect pets due to their unique characteristics and relatively low maintenance care. These insects are often kept for their calm nature and fascinating behaviors. Many enthusiasts also keep tarantulas and other arachnids, though they are technically not insects. These pets are popular in educational settings and among hobbyists who appreciate their diversity and ecological roles.

Stick insects, in particular, are favored for their slow movement and ease of care, while praying mantis are admired for their predatory habits. These insects are legally kept as pets in Illinois, making them a popular choice for those interested in entomology or unusual pets.

Legal Considerations

Understanding state laws, regulations, and local ordinances is crucial for legal pet ownership in Illinois. Compliance ensures responsible pet keeping and avoids legal consequences.

State Laws and Regulations

In Illinois, state laws regulate the ownership of various pets to ensure public safety and environmental protection. The Illinois Department of Agriculture and Illinois Department of Natural Resources enforce these regulations. Certain exotic and wild animals are prohibited as pets due to potential risks. Permits are required for specific species, and restrictions apply to importing and selling animals. These laws also cover animal welfare standards and disease control measures. Compliance with state regulations is essential for legal pet ownership in Illinois.

Local Ordinances

Local ordinances in Illinois provide additional layers of regulation for pet ownership, varying by city or county. These rules often address zoning restrictions, noise limits, and waste management. For example, some municipalities may limit the number of pets per household or prohibit specific breeds. Local animal control agencies enforce these ordinances, ensuring compliance with community standards. Pet owners must familiarize themselves with both state laws and local rules to avoid penalties. These ordinances aim to maintain public order and safety while accommodating diverse pet-keeping practices across Illinois communities.

Permits and Licenses

In Illinois, certain pets require specific permits and licenses to ensure compliance with state and local regulations. Dogs, for instance, must be licensed annually, while exotic pets often need special permits. These permits are typically obtained through local animal control offices or county clerks. The purpose of these requirements is to ensure public safety, prevent the release of non-native species, and promote responsible pet ownership. Pet owners must renew these permits regularly and adhere to associated guidelines.

Responsible Pet Ownership

Responsible pet ownership in Illinois involves ensuring pets are vaccinated, microchipped, and licensed. Owners must provide proper care, housing, and adhere to local regulations to maintain community safety.

Licensing Requirements

In Illinois, licensing requirements vary by county and municipality but generally apply to dogs and sometimes cats. Dogs must be licensed annually, with fees differing based on vaccination status.
Owners must provide proof of current rabies vaccination to obtain or renew a license. Cats may also require licenses in certain areas. Failure to license pets can result in fines or penalties. Licensing ensures pets can be identified and returned if lost, promoting public safety and responsible ownership. Check local regulations for specific requirements.

Vaccination Requirements

In Illinois, vaccination requirements for pets focus primarily on rabies prevention. All dogs and cats must be vaccinated against rabies by a licensed veterinarian. The initial vaccination is followed by booster shots, typically annually or every three years, depending on the vaccine type. Proof of current rabies vaccination is mandatory for licensing. Other pets, like ferrets or exotic animals, may have specific vaccination requirements. Compliance ensures public health safety and prevents disease spread. Always verify local regulations for detailed vaccination needs.

Microchipping and Identification

In Illinois, microchipping and proper identification are vital for pet ownership. State law requires dogs and cats to have a microchip implant for identification purposes. This ensures pets can be reunited with their owners if lost. The microchip, about the size of a grain of rice, is implanted between the shoulder blades. Owners must register the microchip with current contact information. This system significantly increases the likelihood of recovering lost pets. Compliance with microchipping laws helps prevent pet loss and supports public safety.

In Illinois, legal pets include common household animals like dogs, cats, birds, and fish. Exotic pets, such as hedgehogs and certain reptiles, are permitted with proper permits. Insects, like bees, are also legal. However, prohibited pets include dangerous wildlife like bears and venomous snakes. Responsible ownership requires adherence to state and local laws, ensuring proper licensing and care. This summary provides a concise overview of allowable pets in Illinois, highlighting the diversity of options while emphasizing regulatory compliance.

Final Thoughts on Pet Ownership

Owning pets in Illinois offers a diverse range of options, from common household animals to exotic species. Adhering to state laws and local regulations is crucial for compliance. Ensuring proper care and attention is essential for your pet’s well-being. The rewards of ownership, such as companionship and joy, are substantial. These rewards come with responsibilities, including licensing, vaccinations, and microchipping. By fulfilling these obligations, you can enjoy a lawful and fulfilling pet ownership experience in Illinois, fostering meaningful connections with your pets and enhancing your life.

a pocket guide to public speaking pdf

A Pocket Guide to Public Speaking offers a concise yet comprehensive overview of public speaking, covering topics like research, organization, and delivery․ Designed for students and professionals, it provides practical advice on adapting to audiences and using inclusive language, making it an invaluable resource for improving communication skills in various settings․

Overview of Public Speaking Basics

A Pocket Guide to Public Speaking provides a foundational understanding of public speaking, covering essential topics such as invention, research, organization, and delivery․ It offers practical guidance on adapting to audiences, using inclusive language, and selecting organizational patterns․ The guide addresses challenges faced by ESL students and includes advice on digital tools and online presentations․ Its concise format makes it accessible for academic, professional, and community settings, ensuring readers gain the skills to deliver polished speeches and presentations effectively․ This resource is ideal for anyone seeking to improve their communication abilities․

Importance of Effective Communication

A Pocket Guide to Public Speaking emphasizes the importance of effective communication in conveying ideas clearly and engaging audiences․ It highlights how well-structured messages can build connections and inspire action․ The guide underscores the role of inclusive language and audience adaptation in ensuring messages resonate․ By mastering these skills, speakers can communicate more confidently and persuasively, whether in academic, professional, or community settings․ Effective communication is not just about speaking but also about being understood and making a lasting impact․

Key Objectives of Public Speaking

A Pocket Guide to Public Speaking outlines the key objectives of public speaking, focusing on clear expression of ideas, audience engagement, and persuasion․ It emphasizes the importance of organizing content logically to ensure coherence and impact․ The guide also highlights the need to adapt messages to different audiences, ensuring relevance and effectiveness․ By achieving these objectives, speakers can communicate confidently, inspire action, and foster meaningful connections; These principles are essential for delivering polished speeches and presentations in various settings, from classrooms to professional environments․

Audience Analysis and Adaptation

Understanding audience needs, interests, and expectations is crucial for effective communication․ Tailoring your message ensures relevance and engagement, fostering a meaningful connection with your listeners․

Understanding Audience Demographics

Audience demographics include age, gender, education level, occupation, and cultural background․ Analyzing these factors helps tailor your message to their needs and preferences․ For example, younger audiences may respond better to modern references, while professionals might value data-driven insights․ Understanding demographics ensures your content is relevant and engaging․ It also helps anticipate potential questions and concerns, allowing you to address them proactively․ Additionally, cultural sensitivity is key to building rapport and avoiding misunderstandings․ By aligning your speech with demographic insights, you create a more impactful and relatable experience for your audience․

Analyzing Audience Psychographics

Psychographics involve understanding an audience’s values, attitudes, interests, and lifestyle․ This helps tailor your message to their beliefs and preferences․ For instance, identifying whether the audience is conservative or progressive can shape your tone and examples․ Interests and hobbies also guide content relevance․ Analyzing psychographics ensures your speech resonates emotionally and intellectually․ It helps anticipate their reactions and aligns your goals with their expectations․ By addressing their values, you build trust and credibility, making your speech more persuasive and memorable․ Psychographics add depth to your audience analysis, enabling a more personalized and impactful presentation․ This connection fosters engagement and mutual understanding․

Adapting Your Message to the Audience

Adapting your message ensures it resonates with your audience’s needs and preferences․ Start by understanding their background, values, and expectations; Adjust your language, tone, and examples to align with their perspective․ Tailor your content to address their interests and concerns․ Use persuasive elements like logic, emotion, or storytelling based on what motivates them․ Be flexible in delivery, adjusting pace and emphasis to maintain engagement․ Adaptation fosters connection, making your speech more relatable and impactful․ It demonstrates respect for the audience and enhances your credibility as a speaker․ This approach ensures your message is both meaningful and memorable to your listeners․

Research and Organization

Research and organization are crucial for effective public speaking․ Thorough research forms the foundation, while logical structure ensures clarity and flow, engaging your audience and conveying your message effectively․

Conducting Research for Your Speech

Conducting research is essential for crafting a well-informed and engaging speech․ Start by identifying credible sources such as academic journals, books, and reputable websites․ Gather relevant data, statistics, and expert opinions to support your arguments․ Organize your findings into key points, ensuring they align with your speech’s purpose and audience needs․ Use note-taking techniques to categorize information, making it easier to reference during drafting․ Always verify facts to maintain credibility and avoid misinformation; Effective research lays the groundwork for a persuasive and impactful speech, helping you connect with your audience and achieve your communication goals․

Organizing Your Speech Structure

Organizing your speech structure is crucial for clarity and engagement․ Begin with an introduction that grabs attention and states your thesis․ Follow with a body that presents main points logically, supported by evidence and examples․ Use transitions to connect ideas smoothly․ Conclude by summarizing key points and reinforcing your message․ Ensure each section aligns with your audience’s interests and needs․ A clear structure helps maintain focus, making your speech more impactful and easier to follow․ Proper organization enhances credibility and ensures your message resonates effectively with the audience․

Creating an Effective Outline

A well-crafted outline is essential for a coherent and persuasive speech․ Start with a clear title and thesis statement․ Divide your speech into introduction, body, and conclusion․ Use bullet points for main ideas and subpoints for supporting details․ Ensure each section aligns with your thesis․ Balance your structure to avoid overloaded sections․ Use Roman numerals or letters for main points and indent subpoints․ This hierarchical approach ensures logical flow and helps maintain audience engagement․ A strong outline serves as a roadmap, guiding you through your speech with confidence and clarity․

Practice and Delivery

Practice and delivery are critical for impactful public speaking․ Rehearse thoroughly, focusing on vocal modulation, pacing, and gestures․ Engage your audience with eye contact and confident body language․

Rehearsing Your Speech

Rehearsing your speech is essential for mastering delivery and content․ Practice aloud to refine tone, pacing, and inflection․ Rehearse in front of others to gather feedback and adapt to audience reactions․ Time yourself to ensure your speech fits within the allotted period․ Record your rehearsals to identify areas for improvement, such as filler words or awkward pauses․ Practice in the actual speaking environment to familiarize yourself with the space․ Consistent rehearsal builds confidence and ensures a polished performance․ Stay flexible to make final adjustments based on practice insights․

Mastering Vocal and Nonverbal Delivery

Mastering vocal and nonverbal delivery enhances your speech’s impact․ Use a strong, clear voice with proper pitch and tone to engage listeners․ Vary your pace to emphasize key points and maintain audience interest․ Practice projection to ensure your voice reaches everyone․ Nonverbal cues, such as gestures, facial expressions, and eye contact, convey confidence and sincerity․ Stand tall, use purposeful body language, and avoid distracting movements․ Align your nonverbal signals with your message to create consistency and credibility․ These elements work together to make your delivery more compelling and professional․

Handling Stage Fright and Nervousness

Stage fright and nervousness are natural when speaking in public․ To manage them, practice deep breathing exercises to calm your nerves․ Focus on your message rather than your anxiety, and remind yourself that nervousness can enhance your performance․ Visualize success and engage with your audience to build connection․ Reframe nervous energy as excitement, and accept that some level of nervousness is normal․ Overprepare your material to boost confidence, and gradually expose yourself to speaking opportunities to become more comfortable․ Remember, confidence grows with practice and experience․

Visual Aids and Presentation Tools

Visual aids like slides, charts, and images enhance presentations by making information clearer and engaging audiences․ Use tools like PowerPoint or Canva to design visually appealing slides․ Avoid clutter, focus on key points, and use high-quality visuals․ Practice integrating multimedia elements like videos or audio to captivate your audience․ Ensure all tools support your message and are easy to navigate during delivery․ Effective use of visual aids can significantly improve audience understanding and retention of your speech․

Using Visual Aids Effectively

Visual aids enhance presentations by making complex ideas clearer and engaging audiences visually․ Use slides, charts, or images to support key points, ensuring they align with your message․ Keep designs simple and uncluttered, with readable fonts and consistent color schemes․ Avoid overloading slides with text; instead, use bullet points and visuals to convey information concisely․ Ensure visuals are high-quality and relevant to maintain professionalism․ Practice using aids during rehearsals to seamlessly integrate them into your delivery․ Effective use of visual aids can enhance audience understanding, retention, and overall engagement with your speech․

Best Practices for Creating Slides

When creating slides, prioritize clarity and conciseness․ Limit text to key points, using bullet points or short phrases․ Avoid clutter by minimizing animations and transitions․ Use high-quality images and graphics that reinforce your message․ Maintain consistent fonts, colors, and layouts for a professional look․ Ensure slides are readable from a distance, with font sizes of at least 24-point for headings․ Apply the 6×6 rule: no more than six words per line and six lines per slide․ Focus on visuals that complement your speech, rather than distract․ Tailor slides to your audience, ensuring they enhance understanding and engagement without overwhelming viewers․

Incorporating Multimedia Elements

Incorporating multimedia elements like videos, audio clips, or animations can enhance engagement and clarify complex ideas․ Use relevant visuals to support your message, ensuring they align with your speech’s purpose․ Videos should be short and impactful, while audio clips must be clear and well-timed․ Avoid overloading slides with excessive animations, as they can distract․ Instead, use subtle transitions to maintain a professional look․ Infographics and charts are excellent for presenting data visually․ Ensure all multimedia elements are synchronized with your speech and tailored to your audience for maximum impact․ This approach makes your presentation dynamic and memorable․

Types of Speeches

Types of speeches include informative, persuasive, and special occasion․ Each serves unique purposes, from educating audiences to celebrating milestones, ensuring messages resonate effectively always․

Informative Speeches

Informative speeches aim to educate or share knowledge on a specific topic․ Speakers present facts, data, or insights to enlighten the audience․ The goal is to inform, not persuade․ Effective informative speeches require clear organization, starting with an introduction, followed by detailed explanations in the body, and ending with a concise conclusion․ Using visual aids, examples, and storytelling can enhance engagement․ Speakers should avoid jargon and ensure content is accessible to all listeners․ Practicing clarity and pacing helps deliver information effectively, making the speech both informative and memorable for the audience․

Persuasive Speeches

Persuasive speeches aim to convince the audience to adopt a particular viewpoint or take action․ Speakers use compelling arguments, emotional appeals, and logical evidence to influence their listeners․ The structure typically includes a strong opening to grab attention, evidence-based arguments, and a persuasive conclusion․ Understanding the audience’s values and beliefs is crucial to crafting effective persuasive content․ Speakers may also address counterarguments to strengthen their position․ Delivering with confidence and passion enhances the speech’s impact, making it more likely to sway the audience’s opinions or motivate them to act accordingly․ Ethos, pathos, and logos are key tools in persuasion․

Special Occasion Speeches

Special occasion speeches are delivered during events like weddings, graduations, or eulogies, aiming to celebrate, commemorate, or inspire․ These speeches require a tone that matches the event’s mood, whether formal, heartfelt, or motivational․ Speakers should connect emotionally with the audience while honoring the occasion․ Key elements include a heartfelt opening, personal anecdotes, and an uplifting closing․ The speech should be tailored to the event’s significance, ensuring it resonates with listeners and leaves a lasting impression․ Adaptability and sincerity are essential to make the speech memorable and appropriate for the occasion․

Overcoming Public Speaking Anxiety

Overcoming public speaking anxiety involves understanding its roots, preparing thoroughly, and adopting a positive mindset․ Practice and gradual exposure to speaking situations can build confidence and reduce fear․

Understanding Speech Anxiety

Speech anxiety, or glossophobia, is a common phenomenon where individuals experience nervousness or fear when speaking in public․ It manifests physically, such as through rapid heartbeat or sweating, and psychologically, like fearing judgment or embarrassment․ Understanding its roots—whether from past experiences, fear of evaluation, or genetic predispositions—is crucial․ While it can hinder performance, some level of anxiety can enhance focus and energy․ Recognizing and accepting these feelings is the first step toward managing them effectively․ This awareness helps speakers develop strategies to channel anxiety into positive outcomes, fostering confidence and improving communication skills over time․

Techniques to Reduce Nervousness

To manage public speaking anxiety, several techniques can be employed․ Deep breathing exercises help calm the nervous system, while positive visualization focuses the mind on successful outcomes․ Physical relaxation techniques, such as shoulder rolls or light stretching, reduce tension․ Reframing nervousness as excitement can shift perspective․ Focusing on the audience’s needs rather than self-image also eases stress․ Gradual exposure to speaking situations and thorough preparation boost confidence․ These strategies, when practiced consistently, help speakers navigate nervousness and deliver their messages effectively, fostering a more comfortable and engaging experience․

Building Confidence as a Speaker

Building confidence as a speaker involves preparation, practice, and a positive mindset․ Start by setting realistic expectations and celebrating small successes; Focus on your strengths and the value you bring to the audience․ Learning from feedback, rather than fearing criticism, helps refine your skills․ Embrace opportunities to speak, as experience builds assurance․ Additionally, understanding that most audiences want you to succeed can shift your perspective․ Over time, consistent effort and self-encouragement will foster confidence, enabling you to connect effectively and deliver impactful speeches with ease and assurance․ Confidence grows with each step forward․

Digital Tools and Online Presentations

Digital tools empower speakers to craft and deliver engaging online presentations, leveraging technology for preparation, virtual delivery, and audience interaction, enhancing overall communication effectiveness globally․

Using Technology for Speech Preparation

Technology enhances speech preparation through AI tools for drafting, mind mapping apps for organizing ideas, and presentation software like PowerPoint or Canva for designing visuals․ Practice tools like speech-to-text apps and virtual reality platforms simulate real audiences, helping refine delivery․ Collaboration tools enable feedback sharing and real-time editing․ Digital resources provide access to templates, research materials, and tutorials, streamlining preparation․ These tools not only save time but also improve engagement and clarity, ensuring a polished presentation․ Leveraging technology transforms speech preparation into a more efficient and creative process․

Delivering Speeches in Virtual Settings

Delivering speeches in virtual settings requires adaptability and engagement strategies․ Use video conferencing tools like Zoom or Teams effectively, ensuring a stable internet connection and proper lighting․ Engage your audience with interactive elements such as polls, Q&A sessions, and chat interactions․ Maintain eye contact with the camera to simulate in-person connection․ Minimize distractions by choosing a quiet environment and dressing professionally․ Practice your delivery to adapt to the virtual format, focusing on clear enunciation and gestures․ Leveraging these techniques enhances your virtual presentation’s impact and keeps your audience attentive and involved․

Engaging Audiences Online

Engaging audiences online involves using interactive tools and dynamic content․ Incorporate polls, Q&A sessions, and chat interactions to encourage participation․ Use high-quality visuals and dynamic slides to capture attention․ Avoid clutter and ensure content is concise․ Encourage audience participation through questions or discussions․ Use body language and eye contact with the camera to maintain connection․ Leverage storytelling and humor to keep the audience interested․ Consistent interaction helps build rapport and keeps the audience focused․ These strategies ensure your online presentation is memorable and impactful, fostering a sense of connection despite the virtual setting․

Public speaking is a vital skill for effective communication and audience connection․ Continuous practice builds confidence and clarity․ Empower yourself to speak with purpose․

Mastering public speaking involves understanding your audience, organizing content clearly, and delivering with confidence․ Adapt your message to audience demographics and psychographics for greater impact․ Effective speeches require thorough research, a structured outline, and regular practice․ Manage nervousness with preparation and relaxation techniques․ Use visual aids wisely to enhance engagement without distracting․ Whether informative, persuasive, or for special occasions, tailor your approach to the context․ Continuous improvement and embracing feedback are essential for growth․ Remember, public speaking is a skill that evolves with persistence and practice, helping you communicate ideas with clarity and confidence․

Continuous Improvement in Public Speaking

Continuous improvement in public speaking requires consistent practice, feedback, and self-reflection․ Seek opportunities to speak regularly and refine your skills through repetition․ Record your speeches to identify areas for growth, such as vocal delivery, pacing, and body language․ Incorporate feedback from others to enhance clarity and engagement․ Stay updated on new techniques and tools to adapt your approach․ Set incremental goals to challenge yourself and track progress over time․ Embrace lifelong learning to evolve as a speaker and deliver impactful, memorable presentations․

Final Thoughts on Becoming a Skilled Speaker

Becoming a skilled speaker is a transformative journey that enhances personal and professional growth․ By mastering public speaking, you gain confidence, clarity, and the ability to connect with diverse audiences․ Embrace opportunities to practice, adapt, and refine your skills․ Remember, effective communication is a lifelong process, and improvement comes with persistence and dedication; Stay curious, seek feedback, and apply what you learn to real-world situations․ With consistent effort, you’ll become a compelling and impactful speaker, ready to inspire and influence others in every setting․

ge monogram fridge manual

Welcome to the GE Monogram Fridge Manual, your comprehensive guide to understanding and maintaining your appliance․ Located behind the grille panel, this essential resource provides detailed instructions, safety tips, and troubleshooting solutions to ensure optimal performance and longevity․ Use it to explore features, installation requirements, and maintenance routines for your refrigerator․

Overview of the GE Monogram Refrigerator Series

The GE Monogram Refrigerator Series offers a blend of style, convenience, and advanced technology․ Designed to integrate seamlessly with kitchen cabinetry, these refrigerators feature customizable door panels and premium materials like 304-grade stainless steel․ With models ranging from 72-inch built-in units to French-door designs, the series caters to diverse needs, ensuring both functionality and aesthetic appeal․ Each model is crafted to deliver exceptional performance and energy efficiency, making them a standout choice for modern kitchens․

The series includes innovative features such as advanced cooling systems and eco-friendly designs, ensuring optimal food preservation and reduced energy consumption․ Whether you’re looking for a spacious layout or sleek, minimalist aesthetics, the GE Monogram Refrigerator Series provides a tailored solution for every homeowner seeking quality and durability in their appliances․

Importance of the Manual for Proper Operation

The GE Monogram Fridge Manual is essential for ensuring safe and efficient operation of your refrigerator․ It provides detailed instructions for installation, maintenance, and troubleshooting, helping you avoid potential issues․ The manual includes safety guidelines, operating instructions, and care tips to maintain optimal performance and extend the appliance’s lifespan․ By following the manual, you can ensure your refrigerator functions correctly, preserving food quality and energy efficiency while adhering to manufacturer recommendations․

Mini-Manual Location and Purpose

The mini-manual is conveniently located behind the grille panel at the top of your GE Monogram refrigerator․ This compact guide provides quick access to essential information, including operating instructions, safety tips, and troubleshooting steps․ After use, return it to its original location for easy reference․ The mini-manual serves as a handy resource, ensuring you can address common issues and maintain your appliance efficiently without needing the full manual․

Key Features and Benefits of the GE Monogram Fridge

The GE Monogram fridge offers advanced cooling technology, customizable door panels, and energy-efficient design․ These features ensure optimal performance, aesthetic integration, and eco-friendly operation for modern kitchens․

Advanced Cooling Technology

The GE Monogram fridge features advanced cooling technology with dual compressors for independent temperature control in the refrigerator and freezer․ Smart sensors monitor and adjust internal conditions to maintain optimal cooling, ensuring even air circulation and precise humidity levels․ This technology minimizes temperature fluctuations, preserves food freshness, and enhances energy efficiency, delivering superior performance for modern kitchen needs․

Customizable Door Panels for Aesthetic Integration

GE Monogram fridges offer customizable door panels to seamlessly integrate with your kitchen design․ These panels can be tailored to match surrounding cabinetry, whether through wood finishes, metal accents, or custom paints․ This feature allows for a cohesive aesthetic, blending the appliance into your interior decor while maintaining high functionality․ It’s a perfect solution for those seeking a luxurious, built-in look that complements their unique kitchen style and layout․

Energy Efficiency and Sustainability

GE Monogram fridges are designed with energy efficiency in mind, featuring advanced technology to reduce power consumption․ The smart compressor and eco-friendly refrigerants ensure optimal cooling while minimizing environmental impact․ ENERGY STAR certification confirms adherence to energy-saving standards․ These models also incorporate LED lighting, which consumes less energy and lasts longer․ By choosing sustainable materials and innovative designs, GE supports eco-conscious living without compromising on performance or convenience for users seeking green solutions․

Safety and Usage Guidelines

Ensure safe operation by following guidelines: avoid harsh chemicals, store food properly, and prevent overcrowding․ Always unplug before maintenance and keep children away from controls․

Adhere to weight limits and leveling instructions to maintain stability and functionality․ Regularly inspect seals and gaskets for integrity to prevent leaks or energy loss․

Pre-Installation and Setup Safety Tips

Before installing your GE Monogram fridge, ensure the site is clear and well-ventilated; Verify electrical requirements and use a dedicated circuit․ Handle the appliance carefully to avoid damage․ Ensure the floor is level and sturdy to support the weight․ Avoid installing near heat sources or in direct sunlight․ Keep the area dry to prevent moisture-related issues․ Follow all manufacturer guidelines for safe and proper setup to ensure optimal performance and longevity․

Operating Instructions for Optimal Performance

To ensure your GE Monogram fridge runs efficiently, set the temperature between 37°F and 40°F for the refrigerator and 0°F for the freezer․ Use the crisper drawers for fresh produce and adjust humidity settings based on storage needs․ Close doors gently to maintain seals and prevent air leaks․ Regularly clean shelves and drawers to improve airflow․ Activate energy-saving modes when possible to reduce consumption without compromising performance․

Emergency Procedures and Safety Precautions

In case of a power outage, keep doors closed to maintain internal temperature for up to 4 hours․ Avoid opening doors excessively to preserve cooling․ If water leaks, unplug the fridge and mop up spills to prevent damage․ Never operate the fridge near open flames or sparks․ Keep flammable materials away․ If unusual noises or vibrations occur, turn off the appliance and contact a professional․ Always unplug before cleaning or servicing․

Installation and Setup Instructions

Ensure the site is level and clear․ Connect water and electrical supplies securely․ Follow manual guidelines for proper alignment and spacing․ Professional installation recommended․

Site Preparation and Leveling Requirements

Proper site preparation ensures your GE Monogram fridge operates efficiently․ The floor must be level to prevent uneven door closure and noise․ Use adjustable legs or shims to level the appliance․ Ensure the area is clear and the floor can support the weight․ Ensure recommended clearances around the fridge for proper ventilation; A well-prepared site guarantees optimal performance and longevity of your appliance․

Connecting Water and Electrical Supplies

Connect your GE Monogram fridge to a potable water supply using a ¼-inch copper water line․ Ensure the water supply is turned off before connecting․ For electrical hookup, plug the fridge into a grounded 120V outlet․ Avoid using extension cords or adapters․ After connecting, check for leaks at water line connections and ensure the fridge is receiving proper power for optimal function and safety․

Final Checks Before First Use

Before operating your GE Monogram fridge, ensure all connections are secure and leak-free․ Verify the appliance is level for proper door alignment and function․ Check that water and electrical connections are correctly installed․ Test the water dispenser to ensure proper flow․ Set the temperature to the recommended levels․ Allow the fridge to cool for 24 hours before adding food․ Confirm all shelves and compartments are properly installed and aligned․

Maintenance and Troubleshooting

Regularly clean condenser coils to ensure efficiency․ Check door seals for tight closure and inspect for wear․ Refer to the manual for troubleshooting common issues like temperature fluctuations or noise․ Schedule annual professional maintenance to maintain performance and extend lifespan․ Address minor problems promptly to prevent major repairs․ Always follow safety guidelines when performing DIY maintenance tasks․ Ensure all filters are clean or replaced as recommended․

Regular Cleaning and Filter Replacement

Regular cleaning is essential for maintaining your GE Monogram fridge’s performance and hygiene․ Wipe shelves and drawers with mild soap and warm water․ Clean the condenser coils every 6 months to ensure efficient cooling․ Replace water filters every 6 months or as indicated by the manual to prevent impurities and odor buildup․ Check and clean the drain tube to avoid clogs․ Regular maintenance prevents contamination and ensures optimal freshness and efficiency of your refrigerator․

Common Issues and DIY Solutions

Address common issues with your GE Monogram fridge using simple DIY solutions․ If the fridge isn’t cooling, check if doors are sealed properly or if temperature settings are correct․ For ice maker malfunctions, ensure the water supply is turned on and the ice maker switch is activated․ Strange noises may indicate misaligned shelves or loose parts․ Refer to the manual for troubleshooting guides before contacting professional help, saving time and costs․

When to Contact Professional Service

For complex issues beyond DIY fixes, contact a certified technician․ Major repairs, such as compressor replacement or refrigerant leaks, require professional expertise․ If electrical components malfunction or water supply lines leak excessively, seek immediate assistance․ Always consult GE-authorized service providers to ensure compliance with warranty terms and safety standards․ DIY attempts on critical systems may void your warranty or cause further damage, so professional intervention is essential in such cases․

Understanding the User Manual Structure

The GE Monogram fridge manual is organized into clear sections, making it easy to locate information․ From installation to troubleshooting, each chapter is designed for quick reference, ensuring users can find solutions and guidelines effortlessly․ The structured layout helps maximize appliance performance and address concerns efficiently․

Navigating the Manual for Easy Reference

The GE Monogram fridge manual is designed for easy navigation, featuring a detailed table of contents and clear chapter divisions․ Users can quickly locate specific topics like installation, maintenance, or troubleshooting․ The manual includes an index for keyword searches, ensuring fast access to information․ Bullet points and numbered lists simplify complex instructions, while cross-references guide users to related sections․ This structure ensures a seamless experience, helping owners make the most of their appliance․

Interpreting Diagrams and Symbols

The GE Monogram fridge manual includes diagrams and symbols to help users understand complex concepts visually․ A key or legend is provided to interpret these visuals, ensuring clarity․ Diagrams often illustrate parts, installation steps, or troubleshooting processes․ Symbols may indicate safety precautions, operational modes, or maintenance tasks․ These elements enhance comprehension, making it easier to follow instructions and resolve issues promptly․ They are essential for both novice and experienced users to optimize appliance performance and safety․

Using the Parts List for Identification

The parts list in the GE Monogram fridge manual helps users identify components for maintenance or repairs․ Each part is labeled with a number and name, corresponding to its location in the appliance․ This list is essential for diagnosing issues and ordering replacements․ Users can cross-reference parts with diagrams to ensure accuracy․ Understanding the parts list prevents misidentification and ensures correct installation or replacement, aligning with manufacturer guidelines for safety and performance․

Energy Efficiency and Eco-Friendly Features

The GE Monogram fridge incorporates advanced insulation and smart sensors to optimize energy use․ Built with recyclable materials, it aligns with eco-conscious standards and Energy Star certification for efficiency․

Energy-Saving Modes and Settings

The GE Monogram fridge offers energy-saving modes like “Energy Saver” and “Eco Mode” to reduce consumption․ These settings adjust compressor operation and defrost cycles for optimal efficiency․ Users can customize preferences via the control panel or smart app․ Vacation mode maintains minimal operation for extended periods․ These features help lower energy bills and environmental impact without compromising performance or cooling effectiveness․

Eco-Friendly Materials and Design

The GE Monogram fridge incorporates eco-friendly materials, such as recyclable components and non-toxic insulation, reducing environmental impact․ Its design emphasizes energy efficiency and sustainability, aligning with eco-conscious practices․ The fridge is built with durable, long-lasting parts to minimize waste and support sustainable manufacturing processes․ These eco-friendly features ensure the appliance is both environmentally responsible and high-performing, reflecting GE’s commitment to green technology and reducing its carbon footprint․

Compliance with Energy Regulations

The GE Monogram fridge is designed to meet or exceed energy efficiency standards set by regulatory bodies like ENERGY STAR․ By adhering to these guidelines, the appliance ensures reduced energy consumption and lower utility bills․ Compliance is achieved through advanced insulation, smart sensors, and efficient compressors, minimizing energy use while maintaining performance․ This alignment with energy regulations underscores GE’s dedication to environmental responsibility and cost-saving solutions for homeowners․

Warranty and Customer Support Information

The GE Monogram fridge comes with a comprehensive warranty covering parts and labor for one year․ Extended service plans are available for added protection․ Customers can access dedicated support through GE’s website, live chat, or the GE Appliances Answer Center hotline for assistance with repairs, troubleshooting, or general inquiries․ This ensures peace of mind and reliable service for appliance owners․

Understanding Your Warranty Coverage

Your GE Monogram fridge is backed by a 1-year limited warranty covering parts and labor․ Extended warranties are also available for additional protection․ The warranty ensures defective parts are repaired or replaced free of charge within the coverage period․ Proper installation and maintenance are required to maintain warranty validity․ For details, refer to the warranty certificate included in your manual or contact GE customer support for clarification on specific terms and conditions․

Contacting GE Appliances Answer Center

The GE Appliances Answer Center provides dedicated support for your Monogram fridge․ You can reach them via phone, online chat, or email for assistance with troubleshooting, maintenance, or general inquiries․ Visit the official GE Appliances website to find the contact information and support options tailored to your needs․ Ensure to have your model number ready for faster service․ The Answer Center is your primary resource for expert guidance and resolving concerns efficiently․

Additional Resources for Owners

GE Monogram fridge owners can access additional resources through the official GE Appliances website․ These include downloadable user manuals, installation guides, and troubleshooting tips․ Owners can also explore video tutorials and FAQs for enhanced understanding․ Additionally, GE offers a mobile app for smart appliance integration, allowing remote monitoring and control․ Registering your product ensures access to exclusive updates, promotions, and personalized support, helping you maximize your fridge’s performance and longevity․

Troubleshooting Common Issues

This section provides guidance on identifying and resolving frequent issues with your GE Monogram fridge, ensuring optimal performance and longevity through effective problem-solving strategies․

Temperature Control and Fluctuations

Temperature fluctuations in your GE Monogram fridge can occur due to faulty sensors, improper door seals, or incorrect settings․ Check the temperature display and adjust settings if necessary․ Ensure doors close tightly and seals are intact․ If issues persist, recalibrate the temperature controls or reset the fridge․ Regularly cleaning condenser coils and ensuring proper ventilation can also stabilize temperature performance․ Always refer to the manual for specific recalibration instructions and troubleshooting steps to maintain optimal cooling․

Noise Levels and Vibration Concerns

Your GE Monogram fridge may produce noises like humming, rattling, or gurgling due to normal operation, such as the compressor, fan, or drain pump․ Excessive vibration could indicate improper installation or uneven flooring․ Ensure the fridge is leveled correctly and installed on a stable surface․ If noise persists, check for loose parts or debris․ Refer to the manual for troubleshooting steps, as unusual sounds may signal a need for professional maintenance to prevent damage․

Door Alignment and Seal Integrity

Ensuring proper door alignment and seal integrity is vital for your GE Monogram fridge’s efficiency․ Misaligned doors can lead to energy waste and seal damage․ Check alignment by observing even closure and adjust hinges if necessary․ Level the fridge to prevent tilting, which affects door alignment․ Inspect door seals regularly; clean or replace them if compromised․ A tight seal prevents moisture buildup and maintains internal temperature․ Follow GE’s guidelines for adjustments and consider professional help if issues persist․

Proper usage and maintenance ensure longevity․ Regularly clean, check seals, and follow guidelines․ Refer to the manual for troubleshooting․ Contact GE support for assistance․ Happy cooking!

Maximizing the Lifespan of Your Fridge

  • Regularly clean condenser coils to ensure efficient cooling․
  • Check door seals for tightness to prevent air leaks․
  • Replace water filters as recommended to maintain water quality․
  • Avoid overloading shelves to ensure proper air circulation․
  • Defrost manually if necessary to prevent ice buildup․
  • Store food at optimal temperatures for freshness․
  • Keep the fridge level to prevent uneven wear․

By following these tips, you can extend the lifespan of your GE Monogram fridge․

Staying Updated with Manufacturer Guidelines

Regularly check the GE Appliances website for updates, recalls, or new guidelines specific to your Monogram fridge model․

  • Register your appliance to receive notifications and service reminders․
  • Subscribe to GE’s newsletter for tips, maintenance schedules, and feature updates․
  • Refer to the online manual for the latest troubleshooting advice․
  • Contact customer support for clarification on any updated instructions․

Staying informed ensures optimal performance and compliance with safety standards․

liberty of the seas deck plan pdf

The Liberty of the Seas deck plan provides a detailed guide to stateroom locations‚ public areas‚ and amenities‚ helping passengers plan their cruise experience effectively․

1․1 Overview of Liberty of the Seas

Liberty of the Seas is a Freedom-class cruise ship renowned for its expansive size and modern amenities․ With 15 decks‚ it accommodates up to 4‚300 guests and 1‚300 crew‚ offering a vibrant atmosphere for cruisers․ The ship features a wide range of stateroom categories‚ dining options‚ and entertainment venues‚ catering to diverse preferences․ Its deck plan highlights recreational facilities‚ pools‚ and exclusive clubs‚ ensuring an enriching experience․ Updated for 2025-2027‚ the deck plan includes detailed layouts‚ cabin codes‚ and venue reviews‚ helping passengers navigate the vessel efficiently․ Whether for relaxation or adventure‚ Liberty of the Seas is designed to provide unforgettable memories at sea․

1․2 Importance of Understanding the Deck Layout

Understanding the Liberty of the Seas deck layout is crucial for maximizing your cruise experience․ A clear grasp of the deck plan helps passengers locate their cabins‚ dining areas‚ and entertainment venues efficiently․ It reduces the likelihood of getting lost and ensures you can fully enjoy onboard amenities․ The deck plan also reveals proximity to key facilities‚ aiding in decision-making when selecting staterooms․ Familiarity with the layout enhances navigation‚ allowing you to make the most of your time at sea․ Additionally‚ it helps in planning daily activities and booking reservations‚ making your journey stress-free and enjoyable․ A well-understood deck plan is essential for a seamless and memorable cruise adventure․

How to Read the Deck Plan PDF

The Liberty of the Seas deck plan PDF uses symbols‚ color coding‚ and a legend to identify cabins‚ facilities‚ and public areas‚ aiding in easy navigation for passengers․

2․1 Understanding Deck Plan Symbols and Color Coding

The Liberty of the Seas deck plan PDF utilizes a variety of symbols and color coding to simplify navigation․ Symbols represent cabin types‚ such as interior‚ oceanview‚ and balcony staterooms‚ while colors differentiate public areas like dining venues‚ entertainment spaces‚ and recreational facilities․ A legend is provided to decode these symbols‚ ensuring passengers can easily identify key amenities and locate their cabins․ This system helps travelers visualize the ship’s layout‚ making it easier to plan their onboard experience․ By understanding these visual cues‚ guests can efficiently explore the vessel and make the most of their cruise․

2․2 Navigating the PDF Layout

The Liberty of the Seas deck plan PDF is designed for easy navigation‚ with a clear structure that allows users to explore each deck’s layout in detail․ The PDF is typically divided into sections‚ with each deck represented on a separate page; Users can zoom in to view specific areas‚ such as cabin locations or public amenities․ Interactive features like bookmarks and a sidebar menu enable quick access to desired sections․ Color-coded sections and symbols further enhance readability‚ ensuring passengers can identify key areas like dining venues‚ entertainment spaces‚ and recreational facilities․ This user-friendly format helps travelers familiarize themselves with the ship’s layout and plan their cruise experience efficiently․

Deck-by-Deck Breakdown

Explore the Liberty of the Seas deck plan with a comprehensive guide to each of its 15 decks‚ featuring detailed layouts of staterooms‚ amenities‚ and public spaces․

3․1 Deck 2: Lower Decks and Cabin Locations

Deck 2 on the Liberty of the Seas is one of the lower decks‚ primarily housing crew cabins and operational areas․ It is strategically located near the ship’s engine and galley‚ ensuring efficient workflow for the crew․ Passenger cabins on this deck are limited‚ with most being allocated for staff and officers․ These cabins are functional and designed for comfort‚ though they lack the luxurious amenities found on higher decks․ Deck 2 also provides easy access to essential facilities like the crew mess hall and recreational spaces‚ making it a hub for onboard operations while remaining out of sight for most passengers․

3․2 Deck 3: Entertainment and Public Areas

Deck 3 on the Liberty of the Seas is a vibrant hub of entertainment and social activity․ It features the ship’s main theater‚ showcasing Broadway-style productions and live performances․ Additionally‚ this deck is home to popular bars like Boleros and the R Bar‚ offering a variety of cocktails and live music․ The casino is also located here‚ providing guests with a range of gaming options․ Public areas include lounges‚ comedy clubs‚ and entertainment venues‚ creating a lively atmosphere for passengers․ The deck’s layout ensures easy access to these amenities‚ making it a central spot for evening entertainment and socializing․

3․3 Deck 4: Dining and Lounges

Deck 4 on the Liberty of the Seas is dedicated to exceptional dining experiences and elegant lounges․ The main dining room‚ where guests enjoy gourmet meals‚ is centrally located․ Specialty restaurants like Chops Grille and Giovanni’s Table offer steakhouse and Italian cuisine‚ respectively․ The popular Windjammer Café provides a casual buffet option‚ while Café Promenade serves coffee and pastries․ Lounges such as the Schooner Bar and the Champagne Bar offer refined spaces for relaxation and cocktails․ The deck’s design ensures easy access to these venues‚ catering to diverse tastes and preferences‚ making it a focal point for culinary exploration and social gatherings during the cruise․

3․4 Deck 5: Recreational Facilities

Deck 5 on the Liberty of the Seas is a hub for entertainment and leisure․ It features the magnificent Royal Theater‚ where guests can enjoy Broadway-style shows and live performances․ Additionally‚ the deck houses various entertainment venues‚ ensuring there’s always something to do․ Shopping enthusiasts will find retail outlets offering everything from souvenirs to luxury items․ Lounges and bars are also present‚ providing spaces for relaxation and socializing․ Deck 5 is designed to cater to diverse interests‚ offering a mix of activities that make every moment onboard memorable and enjoyable․ Whether it’s catching a show‚ shopping‚ or unwinding with a drink‚ Deck 5 has something for everyone․ This deck is a central spot for onboard enjoyment‚ blending entertainment‚ shopping‚ and relaxation seamlessly․

3․5 Deck 6: Pool Areas and Sun Decks

Deck 6 on the Liberty of the Seas is dedicated to outdoor relaxation and recreation․ It features multiple pools‚ including the expansive main pool and the adults-only Solarium‚ offering serene spaces for sunbathing and swimming․ Whirlpools and shaded areas provide additional comfort for guests․ The deck also includes poolside bars and loungers‚ perfect for enjoying refreshing drinks while soaking up the sun․ Families can engage in fun activities at the H2O Zone‚ a water play area designed for kids․ With its vibrant atmosphere and ample seating‚ Deck 6 is a prime spot for relaxation and recreation‚ catering to both families and those seeking tranquility․ This deck is a highlight for outdoor enthusiasts‚ blending leisure and entertainment seamlessly․

3․6 Deck 7: Upper Decks and Suites

Deck 7 on the Liberty of the Seas is renowned for its luxurious accommodations and prime location․ It is home to a variety of suites‚ including Junior Suites and Grand Suites‚ offering expansive living areas‚ private balconies‚ and stunning ocean views․ Guests staying in these suites enjoy exclusive amenities‚ such as concierge service and priority access to shipboard facilities․ The deck’s central location provides easy access to dining‚ entertainment‚ and recreational areas․ With its elegant design and premium comforts‚ Deck 7 is ideal for travelers seeking a high-end cruising experience․ Its proximity to key amenities ensures a seamless and indulgent stay aboard the Liberty of the Seas․

3․7 Deck 8: Family-Friendly Zones

Deck 8 on the Liberty of the Seas is designed to cater to families‚ offering a variety of activities and spaces for all ages․ It features the H2O Zone‚ an interactive water park with fountains and water slides‚ perfect for kids․ Additionally‚ the deck includes playground areas and family-friendly pools‚ ensuring entertainment for children while parents relax nearby․ The Adventure Ocean youth program is also located here‚ providing age-specific activities for kids․ With its vibrant atmosphere and child-centric amenities‚ Deck 8 is a hub for families seeking fun and memorable experiences together․ It’s an ideal spot for creating lasting memories during your cruise․

3․8 Deck 9: Spa and Wellness Centers

Deck 9 on the Liberty of the Seas is a serene retreat dedicated to wellness and relaxation․ It is home to the luxurious Vitality at Sea Spa‚ offering a wide range of treatments‚ including massages‚ facials‚ and body wraps․ The deck also features thermal suites with heated loungers and steam rooms‚ perfect for unwinding․ Additionally‚ guests can enjoy the Solarium‚ an adult-only pool area with a tranquil atmosphere․ The spa cafe provides healthy dining options‚ complementing the wellness experience․ Deck 9 is designed to rejuvenate both body and mind‚ offering a peaceful escape from the hustle and bustle of the ship․ It’s a must-visit for those seeking relaxation and pampering during their voyage․

3․9 Deck 10: Fitness and Sports Facilities

Deck 10 on the Liberty of the Seas is a hub for fitness enthusiasts‚ offering a variety of sports and wellness facilities․ The deck features a fully equipped gym with state-of-the-art equipment‚ including treadmills‚ free weights‚ and strength-training machines․ Guests can also enjoy group fitness classes‚ such as yoga and spinning‚ in dedicated studio spaces․ Additionally‚ Deck 10 includes outdoor sports courts for basketball‚ volleyball‚ and tennis‚ providing active entertainment for all ages․ The deck’s facilities cater to diverse fitness levels‚ ensuring everyone can stay active and healthy during their cruise․ With its extensive offerings‚ Deck 10 is a key destination for those seeking an energetic and rejuvenating experience at sea;

3․10 Deck 11: Observation Decks

Deck 11 on the Liberty of the Seas is designed to offer breathtaking views of the ocean and surrounding landscapes․ The observation decks provide spacious areas with comfortable seating‚ perfect for relaxation and taking in the scenery․ Large panoramic windows allow guests to enjoy uninterrupted vistas‚ creating a serene atmosphere․ This deck is ideal for those seeking tranquility and a connection with nature․ It also features a bar serving refreshing drinks‚ enhancing the experience․ Whether you’re looking to unwind or simply take in the sights‚ Deck 11’s observation areas are a must-visit destination for every passenger․ The deck’s layout ensures a peaceful and picturesque environment for all․

3․11 Deck 12: Exclusive Clubs and Bars

Deck 12 on the Liberty of the Seas is a hub for vibrant nightlife and sophisticated entertainment․ It features exclusive clubs and bars that cater to diverse tastes‚ offering everything from craft cocktails to live music․ The indoor and outdoor seating areas provide stunning ocean views‚ creating a luxurious ambiance․ These venues are perfect for socializing‚ dancing‚ or simply enjoying a drink in style․ With a variety of themed bars and upscale lounges‚ Deck 12 ensures an unforgettable experience for those looking to unwind or celebrate․ Its prime location makes it a hotspot for evening entertainment‚ blending elegance with lively energy․

3․12 Deck 13: Nightlife and Entertainment

Deck 13 on the Liberty of the Seas is a vibrant hotspot for evening entertainment‚ offering a wide range of nightlife options․ This deck is home to lively dance clubs‚ intimate lounges‚ and entertainment venues that cater to all preferences․ Guests can enjoy live music performances‚ themed parties‚ and interactive shows‚ creating an energetic and dynamic atmosphere․ The nightlife on Deck 13 is designed to keep the excitement going late into the night‚ with a variety of bars and clubs offering signature cocktails and refreshing drinks․ Whether you’re looking to dance the night away or unwind in a sophisticated setting‚ Deck 13 provides the perfect backdrop for unforgettable memories․

3․13 Deck 14: Shopping and Retail Areas

Deck 14 of the Liberty of the Seas is a shopper’s paradise‚ featuring a variety of retail stores and boutiques․ Guests can explore duty-free shops‚ jewelry stores‚ and apparel outlets‚ offering everything from casual wear to formal attire․ The deck also includes specialty stores selling souvenirs‚ cruise-themed merchandise‚ and luxury items․ Whether you’re looking for a unique gift or a personal treat‚ Deck 14 provides a diverse shopping experience․ The retail areas are strategically located to allow for a seamless and enjoyable browsing experience‚ making it easy to find the perfect item to commemorate your cruise․

Stateroom Categories and Locations

Explore Liberty of the Seas’ stateroom options‚ ranging from cozy interior rooms to spacious suites‚ strategically located across various decks for convenience and stunning ocean views․

4․1 Interior Staterooms

Interior staterooms on Liberty of the Seas offer a budget-friendly option with all the essential comforts․ Located on lower decks‚ these rooms provide a quiet and stable experience‚ ideal for first-time cruisers․ Each interior stateroom features modern amenities‚ including flat-screen TVs‚ comfortable bedding‚ and private bathrooms․ While they don’t offer natural light‚ the cozy atmosphere and proximity to public areas make them a great choice for travelers focused on value․ Perfect for those who spend most of their time exploring the ship or relaxing indoors‚ interior staterooms are a practical and affordable way to enjoy your cruise․

4․2 Oceanview Staterooms

Oceanview staterooms on Liberty of the Seas provide a perfect balance of comfort and affordability while offering stunning ocean vistas․ These rooms feature large windows or portholes‚ allowing natural light and views of the horizon․ Located on mid-level decks‚ they are ideal for travelers who want to enjoy the sea without the cost of a balcony․ Categories range from standard oceanview rooms to those with obstructed views‚ ensuring options for various budgets․ Each stateroom is equipped with modern amenities‚ including flat-screen TVs and comfortable seating areas․ Oceanview staterooms are a great choice for guests seeking a blend of value and scenic beauty‚ with sizes ranging from 150 to 200 square feet․

4․3 Balcony Staterooms

Balcony staterooms on Liberty of the Seas offer a luxurious way to enjoy the ocean views with the convenience of a private balcony; These rooms feature furnished balconies‚ perfect for relaxing and taking in the fresh sea air․ Located on higher decks‚ they provide stunning vistas of the horizon․ Balcony staterooms range in size from 150 to 300 square feet‚ including the balcony‚ and are ideal for travelers seeking a mix of comfort and scenic beauty․ Guests can enjoy private moments outside while still being close to the ship’s amenities․ This category is a popular choice for those looking to enhance their cruise experience with a touch of elegance and personal outdoor space․

4․4 Suite Accommodations

Suite accommodations on Liberty of the Seas offer the ultimate in luxury and comfort‚ providing expansive living spaces and exclusive amenities․ Located on higher decks‚ these suites feature large balconies with breathtaking ocean views‚ perfect for private entertaining or relaxation․ Ranging from 300 to 600 square feet‚ suites include separate living areas‚ marble bathrooms‚ and access to exclusive facilities like private lounges and concierge services․ Guests in suites also enjoy perks such as priority boarding‚ personalized butler service‚ and complimentary upgrades․ These premium accommodations are designed for travelers seeking a luxurious and unforgettable cruise experience‚ blending opulence with unparalleled service and privacy․

Public Areas and Amenities

Liberty of the Seas features diverse public areas‚ including pools‚ theaters‚ spas‚ shopping zones‚ and dining venues‚ ensuring a vibrant and enjoyable experience for all passengers․

5․1 Dining Options

Liberty of the Seas offers a wide variety of dining options to cater to every taste and preference; The ship features a grand main dining room serving multi-course meals‚ while specialty restaurants like Chops Grille offer premium steaks․ Guests can also enjoy Italian cuisine at Giovanni’s Table or savor Asian flavors at Sabor Modern Mexican․ For casual dining‚ the Windjammer Café provides an international buffet‚ while Sorrento’s Pizza and Café Promenade offer quick bites․ Room service is available for those preferring to dine in the comfort of their cabin․ The deck plan PDF highlights the locations of these venues‚ making it easy to plan meals and explore culinary options․

5․2 Entertainment Venues

Liberty of the Seas boasts an impressive array of entertainment venues to suit all interests․ The Platinum Theater hosts spectacular Broadway-style shows‚ while the Casino Royale offers gaming excitement with slots‚ poker‚ and roulette․ For live music and comedy‚ guests can head to The Dragon’s Lair Nightclub or enjoy intimate performances at The Centrum․ Families will love the H2O Zone water park and the Adventure Ocean Youth Program‚ designed for kids․ The deck plan PDF provides a clear map of these venues‚ ensuring passengers can easily locate and plan their entertainment experiences throughout the cruise․

5․3 Recreational Activities

Liberty of the Seas offers a wide range of recreational activities for all ages․ The rock climbing wall and FlowRider surf simulator provide thrilling adventures‚ while the main pool and whirlpools offer relaxation․ The ice skating rink is a unique feature‚ and the Mini Golf course and Sports Court cater to sports enthusiasts․ Families can enjoy the H2O Zone water park‚ complete with water slides and splash areas․ The deck plan PDF highlights these facilities‚ making it easy for guests to explore and plan their recreational experiences․ With so many options‚ passengers can stay active‚ unwind‚ or have fun in various settings across the ship․

Planning Your Cruise with the Deck Plan

Effectively plan your cruise with the Liberty of the Seas deck plan‚ exploring layout‚ amenities‚ and activities to ensure an unforgettable journey and informed decisions․

6․1 Choosing the Right Cabin

Selecting the ideal cabin on Liberty of the Seas involves considering your preferences and needs․ Study the deck plan to identify cabin locations relative to key amenities like pools‚ dining‚ and entertainment․ Interior staterooms are budget-friendly and perfect for those who spend less time in their room‚ while oceanview and balcony cabins offer scenic views․ Suites provide luxury and extra perks‚ such as private concierge services․ Families may opt for spacious family staterooms‚ while couples might prefer quiet‚ secluded cabins․ Proximity to elevators or public areas can enhance convenience․ Use the deck plan to avoid noisy zones near nightclubs or theaters‚ ensuring a peaceful stay tailored to your lifestyle․

6․2 Maximizing Your Onboard Experience

To make the most of your time on Liberty of the Seas‚ use the deck plan to locate key amenities and plan your activities․ Identify pools‚ dining venues‚ and entertainment hotspots in advance to avoid missing out․ Pre-book popular restaurants and shows to ensure availability․ Explore unique experiences like rock climbing or the FlowRider for an adventurous stay․ For first-time cruisers‚ familiarize yourself with the ship’s layout on embarkation day to navigate seamlessly․ Check the daily schedule for themed events‚ live performances‚ and enrichment programs․ Staying organized and informed will help you enjoy every moment‚ whether relaxing by the pool or exploring new onboard adventures․

Tips for First-Time Cruisers

First-time cruisers should arrive early‚ explore the ship thoroughly‚ and use the deck plan to locate essential facilities․ Pack essentials like sunscreen and formal attire․ Attend orientation sessions to understand ship protocols and safety procedures․ Familiarize yourself with the daily itinerary to plan activities and dining reservations․ Don’t hesitate to ask crew members for assistance․ Take advantage of onboard amenities‚ such as spas‚ entertainment venues‚ and enrichment programs․ Plan shore excursions in advance to maximize your port visits․ Stay informed about dress codes‚ meal times‚ and special events to make the most of your cruise experience․

7․1 Understanding Ship Layout

Understanding the Liberty of the Seas deck plan is crucial for first-time cruisers to navigate the ship confidently․ The layout is divided into multiple decks‚ each serving specific purposes․ Decks 2 and 3 focus on cabins and entertainment‚ while higher decks like 12 and 13 offer dining‚ pools‚ and nightlife․ Public areas like theaters‚ restaurants‚ and spas are strategically placed for easy access․ Familiarize yourself with the deck plan to locate your cabin‚ nearest elevators‚ and essential amenities․ Knowing the layout helps you avoid getting lost and ensures you make the most of your time onboard․ Study the deck plan PDF before your cruise to plan your movements efficiently․

7․2 Navigating the Vessel Efficiently

Navigating Liberty of the Seas requires a good understanding of its deck plan․ Start by identifying key landmarks like elevators‚ stairwells‚ and main public areas․ Use the deck plan PDF to locate your cabin relative to dining venues‚ entertainment zones‚ and recreational facilities․ Familiarize yourself with high-traffic areas like the Royal Promenade and pool decks․ Digital signage and staff are also available to assist․ Plan your routes in advance to minimize walking distances‚ especially between popular spots like the theater on Deck 3 and the pool on Deck 11․ Using the ship’s app or map can further enhance your navigation experience‚ ensuring you explore every corner efficiently․

Future Updates and Changes

Liberty of the Seas regularly undergoes renovations to enhance passenger experience‚ with updates to amenities‚ technology‚ and deck layouts‚ ensuring the ship remains modern and appealing․

8․1 Upcoming Renovations

Liberty of the Seas is set to undergo significant renovations to enhance its offerings; Plans include modernizing staterooms‚ expanding public areas‚ and upgrading dining venues․ New family-friendly amenities will be added‚ along with improved recreational spaces․ The ship will also feature updated entertainment options and advanced technology for a seamless passenger experience․ Sustainability improvements are a key focus‚ ensuring the vessel remains eco-friendly․ These renovations aim to elevate comfort‚ entertainment‚ and overall guest satisfaction‚ ensuring Liberty of the Seas remains a top choice for cruisers․ The updates will be reflected in future deck plan PDFs‚ giving travelers a preview of the exciting changes․

8․2 New Features and Amenities

Liberty of the Seas will introduce exciting new features and amenities to enhance passenger experiences․ A state-of-the-art water park‚ virtual reality entertainment zones‚ and an expanded spa are among the highlights․ New dining concepts‚ including specialty restaurants and interactive culinary experiences‚ will debut․ Additionally‚ enhanced Wi-Fi connectivity and mobile app features will streamline onboard services․ Family-friendly areas will be expanded‚ offering more activities for all ages․ These additions aim to provide a modern‚ innovative‚ and enjoyable environment for guests․ The updated deck plan PDF will showcase these new amenities‚ helping travelers plan their cruise with greater convenience and excitement․

salvatore ferragamo belt size guide

Salvatore Ferragamo belts embody Italian craftsmanship and timeless style, ensuring a perfect fit. Known for their adjustable designs and snug comfort, they offer a personalized luxury experience.

History of Salvatore Ferragamo

Salvatore Ferragamo, an Italian luxury brand, was founded in 1927 by Salvatore Ferragamo, a renowned shoemaker. Initially catering to Hollywood stars, the brand expanded into accessories, including belts, blending Italian craftsmanship with timeless elegance. Known for sophisticated designs, Ferragamo belts have become a symbol of luxury, offering a perfect blend of style and functionality. The brand’s rich history and commitment to quality ensure a legacy of excellence in every accessory, making Ferragamo belts a cherished choice for discerning individuals worldwide.

Design Philosophy and Craftsmanship

Salvatore Ferragamo belts exemplify timeless elegance and exceptional craftsmanship. The brand’s design philosophy centers on blending sophistication with functionality, ensuring each belt is both stylish and durable. Ferragamo’s commitment to quality is evident in the meticulous attention to detail, from the selection of premium materials to the precise construction. Each belt is crafted to provide a seamless fusion of Italian luxury and modern practicality, making them a standout accessory for any wardrobe. The brand’s dedication to excellence ensures every piece is a testament to its rich heritage in craftsmanship.

Popularity of Ferragamo Belts

Salvatore Ferragamo belts are renowned for their timeless style and exceptional quality, making them a favorite among luxury enthusiasts. Their popularity stems from the perfect blend of sophistication and practicality. Ferragamo belts are crafted from premium materials like leather, ensuring durability and comfort. The adjustable length feature, with removable buckles, allows for a personalized fit, enhancing their appeal. Their sleek designs and versatile options cater to both men and women, making them a must-have accessory for those seeking elegance and craftsmanship. This combination of style, luxury, and functionality solidifies their status as a top choice in the market.

How to Measure Your Waist for the Perfect Belt Fit

Measure your waist accurately with a tape measure for the perfect fit. Ferragamo belts fit snugly and offer adjustable lengths with removable buckles for a personalized fit. They run one size small compared to EU standards.

Step-by-Step Guide to Measuring Your Waist

To measure your waist for a Salvatore Ferragamo belt, wrap a flexible tape measure around your natural waistline, typically above the hipbone. Ensure the tape is snug but not tight. Note the measurement in inches or centimeters. Ferragamo belts run one size small compared to standard EU sizing, so if your waist is 34 inches, select a 90cm belt. This step ensures a perfect fit and optimal comfort.

Understanding Belt Size vs. Waist Size

Belt size and waist size differ slightly due to the buckle and material flexibility. Ferragamo belts are designed to fit snugly, then mold to your shape. Measure your waist accurately, and compare it to the size chart. Note that Ferragamo sizes run one size smaller than standard EU measurements. For example, a 34-inch waist corresponds to a 90cm belt. This ensures a comfortable, tailored fit without compromising on style or durability.

Importance of a Snug Fit

A snug fit is essential for both comfort and functionality. A belt that is too loose may slip, while one that is too tight can be uncomfortable. Ferragamo belts are designed to fit snugly at first, as they will naturally wear in and mold to your body over time. This ensures a tailored, secure fit that enhances your overall look. Proper sizing guarantees the belt stays in place, supporting your pants and completing your outfit with timeless elegance and precision.

Understanding the Salvatore Ferragamo Belt Size Chart

Ferragamo belts are sized in centimeters, with options from 70cm to 115cm. The chart aligns belt sizes with waist measurements, ensuring a precise, comfortable fit for all.

Standard Belt Sizes Offered by Ferragamo

Salvatore Ferragamo offers belt sizes ranging from 70cm to 115cm, ensuring a fit for various waist measurements. These sizes are standardized in 5cm increments, providing flexibility for different body types. The belts are designed to align with natural waist measurements, making it easier to select the correct size. Ferragamo’s sizing system is consistent across collections, allowing customers to rely on their measurements for a precise fit. This range caters to both men and women, ensuring comfort and style.

Comparing EU and US Belt Sizes

Salvatore Ferragamo primarily uses EU sizing for their belts, which can differ from US standards. EU sizes are generally smaller by about 2-3 inches compared to US sizes. For example, a US size 32″ belt corresponds to an EU size 80cm. To ensure accuracy, customers should refer to Ferragamo’s official size chart or consult their website for conversions. This helps in selecting the correct size for a precise fit, maintaining both comfort and style consistency across regions.

How to Read the Ferragamo Belt Size Chart

To read the Ferragamo belt size chart, start by locating your waist size in centimeters or inches. Ferragamo sizes are listed numerically, with EU sizes in centimeters and US sizes in inches. Match your waist measurement to the closest size on the chart. Pay attention to whether the size refers to the belt length or waist circumference, as they may differ slightly. For accuracy, refer to Ferragamo’s official size guide, which often includes a conversion table for EU to US sizes. This ensures a perfect fit for your belt.

How to Choose the Right Belt Size

Measure your waist accurately and compare it to the size chart. Consider the belt’s intended use and your personal comfort. Opt for a size that fits snugly without being too tight, allowing for future adjustments. This ensures the perfect balance of style and functionality.

Factors to Consider When Selecting a Belt Size

When choosing a Salvatore Ferragamo belt size, consider your waist measurement, the belt’s intended use, and personal comfort preferences. The width of the belt should align with the loops on your pants. Material flexibility and durability are also important, as leather may stretch over time. Additionally, body type and how the belt sits on your hips play a role. Finally, compare Ferragamo’s sizing chart with standard measurements to ensure the best fit for your needs.

How to Size Up or Down Based on Your Waist Measurement

To determine whether to size up or down, compare your waist measurement to Ferragamo’s size chart. Typically, your belt size is 2-4 inches smaller than your waist size. If your waist is 32 inches, for example, consider a 28-30 inch belt; If you prefer a looser or tighter fit, adjust accordingly. For larger waists, sizing up may be necessary. Consider the material’s stretch and thickness, as these factors can affect comfort and fit. Always refer to Ferragamo’s official size guide for precise measurements.

Benefits of Adjustable-Length Belts

Adjustable-length belts offer unmatched versatility, allowing a perfect fit for various waist sizes. They eliminate the need to purchase multiple belts, making them a practical choice. Ideal for gifting, these belts suit different wearers. The ability to customize the length ensures comfort and style. Adjustable belts are especially useful for those whose waist size fluctuates or for achieving a precise fit. They reduce sizing guesswork, ensuring a seamless and secure fastening every time. This feature is a hallmark of Ferragamo’s commitment to comfort and timeless elegance.

Salvatore Ferragamo Belt Materials and Their Impact on Fit

Ferragamo belts use premium materials like leather, known for its suppleness and durability. The material’s natural softness ensures a comfortable fit while maintaining structure and longevity.

Types of Materials Used in Ferragamo Belts

Salvatore Ferragamo belts are crafted from high-quality materials, including full-grain leather, calfskin, and exotic leathers like alligator. These materials ensure durability and a luxurious feel. Leather options vary in texture and finish, offering sleek or rustic aesthetics. Some belts feature suede for a softer, matte appearance, while others incorporate metallic accents for a modern touch. The choice of material impacts both comfort and the belt’s ability to maintain its shape, ensuring a precise fit and long-lasting wear.

How Different Materials Affect Comfort and Durability

Salvatore Ferragamo belts use premium materials that influence both comfort and longevity. Full-grain leather is breathable and soft, offering exceptional comfort, while calfskin is lightweight and supple. Exotic leathers, like alligator, provide luxurious durability but may feel less flexible. Suede offers a soft, matte finish but requires careful maintenance. Metallic accents add modern style without compromising strength. Each material balances comfort and durability, ensuring a perfect fit and extended lifespan with proper care.

Caring for Your Ferragamo Belt to Maintain Fit

To preserve the fit and quality of your Salvatore Ferragamo belt, proper care is essential. Avoid exposure to direct sunlight or moisture, as this can cause warping or discoloration. Gently clean leather with a soft cloth and a small amount of leather-specific cleaner. Store the belt in a cool, dry place, away from sharp objects. Avoid using harsh chemicals or abrasive materials, as they may damage the finish. Regular conditioning with a leather conditioner can maintain suppleness and extend the belt’s lifespan.

Buckle Styles and Their Impact on Belt Fit

Buckle styles influence both aesthetics and functionality. Larger buckles may require slightly longer belts for proper fit, while sleek designs offer versatility across sizes and outfits.

Popular Buckle Styles from Ferragamo

Ferragamo offers iconic buckle designs that blend elegance and sophistication. The Gancini buckle, featuring the signature ferragamo hook, is a timeless choice. The Vara bow buckle adds a touch of classic charm, while the logo buckle subtly incorporates the Ferragamo crest. These styles are crafted from premium materials like gold-tone or silver-tone metals, ensuring durability and luxury. Whether for formal or business casual attire, Ferragamo’s buckle designs cater to diverse tastes, offering a perfect balance of functionality and style.

How to Choose the Right Buckle Style for Your Wardrobe

Selecting the right buckle style depends on your personal aesthetic and wardrobe needs. Consider whether you prefer classic, modern, or minimalist designs. For formal occasions, opt for sleek, understated buckles like the Gancini or Vara. For casual wear, unique or textured buckles can add personality. Ensure the buckle complements your existing accessories and shoes. Additionally, match the belt material to your wardrobe—leather belts are versatile, while exotic materials offer a luxurious touch. Balance functionality with style for a polished look.

Impact of Buckle Design on Belt Sizing

The buckle design can influence belt sizing due to its size and shape. Larger or more elaborate buckles may require a slightly longer belt to ensure proper fit and comfort. The buckle’s bulk can affect how the belt sits on the waist, potentially altering the snugness. Ensure the buckle aligns with the center of your waist for balance. When selecting a buckle, consider its proportions relative to your frame and wardrobe. Proper sizing ensures both style and functionality are maintained seamlessly.

Comparing Salvatore Ferragamo Belt Sizes to Other Brands

Ferragamo belt sizes may differ from other luxury brands due to unique measurement standards. Always compare specific size charts to ensure accuracy and the best fit.

Standard vs. Brand-Specific Sizing

While standard sizing provides a universal guide, Salvatore Ferragamo often uses brand-specific measurements tailored to their designs. This ensures optimal fit and alignment with their aesthetic. Ferragamo belt sizes may align closely with European standards, differing slightly from U.S. measurements. Understanding these nuances is crucial for selecting the right size. Always refer to Ferragamo’s official size chart for accurate fitting, as brand-specific sizing can vary from generic standards, ensuring comfort and style.

How Ferragamo Sizes Compare to Other Luxury Brands

Salvatore Ferragamo belt sizes are generally consistent with other luxury brands but may vary slightly due to specific design nuances. For instance, Ferragamo belts tend to align closely with European sizing standards, which can differ from U.S.-based brands like Gucci or Prada. While the differences are often minimal, they can impact the fit. Always compare Ferragamo’s size chart with other brands to ensure accuracy. International shoppers should pay particular attention to these variations to avoid sizing discrepancies.

Tips for International Shoppers

International shoppers should verify Ferragamo’s size chart in their region, as sizing may differ slightly between countries; Always check for EU vs. US size conversions to ensure accuracy. Consider potential currency exchange rates and shipping costs when purchasing abroad. Additionally, confirm the authenticity of the seller to avoid counterfeit products. For the best fit, use a size conversion tool or contact customer service for guidance. This ensures a seamless shopping experience regardless of location.

Tips for Ensuring a Perfect Fit

Measure your waist accurately, consider the buckle style, and adjust the belt to sit comfortably without restricting movement for an ideal fit.

Trying Before Buying: In-Store vs. Online

Trying belts in-store allows for a precise fit and tactile experience, ensuring comfort and quality. Online shoppers should refer to size charts and customer reviews to guide their choice. Ordering multiple sizes can help find the perfect fit, with easy return options for unused items. Balancing convenience and accuracy ensures satisfaction, whether shopping in-store or online.

Using the Punch Holes as a Guide

The punch holes on a Salvatore Ferragamo belt are evenly spaced, typically 1 inch apart, to help determine the best fit. Start by fastening the belt at the middle hole, which usually aligns with your true waist size. If your waist measurement falls between two holes, consider sizing up for comfort. Adjustable belts offer flexibility, but fixed-length styles require precise alignment. Counting the holes from the buckle end can also help verify if your size matches the belt’s length for an ideal fit.

How to Adjust Your Belt for the Perfect Fit

To achieve the perfect fit, fasten the belt and adjust the length by sliding it through the buckle. For prong-style buckles, gently push the prong through the desired punch hole. For adjustable belts, pull the end to tighten or loosen. Ensure the belt sits comfortably, neither too snug nor too loose. Test the fit by tugging the belt end; it should hold firmly without shifting. Adjust as needed to maintain a secure, flattering position on your waistline for optimal comfort and style.

Salvatore Ferragamo belts offer a perfect blend of style and precision fit. By understanding sizing, materials, and buckle designs, you can confidently select a belt that elevates your wardrobe with timeless elegance and superior craftsmanship. Invest in quality and authenticity for a accessory that lasts.

Key Takeaways from the Size Guide

Accurate waist measurement is essential for the perfect fit. Ferragamo belts sizes may differ from waist sizes, so compare carefully. Consider material thickness and buckle style, as they can affect comfort and sizing. Adjustable belts offer flexibility for a tailored fit. Always refer to the official size chart for precise guidance. Trying belts on ensures comfort and proper sizing. Use punch holes as a reference for optimal adjustment. Prioritize quality and authenticity for long-lasting durability and style.

Final Tips for Choosing the Right Belt

Confidence and personal style are key to selecting a belt. Match your belt with your shoes and wardrobe for a cohesive look. Consider the occasion—leather for formal events, canvas for casual outings. Proper care extends the belt’s lifespan. Always purchase from authorized retailers to ensure authenticity. Trust your measurements but also listen to your comfort. A well-chosen Salvatore Ferragamo belt elevates your ensemble and reflects timeless sophistication. Invest wisely for a lasting accessory.

Where to Shop for Authentic Ferragamo Belts

For an authentic Salvatore Ferragamo belt, shop at official Ferragamo boutiques, their website, or authorized luxury retailers like Saks Fifth Avenue or Neiman Marcus. International shoppers can visit Harrods or Galeries Lafayette. Avoid counterfeit sites by verifying the retailer’s authenticity. Use the Ferragamo store locator to find trusted sellers. Purchasing from reputable sources ensures quality and genuine craftsmanship. Invest in authenticity to own a timeless piece of luxury.

marathon wrist watch instructions

Marathon wrist watches are designed for endurance and precision, offering robust features like EOL display, sport apps, and automatic sprints. Built for reliability, they empower runners with essential tools.

First, I need to understand what an “Overview” typically entails. It’s usually a brief summary that highlights the main features and characteristics of the subject. In this case, the Marathon Wrist Watches’ design, functionality, and target audience would be key points to cover. From the provided information, I see that the watches are built for endurance, have a 36mm stainless steel case, a lug-to-lug width of 43.5mm, which makes them suitable for smaller wrists, and they come with features like an EOL display and various sport apps.

I should start by introducing the Marathon Wrist Watches, emphasizing their design and functionality. Maybe mention the materials used and the design elements that make them appealing to runners. Then, I can touch upon the specific features like EOL display and sport apps, but without going into too much detail since those might be covered in other subheadings like ‘Key Features’ or ‘Understanding the Features’.

Let me try drafting this:

Marathon wrist watches are crafted with precision and durability, featuring a 36mm stainless steel case and a 43.5mm lug-to-lug width, making them ideal for smaller wrists. Designed for endurance, these watches offer essential tools for runners and outdoor enthusiasts. The EOL display provides clear battery life indicators, while the sport apps support marathon, half-marathon, and other common race distances. With automatic sprints and race nutrition tracking, these watches cater to the needs of serious athletes. The Marathon watch is also known for its sturdy construction and minimalistic design, appealing to those who value functionality over unnecessary complications. Overall, Marathon wrist watches are reliable companions for both training and racing, combining practical features with a robust build.

Now, I need to check the word count. Let’s count the words:

Marathon
wrist
watches
are
crafted
with
precision
and
durability,
featuring
a
36mm
stainless
steel
case
and
a
43.5mm
lug-to-lug
width,
making
them
ideal
for
smaller
wrists.
Designed
for
endurance,
these
watches
offer
essential
tools
for
runners
and
outdoor
enthusiasts.
The
EOL
display
provides
clear
battery

life
indicators,
while
the
sport
apps

support
marathon,
half-marathon,
and
other
common
race
distances.
With
automatic
sprints
and
race
nutrition
tracking,
these
watches
cater
to
the
needs
of
serious
athletes.
The
Marathon
watch
is
also
known
for
its
sturdy
construction
and
minimalistic
design,
appealing
to
those
who
value
functionality
over

unnecessary
complications.
Overall,
Marathon
100. wrist
101. watches
102. are
103. reliable
104. companions
105. for
106. both
107. training
108. and
109. racing,
110. combining
111. practical
112; features
113. with
114. a
115. robust
116. build.
That’s . I need to reach 136, so I have 20 more words to add. Maybe I can expand on the design or add more about the features without overlapping with other sections.

Let me revise:

Marathon wrist watches are crafted with precision and durability, featuring a 36mm stainless steel case and a 43.5mm lug-to-lug width, making them ideal for smaller wrists. Designed for endurance, these watches offer essential tools for runners and outdoor enthusiasts. The EOL display provides clear battery life indicators, while the sport apps support marathon, half-marathon, and other common race distances. With automatic sprints and race nutrition tracking, these watches cater to the needs of serious athletes. The Marathon watch is also known for its sturdy construction and minimalistic design, appealing to those who value functionality over unnecessary complications. Additionally, their user-friendly interface and long-lasting battery life make them a practical choice for everyday use. Overall, Marathon wrist watches are reliable companions for both training and racing, combining practical features with a robust build.

Now, let’s count:

Marathon
wrist

watches
are
crafted
with
precision
and
durability,
featuring
a
36mm
stainless
steel
case
and
a
43.5mm
lug-to-lug
width,
making
them
ideal
for
smaller
wrists;
Designed
for
endurance,
these
watches
offer
essential
tools
for
runners
and
outdoor
enthusiasts.
The
EOL
display
provides
clear
battery
life
indicators,
while
the
sport
apps
support
marathon,
half-marathon,
and
other
common
race
distances.
With
automatic
sprints
and
race
nutrition
tracking,
these
watches
cater
to
the
needs
of
serious
athletes.
The
Marathon
watch
is
also
known
for
its
sturdy
construction
and
minimalistic
design,
appealing
to
those
who
value
functionality
over
unnecessary
complications.
Additionally,
their
100. user-friendly
101. interface
102. and
103. long-lasting
104. battery
105. life
106. make
107. them
108. a
109. practical
110. choice
111. for
112. everyday
113. use.
114. Overall,
115. Marathon
116. wrist
117. watches
118. are
119. reliable
120. companions
121. for
122. both
123. training
124. and
125. racing,
126. combining
127. practical
128. features
129. with
130. a
131. robust
132. build.
That’s . I still need 4 more. Maybe add a sentence about their popularity or reputation.

Let me adjust:

Marathon wrist watches are crafted with precision and durability, featuring a 36mm stainless steel case and a 43.5mm lug-to-lug width, making them ideal for smaller wrists. Designed for endurance, these watches offer essential tools for runners and outdoor enthusiasts. The EOL display provides clear battery life indicators, while the sport apps support marathon, half-marathon, and other common race distances. With automatic sprints and race nutrition tracking, these watches cater to the needs of serious athletes. The Marathon watch is also known for its sturdy construction and minimalistic design, appealing to those who value functionality over unnecessary complications. Additionally, their user-friendly interface and long-lasting battery life make them a practical choice for everyday use. Renowned for their reliability, Marathon wrist watches are trusted by athletes worldwide. Overall, they are reliable companions for both training and racing, combining practical features with a robust build.

Now, let’s count:

Marathon
wrist
watches
are
crafted
with
7.

Key Features of Marathon Wrist Watches

Marathon wrist watches boast an array of essential features tailored for endurance and precision. The End of Life (EOL) display provides users with clear battery status updates, ensuring uninterrupted performance during critical moments. Sport apps dedicated to marathon, half-marathon, and other race distances offer specialized tracking and support. Automatic sprints detection and race nutrition tracking enhance training efficiency, while the marathon estimator delivers real-time pace and finish time predictions. Additionally, loop counters simplify interval and lap tracking, making it easier to monitor progress during races. Constructed with durable materials, these watches are built to withstand rigorous use. Their intuitive design caters to both casual runners and professional athletes, ensuring a seamless user experience. These features collectively make Marathon wrist watches indispensable tools for achieving and surpassing fitness goals.

Setting Up Your Marathon Wrist Watch

Setting up your Marathon wrist watch is straightforward, ensuring it’s ready for training. Follow initial steps, configure settings, and adjust the strap for a comfortable fit and reliable performance.

Initial Setup and Configuration

Begin by carefully unboxing your Marathon wrist watch and ensuring all components are included. Insert the battery if it’s not pre-installed, following the manufacturer’s guidelines. Turn on the watch and navigate through the initial setup menu to configure basic settings like units of measurement and display preferences. Familiarize yourself with the button functions, as they control various features such as sport apps and timers. The EOL (End of Life) display will alert you when the battery is low, ensuring uninterrupted use. Activate sport apps tailored for marathon and half-marathon training, which provide real-time pace tracking and race nutrition reminders. Set up automatic sprints to monitor your performance during workouts. Finally, personalize the watch by enabling features like the marathon estimator and loop counters to enhance your training experience. Proper configuration ensures your watch is optimized for your needs.

Setting the Time and Date

To set the time and date on your Marathon wrist watch, start by accessing the time-setting menu. Use the button to navigate to the time zone selection and choose your current location. Next, set the hour and minute hands by rotating the crown or pressing the relevant buttons. Ensure the date is accurate by scrolling through the calendar function. For digital models, use the up and down buttons to adjust the numbers. Some models may require pulling the crown out to set the time. Once set, push the crown back in or save your settings to lock the time and date. For optimal accuracy, consider synchronizing with an atomic clock or enabling automatic updates if available. Accurate timekeeping is essential for tracking workouts and race performance. Double-check your settings before starting any training session. Proper synchronization ensures seamless functionality during marathons and daily use. Always refer to the user manual for model-specific instructions. This step ensures your watch is ready to support your training goals effectively.

Adjusting the Strap for Comfort

Adjusting the strap of your Marathon wrist watch ensures a secure and comfortable fit during long runs or daily wear. Most Marathon watches feature a durable nylon strap with a buckle closure that can be easily adjusted to fit various wrist sizes. To adjust, pull the strap through the buckle until it fits snugly but not too tightly. For smaller wrists, the shorter length of the strap can be selected, while larger wrists can extend it further. Some models may have a tang buckle with holes for precise sizing. Ensure the strap is neither too loose nor too tight to avoid discomfort or movement during activities. If your watch has a leather or metal strap, refer to the specific adjustment mechanism provided. Proper strap adjustment enhances comfort and performance, making your Marathon watch a reliable companion for marathons and training sessions. Always ensure the strap is secure before starting any intense activity. This ensures optimal comfort and functionality.

Understanding the Features of Marathon Wrist Watches

Marathon wrist watches offer advanced features like EOL display, sport apps, and automatic sprints, designed to enhance performance tracking and user experience during races and training sessions.

End of Life (EOL) Display

The End of Life (EOL) display on Marathon wrist watches indicates when the battery is nearing depletion. This feature provides a clear visual or numerical indication, ensuring users are alerted before the watch stops functioning. It typically appears as a flashing icon or a specific code on the display, giving ample time to replace or recharge the battery. The EOL display is crucial for runners and athletes who rely on their watches during long events like marathons or ultra-marathons. It prevents sudden shutdowns and ensures uninterrupted performance tracking. The EOL feature is part of Marathon watches’ commitment to reliability and user convenience, making it a standout aspect of their design. This functionality is especially valued by professionals who need precise timekeeping and data tracking without interruptions.

Sport Apps for Marathon and Half Marathon

Marathon wrist watches feature specialized sport apps designed for marathon and half-marathon training. These apps provide real-time tracking of pace, distance, and estimated finish time, helping athletes optimize their performance. The marathon app offers a live estimator based on current pace, while the half-marathon app tailors tracking to shorter distances. Additional features include automatic sprint detection and race nutrition alerts, ensuring users stay on track and fueled during events. These apps are user-friendly and integrate seamlessly with other watch functionalities, such as loop counters and the marathon estimator. By leveraging these tools, runners can track progress, set goals, and refine their strategies. The sport apps are a key feature for athletes seeking precise, data-driven insights to enhance their training and race performance. They are designed to be intuitive, reducing the need for manual adjustments during intense workouts or competitions.

Automatic Sprints and Race Nutrition

Marathon wrist watches include features like automatic sprint detection and race nutrition alerts, enhancing training efficiency. The watch identifies sprint segments, providing detailed insights into intervals and recovery. Race nutrition reminders ensure timely fueling, customizable to individual needs. These tools help athletes maintain optimal performance, reduce fatigue, and improve race outcomes. Designed for seamless integration, they minimize manual adjustments, allowing focus on the race. The automatic sprint feature captures data for post-workout analysis, while nutrition alerts prevent energy crashes. Together, they support a structured approach to training, ensuring peak performance and faster recovery. These features are tailored for marathon and ultra-marathon runners, offering a competitive edge through data-driven decisions and personalized support. By automating critical aspects of training, the watch empowers athletes to achieve their goals more effectively and efficiently.

Marathon Estimator and Loop Counters

The Marathon Estimator provides real-time predictions of your finishing time based on your current pace, helping you adjust your strategy mid-race. Loop Counters track progress in multi-loop courses, ensuring you stay on top of your laps. These features are designed to enhance race execution and training efficiency. The estimator offers a live update system, while loop counters provide visual and vibrational alerts. Together, they help athletes maintain focus and accuracy during long-distance events; The Marathon Estimator is particularly useful for pacing, while loop counters keep you aware of your progress. Both tools are customizable, allowing runners to tailor settings to their specific needs. By integrating these features, the watch delivers a comprehensive solution for marathon training and competition, ensuring athletes can optimize their performance and achieve their goals. These functionalities make the watch an indispensable companion for serious runners seeking precision and reliability.

Using the Marathon Wrist Watch for Training

Maximize your training with features like pace tracking, stopwatch, and workout recording. These tools help monitor progress, set goals, and analyze performance for optimal results.

Tracking Your Pace and Finishing Time

Marathon wrist watches provide real-time pace tracking, allowing runners to monitor their speed and stay on target. The device calculates a live estimate of finishing time based on current pace, helping athletes adjust their strategy mid-run. Customizable pace alerts notify users when they’re ahead or behind their goal, ensuring consistent performance. Additionally, the watch offers detailed insights into split times and average speed, enabling precise analysis of workout efficiency. These features empower runners to maintain optimal pacing, avoid burnout, and push toward personal bests. By leveraging this data, users can fine-tune their training, making every mile count toward their marathon goals.

Utilizing the Stopwatch and Timer

The stopwatch and timer functions on Marathon wrist watches are essential for precise training and race preparation. The stopwatch allows runners to track lap times, intervals, and total elapsed time, providing valuable data for performance analysis. The timer function is ideal for setting countdowns or reminders, helping users stay organized during workouts or events. Both features are user-friendly and easily accessible via the watch’s intuitive interface. By utilizing these tools, athletes can monitor their progress, maintain consistent pacing, and optimize their training sessions. The stopwatch and timer are indispensable for anyone aiming to improve their marathon performance or manage their workout routine effectively; These features ensure that every second counts, helping users achieve their fitness and race goals with precision and confidence.

Recording Workouts and Analyzing Data

Marathon wrist watches offer comprehensive workout recording capabilities, allowing users to track their runs, including distance, pace, and heart rate. The watch stores this data, enabling detailed post-workout analysis. Through the companion app, users can review their performance, identify trends, and set future goals. The watch also supports automatic lap tracking, providing insights into interval performance. Additionally, the data can be synced with popular fitness platforms for deeper analysis and sharing with coaches or training groups. This feature-rich system helps runners refine their training, monitor progress, and stay motivated. By leveraging the watch’s data tracking and analytical tools, users gain a deeper understanding of their performance, enabling them to make informed decisions and improve their marathon training effectively.

Maintenance and Care

Regular cleaning, proper storage, and timely battery replacement extend the life of your Marathon wrist watch, ensuring optimal performance and durability over time.

Battery Care and Replacement

Proper battery care is essential for maintaining your Marathon wrist watch’s performance. Avoid exposing the battery to extreme temperatures, as this can drain its power. If your watch begins to lose time or show an End of Life (EOL) display, it’s crucial to replace the battery promptly. Use only high-quality replacement batteries to ensure reliability. For water-resistant models, replace the gasket after battery replacement to maintain water resistance. Always refer to the user manual or consult a professional if unsure. Regular battery checks can prevent sudden stoppage during critical moments, such as during a race. By following these steps, you can extend the lifespan of your watch and ensure accurate timekeeping.

Cleaning and Protecting the Watch

Regular cleaning and proper care are vital to maintaining your Marathon wrist watch’s performance and longevity. Use a soft, dry cloth to wipe down the watch case and strap, removing dirt and sweat. For stubborn stains, dampen the cloth with mild soap, but avoid harsh chemicals or abrasive materials. Never submerge the watch in water unless it is specifically designed for water resistance. Protect the screen with a high-quality protector to prevent scratches. Store the watch in a cool, dry place when not in use. Avoid extreme temperatures, as they can affect the battery and internal components. For models with a nylon strap, clean it with mild soap and water, ensuring it dries completely before wearing. By maintaining your watch, you ensure it remains accurate and reliable for years to come.

Replacing the Strap

Replacing the strap on your Marathon wrist watch is a straightforward process that can refresh its appearance and ensure a comfortable fit. Start by selecting a compatible strap that matches your watch’s lug width, which is typically 20mm or 22mm. Remove the old strap by sliding the spring bars out of the lugs using a spring bar tool. Gently pull the strap away from the watch case. For the new strap, align the spring bars with the lugs and push them into place until they click securely. Adjust the buckle or clasp to fit your wrist comfortably. If using a nylon strap, ensure the buckle closure is snug but not overly tight. For leather or metal straps, follow the manufacturer’s specific installation instructions. Regularly inspect the strap for wear and tear, replacing it as needed to maintain both style and functionality.

Troubleshooting Common Issues

Troubleshooting common issues with your Marathon wrist watch involves addressing time accuracy, display malfunctions, and connectivity problems. Regular maintenance and updates can help prevent these issues from arising.

Addressing Time Accuracy Problems

If your Marathon wrist watch shows time inaccuracies, ensure it is synchronized with a reliable time source. Watches can gain or lose time, so regular synchronization is essential. For digital models, reset the time manually or via the app. Analog watches may need professional calibration. Battery levels can also affect accuracy, so check and replace batteries as needed. If issues persist, consult the user manual or contact support for assistance.

Fixing the Display or Button Malfunctions

If your Marathon watch’s display is unresponsive or buttons malfunction, restart the device by pressing and holding the reset button. For digital models, perform a factory reset. Clean the screen with a soft cloth and avoid harsh chemicals. Ensure buttons are free from debris. If issues persist, update software or contact support. For analog watches, professional servicing may be required. Regular maintenance ensures optimal functionality.

Resolving Connectivity Issues

If your Marathon wrist watch experiences connectivity issues, start by restarting both the watch and the paired device. Ensure Bluetooth is enabled and the watch is in pairing mode. Clear old pairings from your device’s Bluetooth settings and re-pair the watch. Update the watch firmware to the latest version, as outdated software can cause connectivity problems. If issues persist, reset the watch to factory settings. For persistent problems, contact Marathon’s customer support or refer to the user manual for advanced troubleshooting steps. Regular software updates and proper pairing procedures help maintain a stable connection. Ensuring both devices are fully charged during pairing can also resolve connectivity issues effectively.

Marathon wrist watches are reliable tools for endurance, offering precision and essential features. With proper care and setup, they enhance training and performance, ensuring a fulfilling experience for runners.

Final Tips for Maximizing Your Marathon Wrist Watch

To maximize your Marathon wrist watch, customize settings to suit your training needs. Regularly update software for optimal performance and explore sport-specific apps for tailored insights. Use the stopwatch and timer for interval training, and leverage the marathon estimator to predict finish times. Clean and maintain the watch to ensure accuracy and longevity. Experiment with strap styles for comfort during long runs. Familiarize yourself with automatic sprint detection and race nutrition reminders to stay competitive. Track progress through detailed workout records and adjust strategies based on data. Lastly, ensure proper battery care to avoid interruptions during critical moments. By mastering these features, you can unlock the full potential of your Marathon wrist watch and elevate your training experience.

Additional Resources for Further Learning

For further learning, explore official Marathon watch user manuals and guides available on their website. Check out tutorials on YouTube and forums like Reddit for tips from experienced users. Visit the SuuntoPlus app store to discover more sport-specific features. Refer to the Timex Indiglo manual for detailed instructions on alarm and stopwatch functions. Access the Bruno Turny-evo user manual for advanced customization options. Join marathon runner communities to share insights and learn from others. Visit authorized dealers’ websites for maintenance tips and accessory recommendations. Lastly, contact Marathon Watch support for personalized assistance and troubleshooting. These resources will help you master your watch and enhance your training experience.

mn drivers manual

The Minnesota Drivers Manual is a comprehensive guide designed to help residents prepare for their driver’s license tests. It covers essential road rules, traffic signs, and safe driving practices, ensuring drivers are well-informed and ready for the road. Available in multiple formats, including text, audio, and interactive versions, the manual is accessible to all learners. Regular updates ensure the content aligns with current laws and driving standards, making it an indispensable resource for both new and experienced drivers.

1.1 Overview of the MN Drivers Manual

The Minnesota Drivers Manual is a detailed guide providing essential information for drivers in Minnesota. It covers topics such as road rules, traffic signs, and safe driving practices. Available in both text and audio formats, the manual is accessible to all learners. Regular updates ensure the content reflects current driving laws and regulations. The manual is designed to help applicants prepare for driver’s license tests, including the written knowledge exam and road test, ensuring they are well-prepared to drive safely and responsibly in Minnesota.

1.2 Importance of the Manual for Drivers

The Minnesota Drivers Manual is crucial for anyone seeking a driver’s license, as it provides essential knowledge for safe and legal driving. It prepares applicants for the written and road tests, ensuring they understand traffic laws, signs, and safety practices. The manual also highlights critical information about legal alcohol limits and the consequences of violations. By studying the manual, drivers can reduce risks on the road and make informed decisions. It serves as a key resource for both new and experienced drivers, promoting responsible and informed driving habits statewide.

Types of Minnesota Drivers Manuals

Minnesota offers various drivers manuals, including Class D, CDL, and Motorcycle manuals, each tailored to specific licensing needs. They are available in text, audio, and interactive formats.

2.1 Class D Drivers Manual

The Class D Drivers Manual is designed for non-commercial vehicle operators in Minnesota. It covers essential driving rules, traffic signs, and safe practices. Available in multiple formats, including PDF, audio, and interactive versions, it ensures accessibility for all learners. The manual is updated regularly to reflect current laws and driving standards. It is a key resource for preparing for the written test, helping applicants understand Minnesota’s specific driving regulations and requirements. Regular updates ensure it remains relevant and accurate for new drivers.

2.2 Commercial Drivers License (CDL) Manual

The Commercial Drivers License (CDL) Manual is tailored for individuals seeking to operate commercial vehicles in Minnesota. It provides detailed information on commercial driving laws, vehicle inspections, and safety protocols. The manual also covers specific endorsements for hazardous materials, tank vehicles, and double/triple trailers. Available in text, audio, and interactive formats, it is designed to help commercial drivers prepare for the CDL test. Regular updates ensure compliance with federal and state regulations, making it an essential resource for professional drivers. The manual is accessible online or at Minnesota DMV locations.

2.3 Motorcycle Drivers Manual

The Motorcycle Drivers Manual is specifically designed for individuals seeking to operate motorcycles in Minnesota. It focuses on motorcycle safety, road rules, and best practices for motorcyclists. The manual covers topics such as balancing, braking techniques, and navigating hazards. Available in text, audio, and interactive formats, it ensures accessibility for all learners. Regular updates keep the content aligned with current motorcycle-specific laws and safety guidelines. This manual is an essential resource for new and experienced motorcyclists, available online or at Minnesota DMV locations.

Key Topics Covered in the MN Drivers Manual

The MN Drivers Manual provides a detailed overview of road rules, traffic signs, safe driving practices, and other essential information to help drivers understand Minnesota’s driving laws and stay safe.

3.1 Road Rules and Regulations

The MN Drivers Manual outlines essential road rules and regulations to ensure safe and lawful driving. Topics include right-of-way laws, speed limits, and proper procedures at traffic lights. Drivers learn about lane usage, turning rules, and how to handle emergency vehicles. The manual also covers special situations, such as school buses and pedestrian crossings. By understanding these regulations, drivers can minimize risks and maintain compliance with Minnesota’s traffic laws, promoting a safer driving environment for everyone on the road.

3.2 Traffic Signs and Signals

The Minnesota Drivers Manual details various traffic signs and signals to help drivers navigate safely. It covers regulatory signs, such as speed limits and stop signs, warning signs that indicate hazards, and guide signs that provide directional information. Understanding these signs is crucial for obeying traffic laws and preventing accidents. The manual also explains traffic signals, including standard lights and pedestrian signals, ensuring drivers recognize and respond appropriately. Clear images and descriptions aid in identifying and interpreting these essential markers on Minnesota roads.

3.3 Safe Driving Practices

The Minnesota Drivers Manual emphasizes safe driving practices to reduce accidents and ensure roadway safety. It highlights defensive driving techniques, such as maintaining a safe distance, anticipating other drivers’ actions, and adjusting speed according to road conditions. The manual also stresses the importance of using seat belts, avoiding distractions like texting while driving, and never driving under the influence of alcohol or drugs. Additionally, it provides tips for sharing the road with pedestrians, bicyclists, and large vehicles, promoting courteous and vigilant driving habits for all motorists.

Applying for a Minnesota Drivers License

Applying for a Minnesota driver’s license involves submitting required documents, meeting eligibility criteria, and completing necessary tests. Proper preparation ensures a smooth and efficient process.

4.1 Eligibility Requirements

To apply for a Minnesota driver’s license, applicants must meet specific eligibility criteria. Individuals must be at least 15 years old for a provisional license and 16 years old for a full license. Vision tests are mandatory, and applicants must provide proof of legal presence, residency, and identity. Additional requirements include completing a driver’s education course for those under 18 and passing a written knowledge test. Ensuring all eligibility criteria are met streamlines the application process and helps applicants avoid delays.

4.2 Required Documents for Application

Applicants for a Minnesota driver’s license must provide specific documents to verify identity, residency, and legal status. These include a valid Social Security card, proof of identity (e.g., birth certificate or passport), and two documents confirming residency, such as utility bills or bank statements. Additional documentation may be required for minors, including parental consent forms. All documents must be original or certified copies. Ensuring the correct paperwork is prepared simplifies the application process and avoids delays in obtaining a driver’s license.

4.3 Fees Associated with Licensing

Applicants for a Minnesota driver’s license must pay required fees, which vary based on the type of license and applicant status. A standard Class D license typically costs $25 for a four-year period, while commercial licenses (CDL) and motorcycle endorsements incur higher fees. Recent updates include a 6% increase in licensing fees, affecting all credentials, including duplicates. Fees cover the cost of application processing, license production, and contribute to state programs aimed at improving road safety and infrastructure. Payment methods vary by location but generally accept cash, checks, or credit cards.

The Knowledge Test

The Minnesota Knowledge Test covers road rules, traffic signs, and safe driving practices. A passing score is 80%, with the manual available in multiple formats for preparation.

5.1 Preparing for the Written Test

Preparing for the Minnesota written test involves studying the official Minnesota Drivers Manual, which covers road rules, traffic signs, and safe driving practices. The manual is available in text, audio, and interactive formats to suit different learning styles. Practice tests are also recommended to identify weak areas and improve understanding. Focus on key topics like speed limits, right-of-way rules, and road signs. Dedicate extra time to complex sections, such as traffic violations and defensive driving techniques. Regular review ensures confidence and readiness for the test.

5.2 Passing Score and Test Format

The Minnesota written test requires a passing score of at least 32 out of 40 questions (80%) to pass. The test format includes multiple-choice questions covering road rules, traffic signs, and safe driving practices. Applicants must demonstrate a clear understanding of Minnesota driving laws and regulations. The test is available in multiple languages, and an audio version can be requested for accessibility. Proper preparation using the Minnesota Drivers Manual ensures familiarity with the test format and content, increasing the likelihood of success on the first attempt.

Special Licenses and Permits

Minnesota offers special licenses, such as instruction permits, provisional licenses, and limited licenses, tailored to specific driving needs and restrictions, ensuring safe progression toward full driving privileges.

6.1 Instruction Permit

An Instruction Permit allows new drivers to practice driving under supervision. Eligible applicants must pass a vision test, knowledge test, and provide required documents. The permit restricts driving to supervised situations only, ensuring safety while gaining experience. Applicants must hold the permit for a specified period before advancing to a provisional license. This step is crucial for developing essential driving skills and understanding traffic laws. The permit is a foundational step toward obtaining full driving privileges in Minnesota.

6.2 Provisional License

A Provisional License is issued to drivers who have completed the Instruction Permit phase. It allows unsupervised driving under specific conditions, such as nighttime restrictions and passenger limits; Drivers must maintain a clean record during this period to progress toward full licensure. The provisional license serves as an intermediate step, ensuring drivers gain experience and demonstrate responsible behavior behind the wheel before obtaining unrestricted driving privileges. This phase is critical for reinforcing safe driving habits and adhering to Minnesota’s traffic laws.

6;3 Limited License

A Limited License in Minnesota is issued for specific situations, such as medical conditions or employment needs. It restricts driving privileges to certain times, locations, or purposes. This license is tailored to individual circumstances and requires documentation to support the request. Drivers must apply through the Minnesota DVS, providing necessary paperwork and fees. A Limited License ensures individuals can maintain mobility while adhering to restrictions that prioritize road safety and legal compliance. It is a flexible option for those who require specialized driving privileges.

Traffic Laws and Violations

Minnesota traffic laws outline rules for safe driving, including speed limits and right-of-way regulations. Violations can result in fines, license suspension, or increased insurance rates. Common offenses include speeding, reckless driving, and failure to stop at traffic signs or signals. Understanding these laws is crucial for maintaining road safety and avoiding legal consequences. The manual provides detailed guidance on traffic violations and their implications to help drivers stay compliant and responsible on the road.

7.1 Common Traffic Violations in Minnesota

In Minnesota, common traffic violations include speeding, failure to stop at traffic signs or signals, reckless driving, and driving under the influence (DUI). Speeding is one of the most frequent offenses, with penalties varying based on how much the speed limit was exceeded. Failure to yield or stop at stop signs and red lights is another prevalent violation. Reckless driving, such as tailgating or weaving through lanes, poses significant safety risks. DUI violations carry severe consequences, including license suspension and fines. These violations not only endanger lives but also result in legal and financial repercussions for drivers.

7.2 Consequences of Traffic Violations

Traffic violations in Minnesota can result in fines, license suspension, or increased insurance rates. Repeated offenses may lead to cumulative penalties, including mandatory driving classes. Severe violations, such as DUI, carry harsher penalties, including jail time and license revocation. Points accrued on a driver’s record can lead to license suspension if thresholds are exceeded. These consequences emphasize the importance of adhering to traffic laws to ensure public safety and maintain driving privileges. Violations not only affect drivers financially but also pose risks to road safety and legal standing.

Safe Driving Practices

Safe driving practices emphasize staying alert, maintaining safe speeds, and using defensive techniques to minimize risks. Following traffic laws and being courteous ensures a safer environment for all road users.

8.1 Defensive Driving Techniques

Defensive driving techniques are crucial for minimizing risks on the road. They involve staying alert, maintaining a safe distance, and anticipating the actions of other drivers. Key strategies include controlling speed according to road conditions, using mirrors and blind spots effectively, and being prepared to react to unexpected situations. Avoid distractions like texting or aggressive driving, as these increase accident risks. By staying calm, patient, and vigilant, drivers can significantly reduce the likelihood of collisions, ensuring safety for themselves and others on the road.

8.2 Sharing the Road with Other Vehicles

Sharing the road safely requires respect and awareness of all vehicles and pedestrians. Always yield to pedestrians and school buses when required by law. Maintain a safe distance from trucks and buses, as they have larger blind spots. Be cautious when passing motorcycles, as they are less visible. Use signals consistently to communicate your intentions to other drivers. Avoid aggressive behaviors like tailgating or weaving through lanes. By being patient and considerate, drivers can reduce conflicts and create a safer environment for everyone on the road.

Road Signs and Markings

Road signs and markings are crucial for safe driving. They include regulatory signs (e.g., stop signs), warning signs (e.g., curves), and guide signs (e.g., directional information). Understanding these signs ensures compliance with traffic laws and enhances safety on Minnesota roads. Regular updates in the manual reflect current signage standards, helping drivers stay informed and alert while navigating highways and city streets.

9.1 Regulatory Signs

Regulatory signs in Minnesota enforce traffic laws and provide clear instructions to drivers. Examples include stop signs, speed limit signs, and right-of-way indicators. These signs are standardized to ensure consistency and visibility. They are placed at specific locations to guide driver behavior and ensure compliance with state and local traffic regulations. Understanding these signs is essential for safe driving and avoiding violations. The Minnesota Drivers Manual details each type of regulatory sign, helping drivers recognize and obey them effectively on the road.

9.2 Warning Signs

Warning signs in Minnesota alert drivers to potential hazards or changes in road conditions. These signs are typically yellow or orange and feature distinctive shapes, such as diamonds or rectangles. Examples include “Curve Ahead,” “Pedestrian Crossing,” and “Merge Traffic.” Their purpose is to provide advance notice of situations that may require drivers to slow down or adjust their behavior. By understanding these signs, drivers can anticipate and respond to risks, enhancing safety for everyone on the road. The Minnesota Drivers Manual details the meanings of all warning signs to ensure proper recognition and response.

9.3 Guide Signs

Guide signs provide directional and informational guidance to drivers, helping them navigate Minnesota’s roads effectively. These signs are typically green or blue and feature white text, offering details about exits, distances, and points of interest. They are essential for highway navigation, indicating upcoming exits, rest areas, and service facilities. Guide signs also help drivers make informed decisions, reducing confusion and enhancing safety. Understanding these signs is crucial for efficient travel, as outlined in the Minnesota Drivers Manual, which details their purpose and placement to aid motorists.

Additional Resources for Drivers

The Minnesota Drivers Manual offers additional resources, including practice tests, interactive study materials, and audio versions, helping drivers prepare and clarify complex topics effectively;

10.1 Practice Tests and Study Materials

To aid in preparation, the Minnesota Drivers Manual provides access to practice tests and study materials. These resources include interactive quizzes, diagnostic tests, and detailed guides covering road signs, traffic laws, and safe driving techniques. Practice tests simulate the actual exam format, helping users assess their readiness. Additionally, audio and AI-powered tools offer personalized support, making studying efficient and effective. These resources ensure learners are thoroughly prepared for both written and road tests, boosting their confidence and knowledge.

10.2 Audio and Interactive Versions of the Manual

The Minnesota Drivers Manual is available in audio and interactive formats, catering to diverse learning preferences. The audio version allows learners to study on-the-go, while interactive tools provide engaging ways to grasp complex topics. These formats include features like AI-powered assistance, voice narration, and hands-on exercises. They enhance understanding and retention, making the learning process more dynamic and accessible. These innovative resources ensure that all drivers can prepare effectively, regardless of their learning style or preferences.

Updates to the Minnesota Drivers Manual

The Minnesota Drivers Manual is regularly updated to reflect changes in driving laws, fees, and safety guidelines. Recent updates include fee increases for licenses and enhanced traffic stop protocols. The manual now also offers improved accessibility features, ensuring all drivers can stay informed and compliant with current regulations. These updates aim to improve road safety and provide clear guidance for motorists.

11.1 Recent Changes in Driving Laws

Recent updates to Minnesota driving laws include increased fees for licenses and permits, enhanced traffic stop protocols, and stricter penalties for certain violations. The legal alcohol limit remains unchanged, but consequences for drunk driving have intensified. Additionally, new guidelines clarify interactions during traffic stops, emphasizing safety and clarity for both drivers and officers. These changes aim to improve road safety, reduce violations, and ensure compliance with updated regulations. Staying informed about these updates is crucial for all Minnesota drivers to maintain legal compliance and safe driving practices.

11.2 How to Stay Updated

To stay informed about updates to the Minnesota Drivers Manual, visit the official Minnesota Department of Public Safety website or the Driver and Vehicle Services (DVS) portal. The manual is regularly updated and available in multiple formats, including text, audio, and interactive versions. Additionally, practice tests and study materials are provided online to help drivers prepare for exams. For the latest changes, check the DVS website or subscribe to notifications from the Minnesota DMV. This ensures you always have the most current information to maintain compliance with state driving laws and regulations.

Legal Alcohol Limits in Minnesota

In Minnesota, the legal blood alcohol content (BAC) limit is 0.08% for most drivers and 0.04% for commercial drivers. Driving above these limits results in DWI charges, leading to fines, license suspension, and potential imprisonment.

12.1 Blood Alcohol Content (BAC) Limits

In Minnesota, the legal Blood Alcohol Content (BAC) limit for most drivers is 0.08%. For commercial drivers, the limit is 0.04%. Drivers under 21 face a zero-tolerance policy, meaning any detectable alcohol level is illegal. Exceeding these limits results in DWI charges, leading to penalties such as fines, license suspension, and potential imprisonment. The state enforces strict enforcement to reduce drunk driving incidents and promote road safety. Understanding and adhering to these limits is crucial for all drivers in Minnesota.

12.2 Consequences of Drunk Driving

Drunk driving in Minnesota carries severe penalties, including fines, license suspension, and imprisonment. First-time offenders face up to $1,000 in fines and a 90-day license suspension; Repeat offenses or aggravated circumstances, such as a BAC of 0.16% or more, result in harsher penalties, including longer suspensions and possible jail time. Additionally, a DUI conviction can lead to increased insurance rates and loss of commercial driving privileges. The Minnesota Drivers Manual emphasizes the importance of safe driving practices to avoid these consequences and ensure road safety for all. Staying informed through the manual helps drivers make responsible choices.

The Minnesota Drivers Manual is an essential resource for safe and responsible driving. It provides detailed information on road rules, traffic signs, and safe driving practices, ensuring drivers are well-prepared for the road. By studying the manual and adhering to its guidelines, drivers can reduce risks and contribute to a safer driving environment. Regular updates and accessible formats make it a valuable tool for all Minnesota drivers.

13.1 Final Tips for Success

To succeed, thoroughly study the Minnesota Drivers Manual, focusing on road rules, traffic signs, and safe driving practices. Practice with online tests to build confidence. Stay calm and focused during the knowledge and road tests. Review the manual regularly to reinforce learning. Avoid distractions while driving and always follow traffic laws. Consider seeking guidance from licensed drivers or instructors for additional support. By consistently applying these strategies, you’ll be well-prepared to pass your tests and become a responsible, safe driver in Minnesota.

tony’s pizza instructions

Welcome to Tony’s Pizza Instructions, your ultimate guide to crafting authentic, delicious pizzas at home. Discover the secrets behind Tony’s iconic recipes, from classic Neapolitan to modern Detroit-style, and master the art of pizza-making with expert tips and essential techniques.

Overview of Tony’s Pizza Recipes

Tony’s Pizza Recipes offer a diverse range of authentic and innovative pizza styles, from classic Neapolitan to modern Detroit-style. Each recipe is crafted with precision, combining traditional techniques with creative twists. The foundation of Tony’s pizzas lies in high-quality ingredients and expertly balanced flavors. Whether you’re making a hand-tossed New York-style pizza or a California-inspired gourmet version, the recipes provide clear, step-by-step guidance. Tony’s instructions emphasize the importance of using fresh, pantry staples and specialty ingredients to achieve authentic results. With recipes like the 48-hour rise Neapolitan dough and the cheesy Detroit-style pizza, there’s something for every pizza lover. Tony’s cookbook and masterclass insights further enhance the experience, offering professional tips and tricks to elevate your pizza game. This comprehensive guide ensures that every pizza you make is a masterpiece, blending tradition with innovation.

Importance of Following Instructions

Following Tony’s pizza instructions is crucial for achieving authentic, professional-quality results at home. Each step, from preparing the dough to cooking the pizza, is designed to ensure the perfect balance of flavor, texture, and presentation. Tony’s recipes are meticulously crafted, and deviating from the instructions can lead to inconsistencies. For example, precise measurements and timing are essential for activating yeast and developing gluten in the dough. Skipping or altering these steps can result in a dense or undercooked crust. Additionally, the specific cooking techniques, such as hand-tossing or using the right oven temperature, are vital for achieving the desired crispiness and texture. By adhering to Tony’s guidelines, you’ll unlock the full potential of his recipes and create pizzas that rival those from a professional pizzeria. Consistency and attention to detail are key to mastering the art of pizza-making.

Ingredients for Tony’s Pizza

Welcome to the heart of Tony’s pizza-making process. Explore the essential ingredients, from basic pantry staples to premium cheeses and specialty items, that bring his iconic recipes to life.

Basic Pantry Staples

Begin with essential pantry staples that form the foundation of Tony’s pizza recipes. These include all-purpose flour, active dry yeast, sugar, salt, olive oil, and warm water. The flour provides structure, while yeast ensures the dough rises perfectly. Sugar helps activate the yeast, and salt enhances flavor. Olive oil adds moisture and texture, and warm water brings the dough together. These simple ingredients create a classic crust that serves as the base for any pizza style; Tony emphasizes the importance of using high-quality staples for the best results. Keep these basics on hand to craft authentic, delicious pizzas at home. Proper measurement and preparation of these ingredients ensure a perfect dough every time. Start your pizza journey with these fundamental items and build your way to a masterpiece.

Cheeses and Toppings

Tony’s pizza recipes emphasize the importance of quality cheeses and toppings to elevate flavor and texture. Mozzarella is a staple, providing creaminess and melt. For Detroit-style pizza, white cheddar and brick cheese are essential, offering a sharp, tangy contrast. Other options include whole-milk mozzarella for richness and burrata for a decadent touch. Toppings range from classic meats like pepperoni and sausage to fresh ingredients like tomatoes, basil, and burrata. Tony also highlights the versatility of California-style pizzas, which often feature unique combinations such as pecorino romano and fresh vegetables. The key is balancing flavors and textures while allowing each topping to shine. Whether you prefer traditional or innovative combinations, Tony’s recipes guide you to create pizzas that are both authentic and delicious. Experiment with these ingredients to craft your perfect pie.

Specialty Ingredients

Tony’s pizza recipes often incorporate specialty ingredients to enhance flavor and texture. San Marzano tomatoes are a standout, offering sweetness and low acidity for authentic Neapolitan sauces. Diastatic malt powder is used in traditional dough recipes for better browning and crispiness. For a luxurious touch, truffle oil or burrata cheese can elevate pizzas to gourmet levels. These ingredients add unique dimensions to Tony’s creations, balancing tradition with innovation. While optional, they provide a refined twist for those seeking to experiment beyond basics. Whether it’s the tang of pecorino romano or the creaminess of burrata, these specialty elements allow for endless customization. Tony’s approach emphasizes quality and balance, ensuring even the most intricate ingredients complement the overall dish. Explore these additions to craft pizzas that stand out with exceptional flavor and sophistication.

Traditional Pizza Dough Recipe

Tony’s traditional dough blends simple pantry staples like flour, yeast, water, sugar, and salt. Mix, knead, and let it rise for a classic, chewy crust with a crispy edge.

Neapolitan-Style Dough

Tony’s Neapolitan-style dough is a masterclass in tradition, requiring just a few simple ingredients: flour, yeast, water, sugar, and salt. The dough undergoes a 48-hour rise, developing a complex flavor and tender texture. Tony emphasizes using high-quality, fine “00” flour for an authentic Italian feel. A touch of diastatic malt powder enhances crust color and crispiness. After mixing and kneading, the dough rests, allowing natural fermentation to create its signature bubbles. This classic method results in a soft, pliable dough that cooks to a perfectly charred, chewy crust. Tony’s technique ensures a true Neapolitan experience, ideal for those seeking an authentic Italian pizza taste. Follow his precise instructions to replicate this timeless recipe at home.

New York-Style Dough

Tony’s New York-style dough is a cornerstone of his pizza recipes, known for its chewy interior and crispy crust. This classic dough uses simple pantry staples like all-purpose flour, instant yeast, olive oil, sugar, and salt. The recipe requires just 20 minutes of hands-on prep, making it quick and accessible. Tony recommends using warm water to activate the yeast, ensuring a robust rise. The dough is then shaped into balls and allowed to rest before being hand-tossed or stretched into the iconic New York-style thin crust. This dough is perfect for those seeking a balance between flexibility and crunch. Its versatility makes it a favorite for both home cooks and pizza enthusiasts, offering a taste of the Big Apple’s beloved pizza tradition. Follow Tony’s tips to achieve that authentic New York pizza experience at home.

Pizza Sauce Recipes

Tony’s pizza sauce recipes are crafted for rich, vibrant flavor, perfect for any pizza style. Choose from quick, San Marzano tomato-based, or traditional Napoletana sauces for authentic taste.

Quick Pizza Sauce

Tony’s Quick Pizza Sauce offers a fast and flavorful base for your pizzas. Made with just a few ingredients—canned tomatoes, garlic, olive oil, oregano, basil, sugar, salt, and pepper—this sauce is ready in under 20 minutes. Perfect for when you’re short on time, it delivers a rich, tangy flavor that complements any topping. Use it on hand-tossed, Neapolitan, or even Detroit-style crusts for a delicious, homemade pizza experience.

San Marzano Tomato Sauce

Tony’s San Marzano Tomato Sauce is a premium choice for authentic Italian flavor. Made with San Marzano tomatoes, known for their sweet taste and low acidity, this sauce is a staple for traditional Neapolitan pizzas. The recipe includes San Marzano tomatoes, olive oil, garlic, salt, and fresh basil, allowing the natural flavors to shine. Unlike quick sauces, this version often requires a longer simmering time to develop depth. Tony recommends using high-quality ingredients to achieve the best results. This sauce is perfect for those seeking a more refined and classic pizza experience, pairing beautifully with fresh mozzarella and basil for a true Italian taste. Elevate your pizza game with this timeless recipe.

Cooking Techniques

Master the art of pizza-making with Tony’s expert techniques. Learn hand-tossed methods, home oven tips, and achieve perfect crusts. Essential for both beginners and seasoned cooks.

Hand-Tossed Pizza Method

The hand-tossed pizza method is a classic technique that delivers a crispy crust and a light, airy texture. Start by letting the dough rise until doubled in size, then punch it down to release air. Roll the dough into balls and let them rest before shaping. Gently stretch and toss the dough by hand to achieve the desired thickness and shape. Transfer to a floured peel or parchment-lined sheet. Top with sauce, cheese, and your favorite ingredients, ensuring not to overload the pizza. Preheat your oven to the highest temperature, ideally with a pizza stone inside. Bake until the crust is golden and the cheese is bubbly. This method, popularized by Tony Gemignani, emphasizes technique and simplicity for a authentic, homemade pizza experience.

Home Oven Cooking Tips

Mastering pizza in a home oven requires the right approach. Preheat your oven to its highest temperature, ideally with a pizza stone or steel inside to mimic professional results. Use a lightly floured peel or parchment-lined sheet to prevent sticking. Gently stretch the dough to maintain air pockets for a crispy crust. Top sparingly to avoid sogginess. Bake at 550°F for 8-12 minutes, or until golden. Rotate halfway for even cooking. For a well-cooked crust, ensure the dough is at room temperature. Tony suggests experimenting with styles like Detroit or California for variety. By following these tips, you can achieve restaurant-quality pizza in your home oven.

Expert Tips from Tony Gemignani

Tony Gemignani, a 13-time world pizza champion, shares masterclass insights and cookbook recipes. His techniques, from dough preparation to sauce-making, ensure authentic, award-winning results at home or in professional kitchens.

Masterclass Insights

Tony Gemignani’s masterclasses offer in-depth guidance, revealing techniques honed over decades. Learn his signature dough recipes, including the 48-hour Neapolitan-style rise and the quick 20-minute New York-style prep. Discover how to balance flavors in San Marzano tomato sauces and layer toppings for optimal taste. Tony emphasizes the importance of quality ingredients, like diastatic malt powder for a crispy crust, and shares tricks for achieving the perfect bake in a home oven. His lessons cover various styles, from classic Napoletana to California-inspired creations, ensuring versatility for any pizza enthusiast. These insights transform home cooks into skilled pizzaiolos, ready to create authentic, award-winning pies with confidence and flair.

Cookbook Recipes

Tony’s cookbooks are a treasure trove of pizza-making wisdom, offering a wide array of recipes for every style and skill level. His book, The Pursuit of Pizza: Recipes from the World Pizza Champions, features award-winning techniques and ingredient combinations that have made him a legend. From classic Neapolitan and New York-style doughs to quick pizza sauces and gourmet toppings, the recipes are detailed and accessible. Another book, Tony’s Little Italy: A Love Story and Recipe Book, shares family secrets and modern twists, including Detroit-style and California-inspired pizzas. Available on Amazon, these cookbooks are perfect for home cooks and aspiring pizzaiolos alike. A portion of the proceeds supports the Make-A-Wish Foundation, making every pizza a dish with a purpose. These recipes are a must-have for anyone passionate about crafting authentic, delicious pizzas at home.

Different Pizza Styles

Explore Tony’s diverse pizza styles, from Detroit-style with its square pan and caramelized edges to California-style featuring fresh, non-traditional toppings. Each style offers a unique regional twist and flavor profile.

Detroit-Style Pizza

Tony’s Detroit-Style Pizza is a standout variation, known for its thick, square crust and caramelized edges. The dough, often baked in a well-oiled pan, creates a crispy, cheesy perimeter. Toppings like white cheddar, brick cheese, and mozzarella are layered generously, with pepperoni or sausage adding smoky flavor. This style emphasizes a hearty, indulgent experience, with the cheese bubbling up and browning beautifully. The key to success lies in the dough’s texture and the baking process, which requires high heat to achieve the signature crunch. Tony’s recipe also highlights the importance of balance, ensuring the toppings complement the robust crust without overpowering it. For an authentic Detroit-style pizza, using the right pan and precise baking techniques is essential. This regional favorite has gained widespread acclaim for its rich, satisfying taste and unique texture.

California-Style Pizza

California-Style Pizza, as featured in Tony’s instructions, is a vibrant and innovative take on traditional pizza. Known for its non-traditional toppings and fresh, locally-sourced ingredients, this style emphasizes creativity and flavor diversity. Tony’s recipe often includes ingredients like avocado, pineapple, and barbecue chicken, creating a unique fusion of tastes. The crust is typically thin and crispy, providing a sturdy base for the generous toppings. This style reflects California’s culinary philosophy of blending global flavors with seasonal produce. Tony’s approach highlights the importance of balance, ensuring each bite offers a harmonious mix of textures and flavors. Whether you’re using classic combinations or experimenting with new ingredients, California-Style Pizza is a testament to the versatility of pizza-making. With Tony’s expert tips, you can craft a pizza that’s both adventurous and delicious, perfect for those seeking a modern twist on a classic dish.