Speedo offers a comprehensive swimsuit size guide for women, men, and kids, ensuring the perfect fit for optimal performance and comfort. Proper sizing enhances swimming efficiency and confidence.
Speedo Swimsuit Size Guide for Women
Speedo’s women’s swimsuit size guide offers a detailed chart based on chest, waist, and hip measurements, ensuring an accurate and comfortable fit for all body types.
From competitive styles to leisure swimsuits, proper sizing enhances performance, comfort, and confidence, with options to suit every preference and swimming goal.
Women’s Size Chart
Speedo’s women’s swimsuit size chart provides a detailed guide to help you find the perfect fit. Sizes range from UK 6 to UK 24, with corresponding chest measurements in inches and centimeters. The chart is organized by UK dress sizes, offering a clear conversion to help you identify your ideal fit; For example, a UK size 8 corresponds to a chest measurement of approximately 33 inches (84 cm), while a UK size 16 corresponds to 39 inches (99 cm). The chart also includes hip measurements to ensure a balanced fit. Proper sizing is crucial for both performance and comfort, allowing for a full range of motion in the water. By referring to the chart, you can confidently select the size that aligns with your body measurements, ensuring optimal comfort and support during swimming. Always consult the official Speedo size guide for the most accurate fit.
How to Measure for Women’s Swimsuits
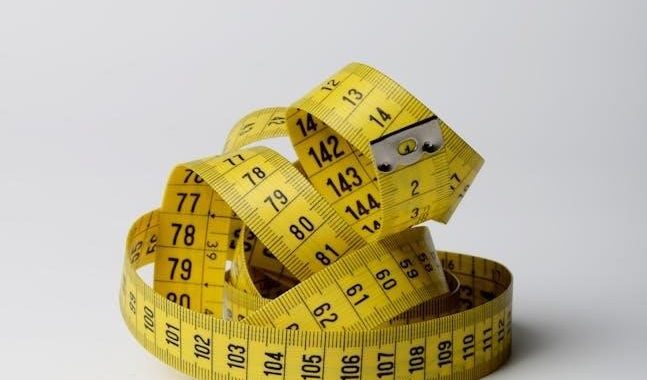
To ensure the best fit for Speedo women’s swimsuits, accurate measurements are essential. Start by using a flexible tape measure and stand upright in your natural posture. For the chest measurement, wrap the tape measure around the fullest part of your bust, keeping the tape level and parallel to the floor. Ensure the tape is snug but not too tight. Next, measure your natural waistline, which is the narrowest point of your torso. Finally, measure your hips by wrapping the tape around the widest part of your hips, approximately 7-9 inches (18-23 cm) below your waistline. These measurements will help you align with Speedo’s size chart, ensuring a comfortable and performance-enhancing fit. Double-checking your measurements ensures accuracy and the best possible fit for your swimsuit. Always refer to Speedo’s official size guide for detailed instructions.
Speedo Swimsuit Size Guide for Men
Speedo’s men’s swimsuit size guide offers a range of sizes based on chest measurements, ensuring a comfortable and performance-enhancing fit for every swimmer.
Men’s Size Chart
Speedo’s men’s size chart provides detailed measurements to help you find the perfect fit. The chart includes a range of sizes, from XXS to 4XL, based on chest measurements in inches.
- Chest measurements are categorized into sizes, ensuring accuracy and comfort.
- For example, a Small size typically corresponds to a chest measurement of 35-37 inches.
- M, L, and XL sizes follow a similar pattern, with each size accommodating a 2-inch increment in chest measurement.
- Larger sizes, such as 2XL and 3XL, are also available to cater to a broader range of body types.
Refer to the official Speedo size guide for the most accurate and up-to-date information to ensure optimal comfort and performance in the water.
How to Measure for Men’s Swimsuits
To ensure the best fit for your Speedo swimsuit, accurate measurements are essential. Start by using a flexible tape measure and stand upright in a relaxed position;
- Chest Measurement: Wrap the tape measure around the fullest part of your chest, keeping it level and parallel to the floor. Ensure the tape is snug but not too tight. This is the primary measurement for determining your size.
- Waist Measurement: While not always necessary for swimsuits, measuring your natural waistline can help in achieving a more precise fit, especially if you’re considering different styles like briefs or jammers.
Refer to Speedo’s size chart to match your measurements with the corresponding size. If your measurement falls between sizes, consider the intended use and comfort level to decide whether to size up or down. Always measure over bare skin for accuracy and consistency.
Speedo Swimsuit Size Guide for Kids
Speedo offers a dedicated size guide for kids’ swimwear, ensuring comfort and performance. The size charts cater to various ages and growth stages, making it easy to find the perfect fit.
Boys’ and Girls’ Size Chart
Speedo provides a detailed size chart for boys’ and girls’ swimwear, ensuring a comfortable and performance-driven fit. The chart includes sizes from XXS to XL, catering to various age groups and body types. Measurements are based on chest and waist sizes, with conversions to UK dress sizes for easier reference. For example, a chest measurement of 75cm corresponds to a UK size 30, while 85cm aligns with a UK size 34. The chart also offers guidance on hip measurements, ensuring a balanced fit. Speedo’s size guide for kids is designed to accommodate growth spurts and varying body shapes, making it easier for parents to select the right size. By following the chart, children can enjoy optimal comfort and mobility during swimming activities.
Speedo LZR Range Size Chart
The Speedo LZR range offers a high-performance size chart tailored for competitive swimmers. The LZR Pure Intent and LZR Pure Valor suits are available in sizes 20 to 30, with chest measurements ranging from 84cm to 108cm. Hip measurements are also provided to ensure a streamlined fit. The LZR X and LZR Elite models cater to different body types, with sizes up to 38 for elite athletes. The chart includes detailed conversions between UK and international sizes, ensuring accuracy. Speedo’s LZR range is designed for racing, with a focus on compression and flexibility. Proper sizing is crucial for maximizing performance and comfort in the water. Refer to the official Speedo size guide for precise measurements and to find the ideal fit for your LZR swimsuit.
Speedo Triathlon Swimsuit Size Guide
Speedo’s Triathlon Swimsuit Size Guide is designed to help athletes find the perfect fit for endurance and comfort during multi-sport events. The size chart includes detailed measurements for chest, waist, and hips, ensuring a streamlined fit. Sizes range from XXS to 3X, catering to a wide range of body types. The guide emphasizes the importance of proper fit for reducing drag and enhancing performance. Fabric elasticity and compression are key factors in the sizing, as they impact mobility and comfort during swimming, cycling, and running. Speedo recommends measuring without clothing and consulting the official size chart for accurate sizing. The Triathlon range includes suits with built-in liners and chlorine-resistant fabric, making them ideal for long-distance races. By following the size guide, triathletes can optimize their performance and comfort in training and competition.
How to Measure for Speedo Swimsuits
To ensure the best fit for your Speedo swimsuit, accurate measurements are essential. Start by measuring your chest, waist, and hips using a flexible tape measure. For women, the chest measurement is taken around the fullest part of the bust, while the waist is measured at the narrowest point. Hips are measured around the widest part, typically 7-9 inches below the waistline. For men, the chest measurement is taken around the broadest part of the chest, and the waist is measured at the narrowest point. Additionally, measure your body length from the base of the neck to the desired suit length. Use Speedo’s official size charts to match your measurements to the correct size. Proper fit ensures comfort, support, and optimal performance in the water. Always measure without clothing for the most accurate results.

Speedo Size Charts
Speedo provides detailed size charts to help you find the perfect fit for their swimwear and accessories. These charts are categorized by gender, with specific measurements for men, women, and kids. The women’s size chart includes chest, waist, and hip measurements, while the men’s chart focuses on chest and waist. Kids’ sizes are based on age and body length. The charts also include conversions between UK and international sizes for convenience. Speedo offers additional size guides for specialized products like tech suits, triathlon gear, and goggles. Each chart is designed to align with specific product lines, ensuring accuracy. To use the charts effectively, measure yourself carefully and match your dimensions to the corresponding size. This system helps avoid sizing errors and ensures optimal comfort and performance. Always refer to Speedo’s official size charts for the most accurate information.
Care Tips for Speedo Swimsuits
To maintain the quality and longevity of your Speedo swimsuit, proper care is essential. After each use, rinse the suit in cold water to remove chlorine, sweat, and sunscreen. Avoid using harsh detergents or bleach, as they can damage the fabric. Instead, hand wash with a mild detergent specifically designed for swimwear. Gently reshape the suit while it’s wet to prevent stretching. Air dry away from direct sunlight, as UV rays can cause fading. Do not wring or twist the suit, as this can stretch or misshape it. Avoid using fabric softeners or putting the suit in the dryer, as heat can damage the material. Regularly following these care tips will help extend the lifespan of your Speedo swimsuit, ensuring it retains its performance and appearance. Proper care also helps maintain the suit’s elasticity and color vibrancy.
Troubleshooting Fit Issues
Ensuring the perfect fit for your Speedo swimsuit is crucial for comfort and performance. If your suit feels too tight, it may restrict movement, while a suit that’s too loose can cause discomfort during swimming. Common fit issues include improper chest or waist measurements and incorrect sizing due to body type variations. To address this, refer to Speedo’s size charts and remeasure yourself if necessary. For women, ensure the bust and hip measurements align with the chart, while men should focus on chest size. If the suit rides up or digs into the shoulders, it may be too small. Conversely, if it sags or feels baggy, it could be too large. Adjusting your size selection based on these observations can help achieve a better fit. If issues persist, consider reaching out to Speedo’s customer support for personalized assistance.
Importance of Proper Fit for Performance
A well-fitting Speedo swimsuit is essential for maximizing performance in the water. Proper sizing ensures minimal drag, allowing for smoother strokes and faster lap times. A suit that fits correctly provides optimal support and reduces muscle fatigue, enabling swimmers to maintain technique and endurance. For competitive athletes, even slight discomfort from an ill-fitting suit can hinder performance. Speedo’s size guides are designed to help swimmers achieve a snug yet comfortable fit, ensuring freedom of movement. Whether training or competing, the right fit enhances confidence and overall swimming efficiency. By following Speedo’s sizing charts and measuring guidelines, swimmers can optimize their performance and enjoy a more enjoyable swimming experience.
Speedo’s Size Resources
Speedo provides a variety of resources to help customers find their perfect fit. Their official website offers detailed size charts for women, men, and kids, covering swimwear, footwear, and accessories. Additionally, Speedo provides measurement guides to ensure accuracy when selecting sizes. Customers can access size conversion charts to compare UK, US, and EU sizes seamlessly. For specific products like the LZR range or triathlon suits, Speedo offers tailored size guides to meet the unique needs of competitive athletes. Many Speedo products also include a “Find Your Size” tool, allowing shoppers to input their measurements for personalized recommendations. These resources are designed to make the sizing process straightforward and stress-free, ensuring the best fit for comfort and performance in the water.
Speedo’s swimsuit size guide is an essential tool for ensuring a perfect fit, whether for casual swimming or competitive performance. By following the detailed charts and measurement guidelines provided, customers can make informed decisions to select swimwear that offers both comfort and optimal functionality. Speedo’s commitment to accuracy and inclusivity across their range ensures that all individuals, from children to adults, can find the right size. Proper fit not only enhances swimming efficiency but also boosts confidence, making every swim session more enjoyable. Utilizing Speedo’s size resources guarantees a tailored experience, allowing swimmers to focus on their goals without compromise. With a focus on quality and precision, Speedo continues to be a trusted choice for swimmers worldwide.