The Infiniti G35 Coupe with a manual transmission is a standout blend of performance, style, and driver engagement, making it a favorite among automotive enthusiasts seeking a thrilling yet refined ride․
Overview of the Infiniti G35 Coupe
The Infiniti G35 Coupe is a sleek, two-door sports car known for its blend of power, elegance, and driving excitement․ Produced from 2003 to 2008, it features a rear-wheel-drive layout and a robust V6 engine, making it a favorite among enthusiasts․ The manual transmission variant, particularly the 6-speed gearbox, enhances the driving experience with precise control and sporty responsiveness․ Combining aggressive styling with refined interior comforts, the G35 Coupe strikes a balance between performance and luxury, appealing to both thrill-seekers and those seeking a polished ride․ Its enduring popularity stems from its timeless design and the joy it delivers behind the wheel․
Why the Manual Transmission G35 Coupe is Popular
The manual transmission G35 Coupe remains a beloved choice for driving purists due to its engaging and precise 6-speed gearbox․ Enthusiasts appreciate the tactile connection it provides, enhancing the overall driving experience with a sense of control and intimacy․ The manual model is often preferred for its sporty feel, making it ideal for spirited drives․ Additionally, the absence of an automatic transmission’s added weight contributes to better handling dynamics․ Its popularity also stems from a strong community of owners who value performance and driving involvement․ The manual G35 Coupe has become a sought-after option for those who cherish the art of driving and the thrill it delivers․

Design and Features
The Infiniti G35 Coupe combines sleek, aerodynamic exterior styling with a luxurious interior, offering premium materials, advanced technology, and sporty accents that elevate both comfort and sophistication․
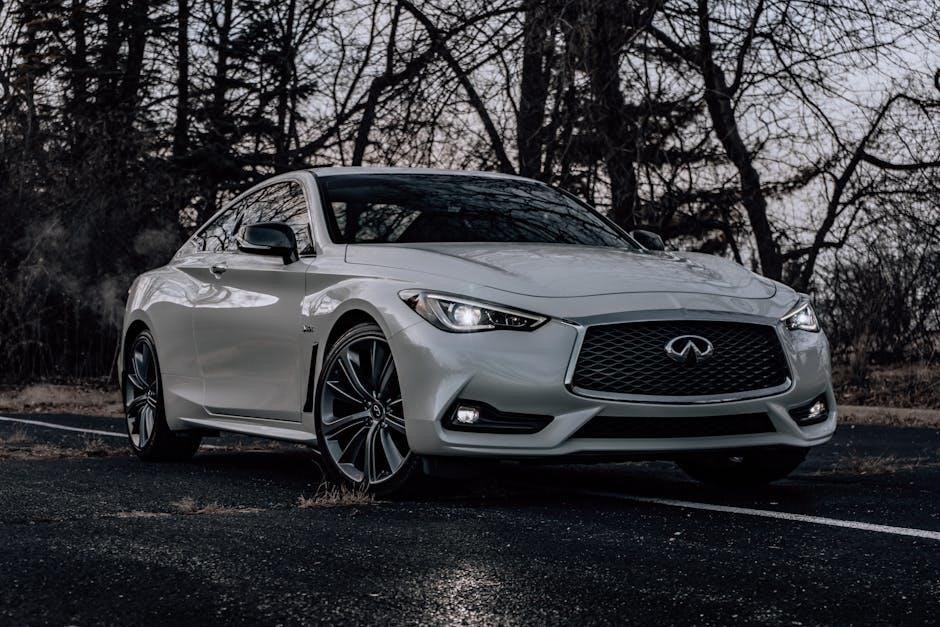
Exterior Design Elements
The Infiniti G35 Coupe boasts a sporty, aerodynamic design with a sloping roofline, aggressive front fascia, and distinctive LED headlights․ Its sleek, curved hood and sharp character lines emphasize a dynamic profile․ The rear features a trunk lid spoiler and dual exhaust tips, enhancing its athletic stance․ Chrome accents and alloy wheels add a touch of elegance, while the overall proportions balance performance and luxury․ The exterior is both functional and visually appealing, with elements like a low center of gravity and aerodynamic shaping to improve handling and reduce drag․ This design language ensures the G35 Coupe stands out as a stylish and powerful performer on the road․
Interior Features and Comfort
The Infiniti G35 Coupe offers a refined interior with premium materials, blending comfort and functionality․ The cabin features leather-appointed seats with heated front seats, providing excellent support during spirited driving․ The center console houses a user-friendly infotainment system with a touchscreen display, while the three-spoke steering wheel includes controls for audio and cruise functions․ Rear legroom is limited, but the front seats are spacious, accommodating even taller drivers․ The manual transmission adds a sporty touch with its short-throw shifter, enhancing the driving experience․ Additional features like automatic climate control and a Bose audio system ensure a luxurious and enjoyable ride for both driver and passenger․
Performance
The Infiniti G35 Coupe delivers robust performance with its powerful V6 engine, offering smooth acceleration and responsive handling, making it a thrilling choice for driving enthusiasts․
Engine Specifications
The Infiniti G35 Coupe is powered by a robust 3․5-liter V6 engine, delivering 280 horsepower and 260 lb-ft of torque․ This engine is renowned for its smooth power delivery and responsiveness, making it ideal for both daily driving and spirited performance․ Paired with the 6-speed manual transmission, the G35 Coupe offers a driver-focused experience, with precise throttle response and a wide power band․ The rear-wheel-drive layout enhances handling and acceleration, allowing the car to reach 0-60 mph in just over 5 seconds․ Its well-balanced design ensures reliable performance while maintaining a refined and sporty driving character․
Handling and Driving Dynamics
The Infiniti G35 Coupe excels in handling and driving dynamics, offering a balanced blend of sportiness and comfort․ Its rear-wheel-drive layout and well-tuned suspension provide precise cornering and responsive steering, making it a joy to drive on winding roads․ The manual transmission further enhances driver engagement, with a smooth clutch and gearshift that allow for seamless control․ The coupe’s weight distribution and suspension tuning minimize body roll, delivering a firm yet comfortable ride․ Whether navigating city streets or carving through canyons, the G35 Coupe’s dynamic capabilities ensure a rewarding and exhilarating experience behind the wheel, making it a standout choice for driving enthusiasts․
Exhaust System and Sound
The Infiniti G35 Coupe’s exhaust system is designed to complement its powerful V6 engine, delivering a bold yet refined sound that enhances the driving experience․ The stock exhaust system balances performance and sophistication, producing a deep, resonant tone that becomes more pronounced during acceleration․ Enthusiasts often praise the exhaust notes for their sporty character, which pairs perfectly with the manual transmission’s engaging driving dynamics․ While the factory setup is impressive, aftermarket exhaust upgrades can further amplify the sound, creating a more aggressive and distinctive tone that appeals to those seeking a louder, race-inspired auditory experience without sacrificing daily drivability․
Manual Transmission
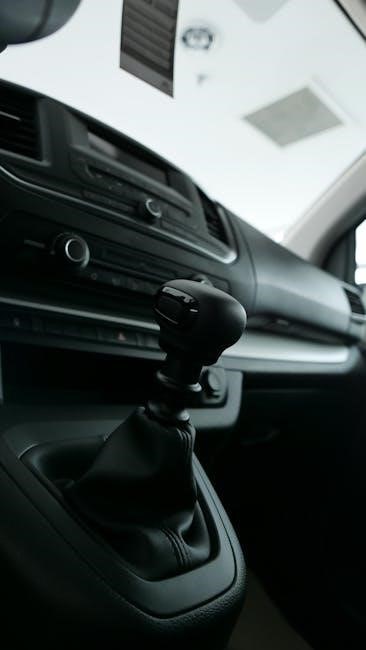
The Infiniti G35 Coupe’s manual transmission offers precise control and a direct connection to the vehicle, enhancing the driving experience with a sporty, engaging feel behind the wheel․
6-Speed Manual Transmission Overview
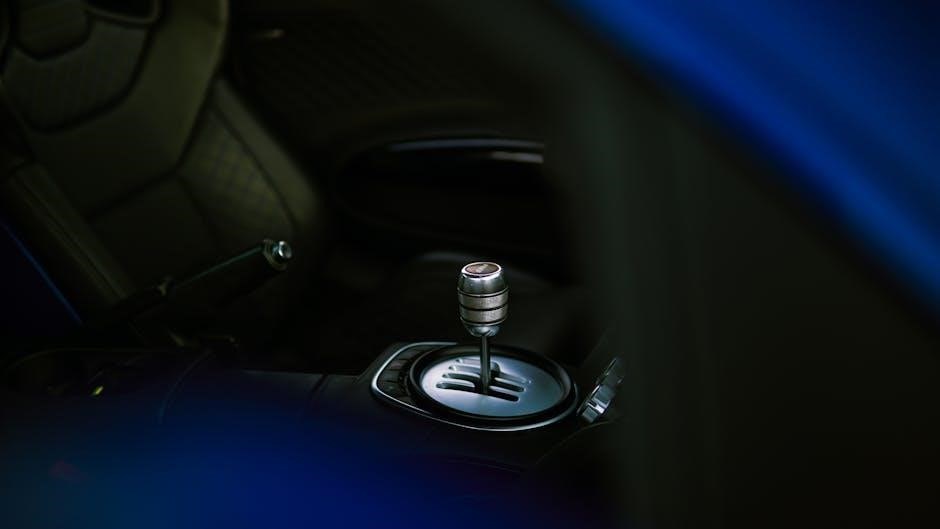
The Infiniti G35 Coupe’s 6-speed manual transmission is a defining feature, offering smooth, precise shifts that enhance the driving experience․ Its short-throw design allows for quick, responsive gear changes, making it ideal for spirited drives․ The manual gearbox is paired with a lightweight clutch, providing a seamless connection between driver and vehicle․ This setup is particularly popular among enthusiasts who value control and engagement․ The transmission’s robust construction ensures durability, while its refined operation minimizes noise and vibration, blending performance with comfort․ It remains a standout element in the G35 Coupe’s appeal, catering to those who cherish a hands-on driving experience․
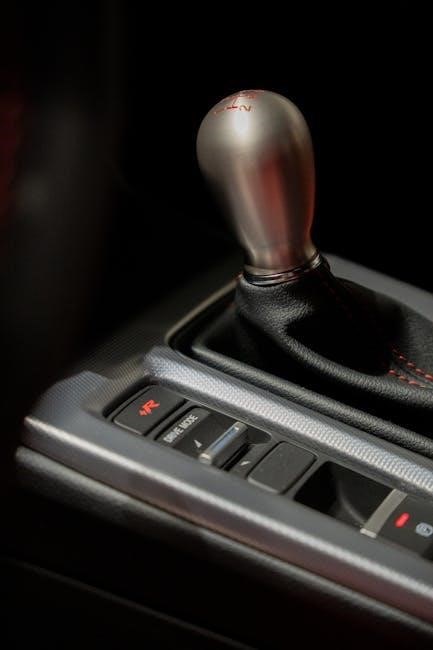
Driving Experience with the Manual Gearbox
The Infiniti G35 Coupe’s manual transmission delivers a driver-focused experience, blending precision and responsiveness․ Its short-throw design allows for quick, smooth shifts, enhancing control and engagement․ The manual gearbox connects the driver to the road, offering a tactile and immersive driving experience․ Whether navigating twisty roads or cruising through city streets, the manual transmission provides a sense of involvement that automatics often lack․ Its balanced clutch effort and precise gate alignment make it accessible for both novices and enthusiasts․ The combination of the V6 engine’s power and the manual gearbox creates a harmonious driving experience, making every journey feel deliberate and enjoyable․
Technology and Innovations
The Infiniti G35 Coupe features advanced technologies like its Intelligent Key system, premium infotainment, and driver-assistance systems, enhancing both convenience and driving dynamics for a modern experience․
Advanced Infotainment Systems
The Infiniti G35 Coupe boasts a sophisticated infotainment system designed to elevate the driving experience․ With a user-friendly interface, it integrates premium audio, Bluetooth connectivity, and satellite navigation, ensuring seamless entertainment and navigation on the go․ The system’s compatibility with various multimedia formats allows for versatile entertainment options, while voice command functionality enhances convenience․ Additionally, the optional rearview camera provides improved visibility and safety during parking maneuvers․ These features collectively create a modern and connected driving environment, making every journey enjoyable and stress-free for both driver and passengers․
Driver Assistance and Safety Features
The Infiniti G35 Coupe is equipped with a range of safety features to ensure a secure driving experience․ Dual front, side, and curtain airbags provide comprehensive protection in the event of a collision․ The vehicle also features anti-lock brakes (ABS) and electronic stability control, which enhance traction and prevent skidding․ A rearview camera is available to improve visibility during parking and reversing maneuvers․ Additionally, the G35’s robust chassis and advanced crumple zones are designed to absorb and distribute impact forces, safeguarding occupants․ These features, combined with its responsive handling, make the G35 Coupe a reliable choice for safety-conscious drivers․
Reliability and Durability
The Infiniti G35 Coupe is known for its strong reliability when properly maintained, with a durable V6 engine and robust transmission․ Regular maintenance is key to longevity;
Common Issues and Solutions
The Infiniti G35 Coupe with a manual transmission is generally reliable but can experience some common issues․ One frequent problem is the failure of the crankshaft and camshaft sensors, which can cause engine misfires and poor performance․ Replacing these sensors with genuine parts typically resolves the issue․ Another common concern is the Intelligent Power Distribution Module (IPDM) failing, leading to voltage-related problems․ Upgrading to a revised IPDM or replacing it entirely is the solution․ Additionally, some owners have reported issues with the clutch master cylinder, which may require replacement․ Regular maintenance and addressing these issues promptly ensures long-term reliability and performance․
Long-Term Ownership Experiences
Owners of the Infiniti G35 Coupe with a manual transmission often report positive long-term experiences, citing its reliability and enduring performance․ Many appreciate the balance between luxury and sportiness, making it a practical choice for daily driving while still offering excitement․ The V6 engine’s robustness and the manual gearbox’s smooth operation contribute to a satisfying ownership experience․ However, some owners mention that higher mileage can bring maintenance costs, particularly with the transmission and engine components․ Proper care and timely repairs help maintain the car’s condition, ensuring it remains a reliable and enjoyable companion for years․ Overall, it’s a beloved option for enthusiasts seeking a blend of style, power, and driving engagement․
Maintenance and Repair
Regular maintenance is crucial for the Infiniti G35 Coupe’s longevity․ Owners should focus on oil changes, fluid checks, and monitoring transmission health․ DIY repair tips and addressing common issues early can prevent costly fixes, ensuring the car runs smoothly for years․
Regular Maintenance Requirements
Regular maintenance is essential to ensure the longevity and performance of the Infiniti G35 Coupe with a manual transmission․ Owners should prioritize regular oil changes, typically every 5,000 to 7,500 miles, using synthetic oil for optimal engine health․ Fluid checks, including transmission and coolant, should be performed routinely․ Tire pressure should be monitored and adjusted as needed, while brake pads and rotors require inspection every 10,000 miles․ The manual transmission fluid should be checked every 30,000 miles and replaced every 60,000 miles․ Additionally, timing belt replacements and spark plug changes are critical at recommended intervals․ Following the owner’s manual maintenance schedule ensures reliability and prevents costly repairs down the road․
DIY Repair Tips and Tricks
DIY maintenance for the Infiniti G35 Coupe manual transmission can save costs and foster a deeper connection with the vehicle․ Regular fluid checks and changes are crucial, with manual transmission fluid replacements recommended every 60,000 miles․ For clutch replacements, ensure proper alignment of the clutch disc and pressure plate to avoid costly rework․ When addressing common issues like clutch wear or gear grinding, inspect the clutch master and slave cylinders for leaks․ Cleaning the throttle body and mass airflow sensor can improve engine responsiveness without professional help․ Additionally, replacing the air filter and spark plugs can enhance performance and fuel efficiency․ DIY repairs not only save money but also empower owners to better understand their vehicle’s mechanics․
Modifications and Upgrades
Popular upgrades for the Infiniti G35 Coupe include engine modifications like cold air intakes and exhaust systems to boost performance, while suspension upgrades enhance handling and stability․
Popular Engine Modifications
Popular engine modifications for the Infiniti G35 Coupe include cold air intakes to enhance airflow, aftermarket exhaust systems for improved sound and reduced backpressure, and engine tuning to optimize performance․ Forced induction, such as turbochargers or superchargers, is also a common upgrade to significantly boost power output․ Additionally, upgrading the engine’s internals, like pistons or camshafts, can further enhance reliability and performance․ These modifications are often paired with ECU reflashes or piggyback ECUs to maximize gains․ Proper installation and tuning are critical to ensure reliability and avoid potential engine damage․ These upgrades make the G35 Coupe even more thrilling for enthusiasts seeking enhanced power and responsiveness․
Suspension and Brake Upgrades
Suspension upgrades for the Infiniti G35 Coupe often include coilovers, sway bars, and bushings to improve handling and reduce body roll․ These modifications enhance cornering stability and provide a sportier ride․ Brake upgrades, such as high-performance pads and rotors, are popular for better stopping power and heat dissipation during spirited driving․ Many owners also opt for adjustable suspension systems to tailor ride quality and handling to their preferences․ Upgraded brake lines and fluid are also common to improve pedal feel and responsiveness․ These modifications are particularly beneficial for enthusiasts who use their G35 Coupe for track days or canyon carving, ensuring enhanced performance and control․
Interior and Exterior Cosmetic Enhancements
Owners of the Infiniti G35 Coupe often enhance its appearance through cosmetic upgrades․ Exterior modifications include body kits, spoilers, and custom paint jobs to give the car a more aggressive or personalized look․ LED lighting upgrades, such as headlights and taillights, improve visibility while adding a modern aesthetic․ Inside, common upgrades involve premium upholstery, carbon fiber trim, and aftermarket infotainment systems․ Some enthusiasts also install sport pedals and shift knobs for a more performance-oriented feel․ These cosmetic enhancements not only boost the car’s visual appeal but also reflect the owner’s personal style, making each G35 Coupe unique and tailored to individual preferences․

Buying Guide
When purchasing an Infiniti G35 Coupe with a manual transmission, focus on model year, mileage, and maintenance history․ Ensure all electrical systems function properly, especially the IPDM, and test drive thoroughly to assess transmission smoothness and overall performance․
What to Look for When Purchasing
When buying an Infiniti G35 Coupe with a manual transmission, prioritize model year, mileage, and maintenance history․ Ensure the 6-speed gearbox operates smoothly, with no grinding or hesitation․ Check for common issues like worn synchronizers or clutch wear․ Inspect electrical systems, as the IPDM module can cause voltage problems․ Look for signs of modifications, as they may impact reliability․ Test drive to assess handling and acceleration․ Review service records to confirm regular maintenance․ Avoid cars with unresolved “failsafe” mode or crank/no-start issues․ Ensure all features, like the Intelligent Key system, function properly․ A pre-purchase inspection by a specialist is highly recommended․
Model Year Differences
The Infiniti G35 Coupe manual transmission models vary across production years․ The 2003-2005 models offer a more raw driving experience but may require closer inspection for common issues like earlier engine wear․ Starting from 2005, minor updates improved reliability, while 2007 models introduced features like the Intelligent Key system (excluding 6MT) and auto on/off headlamps․ The 2008-2009 models refined engine performance and interior comfort․ Generally, 2005-2009 models are considered more reliable․ When purchasing, focus on model years with updated features and lower mileage for better long-term ownership․ Each year offers unique characteristics, so research specific updates and issues to make an informed decision․
Test Drive Tips
When test driving an Infiniti G35 Coupe with a manual transmission, focus on smooth gear shifts and clutch engagement․ Check for any hesitation or grinding during acceleration․ Inspect the engine for unusual noises or leaks, and ensure proper acceleration and responsiveness․ Evaluate the handling by driving on winding roads to assess balance and stability․ Test the brakes for firmness and even stopping power․ Look for any signs of wear in the interior, such as worn-out seats or faulty electronics․ Pay attention to the overall driving experience and how the car feels on the road․ A well-maintained G35 should deliver a smooth, engaging ride․
Market Value and Resale
The Infiniti G35 Coupe with a manual transmission retains strong resale value due to its performance and enthusiasts’ demand, making it a smart choice for long-term ownership․
Current Market Trends
The Infiniti G35 Coupe, especially with a manual transmission, has seen a steady rise in demand․ Enthusiasts are drawn to its blend of performance and classic design, driving up prices․ Recent sales data shows that manual models are particularly sought after, often selling for a premium compared to automatic versions․ Additionally, the car’s reliability and lower mileage examples are highly valued, contributing to its strong market presence․ This trend is expected to continue as interest in driver-focused vehicles grows, making the G35 Coupe a desirable choice for collectors and driving purists alike․
Factors Affecting Resale Value
Mileage, condition, and maintenance history significantly impact the resale value of the Infiniti G35 Coupe with a manual transmission․ Lower mileage and well-maintained vehicles generally retain higher value․ The manual transmission itself is a desirable feature for enthusiasts, boosting resale appeal․ Model year and specific updates also play a role, with certain years being more sought after․ Cosmetic or performance modifications can enhance value if done tastefully, while excessive modifications may deter buyers․ Additionally, the car’s reputation for reliability and its classic design contribute to sustained demand, making it a solid investment for automotive enthusiasts․

Community and Resources
Active online forums and communities provide invaluable support and knowledge sharing for Infiniti G35 Coupe manual transmission owners, fostering a strong enthusiast network and resource hub․
Online Forums and Communities
Online forums and communities dedicated to the Infiniti G35 Coupe manual transmission are vibrant hubs for enthusiasts to share knowledge, experiences, and modifications․ Platforms like Reddit, Facebook groups, and specialized automotive forums host discussions on reliability, performance upgrades, and maintenance tips․ Owners often exchange advice on troubleshooting common issues, such as crankshaft position sensor problems or transmission maintenance․ These communities also provide insights into aftermarket parts and DIY projects, fostering a collaborative environment for enthusiasts․ Additionally, forums like Edmunds and Infiniti-specific groups offer detailed discussions on model years, resale value, and test drive experiences, making them invaluable resources for both new and experienced owners of the G35 Coupe manual transmission․
Recommended Repair Shops and Specialists
For owners of the Infiniti G35 Coupe with a manual transmission, finding trusted repair shops and specialists is crucial for maintaining performance and addressing issues․ Local dealerships and independent mechanics with experience in Japanese luxury vehicles are often recommended․ Specialized shops that focus on Nissan and Infiniti models are particularly skilled in handling the G35’s V6 engine and manual gearbox․ Additionally, enthusiasts often suggest consulting with experts from forums or communities, as they can recommend reputable service providers․ Crutchfield Advisors and Infiniti-specific repair shops are also highlighted for their expertise in resolving common problems like transmission leaks or throttle position sensor issues, ensuring your G35 runs smoothly․
The Infiniti G35 Coupe with a manual transmission offers a perfect blend of performance, reliability, and driving enjoyment, making it a timeless choice for enthusiasts․
Final Thoughts on the Infiniti G35 Coupe Manual Transmission
The Infiniti G35 Coupe with a manual transmission is a standout vehicle that combines sleek design, robust performance, and a engaging driving experience․ Its 6-speed manual gearbox offers precise control, enhancing the connection between driver and car․ While it may not be without its quirks, such as occasional reliability concerns, the overall package remains appealing․ Enthusiasts praise its balanced handling and the thrill of shifting gears, making it a beloved choice for those who cherish the art of driving․ With proper care, it can remain a reliable companion for years, offering both excitement and comfort on the road․