Free Dodge RAM repair manuals provide essential guidance for DIY enthusiasts and professional mechanics, offering detailed instructions, wiring diagrams, and troubleshooting tips for various RAM models.
Understanding the Basics
Free Dodge RAM repair manuals offer comprehensive guides for troubleshooting, maintenance, and repairs. They cover essential topics like engine repair, transmission issues, and electrical systems. These manuals are designed for both DIY enthusiasts and professional mechanics, providing step-by-step instructions and wiring diagrams. They often include model-specific information, such as details for the 2005 Dodge RAM or the 2015 RAM 1500 HEMI 4×4. Accessing these manuals can help users diagnose problems and perform repairs confidently and safely.
Importance of Repair Manuals
Repair manuals are essential for empowering vehicle owners to perform DIY repairs, saving costs, and ensuring safety by following proper procedures and specifications.
Why You Need a Repair Manual
A repair manual provides step-by-step instructions, diagrams, and troubleshooting tips, enabling owners to diagnose and fix issues efficiently. It empowers DIY enthusiasts, saves costs, and ensures repairs are done safely and correctly, avoiding costly mistakes. Whether maintaining, repairing, or upgrading your Dodge RAM, a manual is indispensable for understanding complex systems, from engines to electrical components, specific to your model year.

Where to Find Free Dodge RAM Repair Manuals
Free Dodge RAM repair manuals can be found on official Dodge websites, RAM forums, and third-party sites like RepairSurge, offering PDF downloads for various models and years.
Official Dodge RAM Website
The official Dodge RAM website is a primary source for free repair manuals, offering comprehensive guides for various RAM models. While not all manuals are freely available, some can be accessed by registered users or through specific promotions. These manuals are detailed, covering maintenance, repairs, and troubleshooting procedures. They are ideal for both DIY enthusiasts and professional mechanics, ensuring accurate and reliable information for your vehicle. Always verify the model year compatibility before downloading.
RAM Forums and Communities
RAM forums and communities are excellent resources for locating free repair manuals. Many members share PDF links for various models, including the 2005 Dodge RAM 1500 and 2015 RAM 1500 HEMI 4×4. These forums often provide detailed discussions, tutorials, and direct downloads. Registration may be required to access certain files, but the collaborative environment makes it easier to find the specific manual you need for your vehicle repairs.
Third-Party Websites
Third-party websites like Google Drive, forums, and file-sharing platforms often host free Dodge RAM repair manuals. These sites provide access to PDF versions of service manuals for models such as the 2005 Dodge RAM 1500 and 2015 RAM 1500 HEMI 4×4. Some links are shared by community members, while others are uploaded by enthusiasts. Be cautious of reliability and ensure downloads are from trusted sources to avoid malicious content or incomplete files.
How to Download and Access the Manuals
Visit trusted third-party sites or forums, search for the specific RAM model, and download the PDF manual. Ensure stability by using reliable file-sharing platforms for access.
Effective Searching Tips
Use specific search terms like “free Dodge RAM repair manual PDF” or include the model year, such as “2005 Dodge RAM 1500 repair manual.” Check forums and communities where users often share links to downloadable manuals. Verify the file format and ensure it’s compatible with your viewer. Look for trusted sources to avoid malicious links. Some manuals may require unzipping or extracting files, so ensure you have the right tools. Always prioritize legal and safe downloads.
Handling Large Files and Archives
Large repair manuals often come as ZIP or RAR archives. Use file extraction tools like WinRAR or 7-Zip to access the contents. Ensure you have enough storage space, as some manuals exceed 100MB. PDF readers like Adobe Acrobat are necessary for viewing the files. Be cautious of large downloads, as they may strain your internet connection. Always verify file integrity and source reliability to avoid corrupted or malicious content.
Understanding the Content of the Manuals
Dodge RAM repair manuals contain detailed wiring diagrams, troubleshooting guides, and maintenance schedules. They cover engine, transmission, and suspension repairs, suitable for both DIYers and professionals.
Components of a Typical Repair Manual
A typical Dodge RAM repair manual includes wiring diagrams, step-by-step instructions, and troubleshooting guides. It covers detailed sections like engine repair, transmission maintenance, and suspension systems. Manuals also provide diagnostic procedures, torque specifications, and exploded views of components. They often feature maintenance schedules, parts catalogs, and electrical system diagrams, ensuring comprehensive coverage for both routine servicing and complex repairs.
Wiring Diagrams and Electrical Systems
Wiring diagrams in Dodge RAM manuals detail electrical circuits, connectors, and component locations. They simplify troubleshooting by visualizing power flow and system interactions. These diagrams cover lighting, ignition, and advanced systems like ABS and infotainment. Clear labels and color-coded wires help users trace circuits efficiently, making DIY electrical repairs more accessible and reducing the risk of errors.

Safety and Legal Considerations
Always adhere to safety and legal guidelines when using free Dodge RAM repair manuals. Ensure compliance with copyright laws and verify information accuracy to prevent accidents.
Copyright and Legal Issues
Free Dodge RAM repair manuals may infringe on copyright laws if downloaded without authorization. Always verify the legality of the source and respect intellectual property rights. While some forums and websites offer free access, ensure compliance with local laws to avoid legal consequences. Purchasing official manuals supports creators and guarantees authenticity and reliability.
Safety Precautions and Warnings
Always follow safety guidelines in free Dodge RAM repair manuals to avoid injuries and damage. Wear protective gear, ensure proper ventilation, and disconnect the battery before starting work. Be cautious with electrical systems and high-pressure components. Never skip precautions or warnings, as they are critical for safe repairs. Proper tools and knowledge are essential to prevent accidents and ensure successful outcomes.
Popular Dodge RAM Models and Their Manuals
Free repair manuals are available for popular Dodge RAM models like the 2005 RAM 1500/2500/3500 and 2015 RAM 1500 HEMI 4×4, offering comprehensive guides and wiring diagrams.
2005 Dodge RAM 1500/2500/3500
The 2005 Dodge RAM 1500/2500/3500 repair manual is a comprehensive guide covering engine, transmission, and suspension systems. It includes detailed instructions for maintenance, troubleshooting, and repairs, along with wiring diagrams and vehicle identification number locations. Available as a free PDF download, this manual is essential for DIY enthusiasts and professional mechanics working on these popular RAM models, including diesel variants.
2015 RAM 1500 HEMI 4×4
The 2015 RAM 1500 HEMI 4×4 repair manual is a detailed guide for DIY repairs and maintenance. Available as a free PDF download, it covers engine specifics, transmission, and 4×4 system details. While some images may not be perfect, the manual remains a valuable resource for enthusiasts and mechanics. Forum communities often share links to access this manual, making it easier to diagnose and fix issues independently.

DIY Repair vs. Professional Mechanic
Free Dodge RAM repair manuals empower DIY enthusiasts to save costs and gain hands-on experience. However, complex issues often require professional expertise for safety and reliability.
When to Attempt DIY Repairs
DIY repairs are ideal for minor issues like oil changes or air filter replacements. Assess your skill level and tools; complex problems may require professional expertise. Ensure you have a safe workspace and follow safety precautions outlined in the manual. Consult forums and video tutorials for additional guidance, and consider the time investment versus cost savings; Evaluate the complexity of the issue and your ability to handle it safely and effectively.
Knowing Your Limits
Recognizing your mechanical expertise is crucial before starting repairs. Avoid tackling complex tasks like transmission rebuilds or advanced diagnostics without experience. Manuals provide guidance, but practical skills are essential. If uncertain, consult forums or seek professional help. Safety and vehicle reliability depend on staying within your skill level. Avoid risking further damage or personal harm by understanding when to seek assistance from a qualified mechanic.

Tools and Software Needed
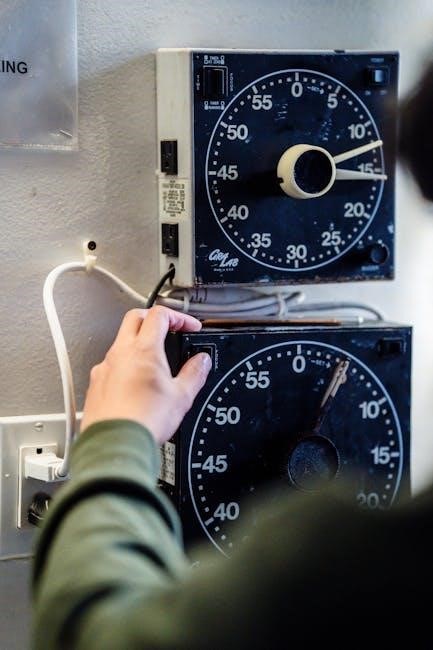
Essential tools include a PDF reader, file extraction software, and diagnostic scanners. Additional hardware like multimeters and wrench sets may be required for specific repairs.
PDF Readers and Adobe Acrobat
PDF readers like Adobe Acrobat are essential for viewing and navigating Dodge RAM repair manuals. Adobe Acrobat offers advanced features like zoom, search, and bookmarking, making it ideal for large manuals. While free PDF readers exist, Adobe Acrobat’s full version requires a subscription. Ensure your PDF reader supports large files, as manuals can exceed 500 pages. This ensures seamless access to diagrams, instructions, and wiring schematics.
File Extraction Tools
File extraction tools like WinZip or 7-Zip are necessary for accessing Dodge RAM repair manuals stored in ZIP or RAR archives. These tools allow users to unzip large files, ensuring access to PDF manuals, diagrams, and guides. Many free repair manuals are compressed to reduce size, making extraction essential. Always use trusted software to avoid corrupted files and ensure proper access to your Dodge RAM repair manual.
Common Repairs Covered in the Manual
Common repairs include engine maintenance, transmission fixes, suspension adjustments, and electrical system diagnostics. These manuals provide step-by-step guides for routine and complex repairs, ensuring efficiency.
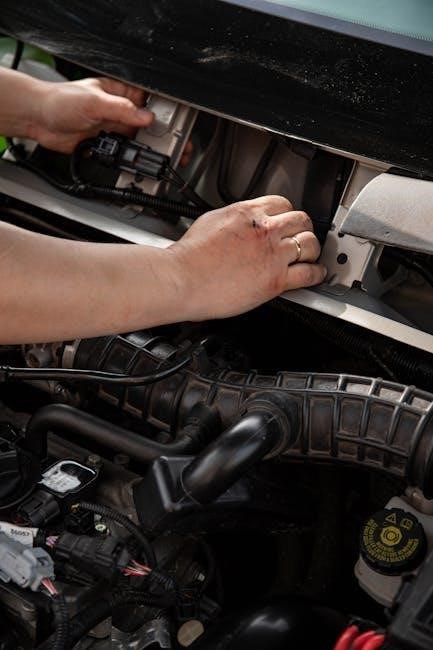
Engine Repair and Maintenance
The manual provides detailed instructions for engine repairs, including oil changes, filter replacements, and diagnosing issues like poor performance or overheating. It covers various engine types, such as the 3.7L, 4.7L, 5.7L HEMI, and 5.9L diesel, with step-by-step guides for disassembly and reassembly. Troubleshooting common problems, like oil leaks or coolant system failures, is also included, ensuring drivers can address issues efficiently and safely. These resources empower both DIY enthusiasts and professional mechanics to maintain their Dodge RAM’s engine in optimal condition.
Transmission Repair
Transmission repair sections in free Dodge RAM manuals detail diagnoses and fixes for common issues like slipping, rough shifting, or fluid leaks. The 46RE transmission teardown and rebuild guide is particularly comprehensive, offering step-by-step instructions for disassembly, inspection, and reassembly. These manuals also cover torque converter checks, solenoid replacements, and fluid changes, ensuring drivers can address transmission problems confidently and efficiently, whether they’re experienced mechanics or DIYers.
Troubleshooting Tips and Techniques
Free Dodge RAM manuals provide step-by-step troubleshooting guides, helping identify common issues like engine misfires or transmission slips. They include diagnostic procedures and fault code explanations to pinpoint problems efficiently and accurately, ensuring repairs are done correctly and safely.
Diagnosing Common Issues
Free Dodge RAM repair manuals offer detailed troubleshooting sections, helping users identify common issues like engine misfires or transmission problems. They provide fault code explanations, step-by-step diagnostic procedures, and real-world examples, such as resolving smoking issues in a 2015 RAM 1500 HEMI or rebuilding a 46RE transmission. These guides empower users to pinpoint problems accurately, ensuring repairs are both effective and safe, while covering various model years and engine types.
Using Fault Codes
Free Dodge RAM repair manuals detail how to interpret fault codes, enabling users to diagnose issues accurately. They explain OBD-II trouble codes and specific DTCs, like those for the 2015 RAM 1500 HEMI. By understanding these codes, users can identify problems such as transmission faults or engine misfires, guiding effective repairs without dealership involvement, and ensuring troubleshooting is precise and efficient for all model years.

Community Support and Resources
Online forums and communities offer extensive support for Dodge RAM owners, providing access to free repair manuals, troubleshooting tips, and shared knowledge from experienced enthusiasts and mechanics.
Online Forums and Groups
Online forums and groups dedicated to Dodge RAM owners provide a wealth of resources, including free repair manuals, troubleshooting tips, and shared experiences. Many enthusiasts share PDF versions of service manuals for popular models, such as the 2005 Dodge RAM 1500/2500/3500 and the 2015 RAM 1500 HEMI 4×4. These communities often include step-by-step guides, wiring diagrams, and advice from experienced mechanics, making them invaluable for DIY repairs and maintenance. Some forums also offer direct links to download manuals, while others provide detailed tutorials and support for specific issues. By engaging with these groups, owners can access reliable information and solutions tailored to their needs, ensuring their trucks run smoothly without costly dealership visits. Always verify the credibility of sources when downloading files to avoid errors or incomplete information.
Video Tutorials and Guides
Video tutorials and guides complement free repair manuals by offering visual, step-by-step instructions for Dodge RAM repairs. Platforms like YouTube and specialized forums host tutorials covering common fixes, such as engine maintenance or transmission repairs. These videos often focus on specific models, like the 2005 RAM 1500 or 2015 RAM 1500 HEMI 4×4, providing detailed insights. While they don’t replace manuals, they enhance understanding and confidence for DIY projects. Always cross-reference videos with written manuals for accuracy and safety.
Free Dodge RAM repair manuals are invaluable resources for DIY enthusiasts and professionals alike, offering comprehensive guidance for repairs and maintenance. By utilizing these manuals, owners can save costs and gain hands-on experience. Ensure to source manuals from reputable websites or forums to maintain reliability. Always prioritize safety and adhere to manufacturer guidelines. These resources empower RAM owners to keep their vehicles in optimal condition, fostering independence and confidence in their repair journeys.